
A maytag washer code f9 e1 means your appliance is struggling to communicate with the drain pump. This error happens when the main control board doesn’t receive a signal from the pump to confirm it’s actually moving water. If the pump is clogged, you must clear the debris to restore the flow. If the pump is damaged, you’ll need to replace the component to clear the fault code.
Simple steps to clear your Maytag washer code
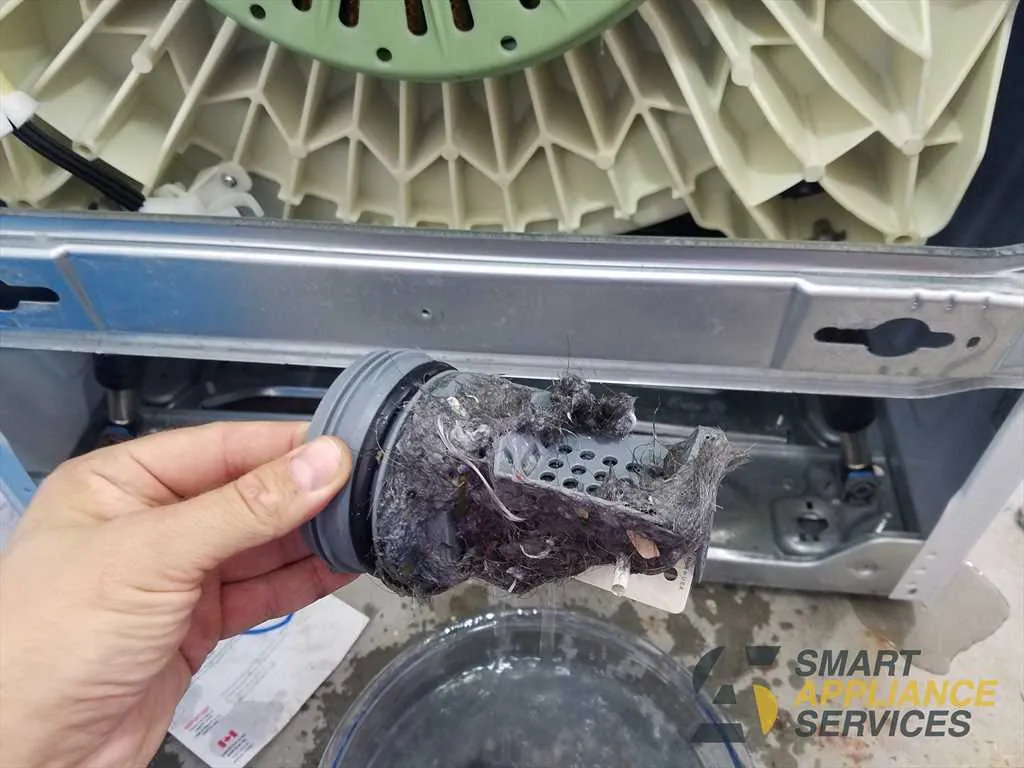
Check the drain hose for any kinks, sharp bends, or clogs that prevent water from exiting the machine. If the hose runs through a tight cabinet space, ensure it isn’t pinched against the rear panel.
Inspect the drain pump filter for coins, buttons, or hair that could stop the impeller from spinning. Before opening the filter cover, place a shallow pan and a thick towel on the floor to catch the inevitable spill of trapped grey water.
Unplug the washer for 5 minutes to reset the control board and clear temporary electronic glitches. If the error code returns immediately upon restarting, the fault likely lies in a physical component rather than the software.
Verify the drain hose height is at least 39 inches high, as required by the manufacturer for proper siphoning. If the hose sits too low, the washer may experience a constant drain-and-fill loop that wastes water and triggers a sensor error.
Listen for a humming sound during the drain cycle. Silence often indicates a failed pump motor or a blown thermal fuse. If you hear a loud grinding noise instead, the pump impeller is likely obstructed by debris or damaged, requiring a full replacement to restore flow.
Why Communication Fails During Draining
The error code appears because the washer’s internal computer, the Central Control Unit (CCU), constantly monitors the drain pump’s performance. During a cycle, the CCU sends a command to the pump to start moving water out of the drum. If the pump doesn’t respond or if the electrical resistance is outside of the expected range, the control board triggers the alert to prevent the machine from flooding.
This mechanism is a safety feature designed to stop the cycle before the motor is damaged by overheating. If the drain pump is electrically “open” or shorted, the board can’t complete the circuit. Testing these electrical components is a job for a qualified technician. If your multimeter displays an “OL” or infinite reading, the internal coil is broken and the pump requires a full replacement.
If the pump is physically blocked, the motor tries to spin but cannot, which creates a spike in current. The control board senses this abnormal current draw and shuts down the process to protect the internal wiring. If the machine drains slowly but doesn’t throw an error, the issue is likely a partial obstruction in the pump filter or the corrugated drain hose.
When testing, always disconnect the power cord from the wall outlet. Even when unplugged, a capacitor or internal board component can hold a lethal charge. If you aren’t comfortable working with high-voltage electrical components, contact a professional service technician.
Many users mistake a clogged house drain pipe for a failed pump. If the washer drains into a standpipe, pull the hose out and observe the flow into a bucket. If the water rushes out with force, the pump is functional, and the restriction lies within your home’s plumbing. If the flow remains a trickle regardless of the exit point, the pump impeller is likely compromised by debris.
When the Error Remains
| Situation | What changes | What to do instead |
|---|---|---|
| Clogged filter | Water can’t move | Clean the pump filter |
| Kinked hose | Flow is restricted | Straighten the drain hose |
| Failed pump | Motor won’t spin | Install a new pump |
| Loose wire | No signal sent | Check pump harness |
| Board failure | Logic is broken | Replace control board |
If the error persists after these checks, listen for a faint hum when the cycle begins. A hum indicates the motor is receiving power but is physically jammed by debris. If you hear silence, the issue is electrical rather than mechanical.
Most users mistakenly assume a failed pump requires a total machine replacement. In reality, a pump assembly is inexpensive compared to a new machine and takes twenty minutes to swap. You can verify the part’s health by measuring the resistance across the pump terminals with a multimeter. A reading of infinity indicates an open circuit, confirming the pump is dead.
If the control board is the culprit, look for burnt traces or a sulfur smell near the relays. These are clear signs of a surge-related failure. If the board looks pristine but the machine remains unresponsive, the fault likely lies in the door latch switch. A faulty latch prevents the board from initiating the drain sequence as a safety precaution. If the pump engages during the bypass, you have identified a faulty door interlock rather than a broken logic board.
How to Fix the Drain Pump
Turn off the water supply valves and unplug the washer from the wall outlet to ensure you’re working safely. Never skip this step; a live circuit near standing water creates a lethal hazard.
Open the bottom front service panel by releasing the clips with a flat-head screwdriver to access the pump area. If your model lacks clips, check the kickplate for two hidden Phillips-head screws near the floor.
Place a shallow tray under the drain pump filter to catch the remaining water when you unscrew the cap. Expect at least one quart of residual liquid to spill out immediately.
Remove the filter and check for debris. If the impeller doesn’t spin freely by hand, clear the obstruction. Most failures occur because a stray coin or hair tie jams the blades. If the impeller feels “crunchy” or lacks resistance, the internal bearings have likely seized.
Check the wiring harness connected to the pump for any signs of burning or loose connections at the terminals. Melted plastic insulation indicates a short circuit. If the wiring looks clean but the pump remains silent during a cycle, use a multimeter to test for 120V at the harness.
Secure the new pump, reconnect the hoses, and run a short rinse cycle to verify the error is gone. Ensure the hose clamps are tight enough to prevent slow leaks. If you notice dampness under the machine after the first test, tighten the clamp another quarter turn. Don’t overtighten, as this can crack the plastic pump housing.
Common Mistakes That Ruin Repairs
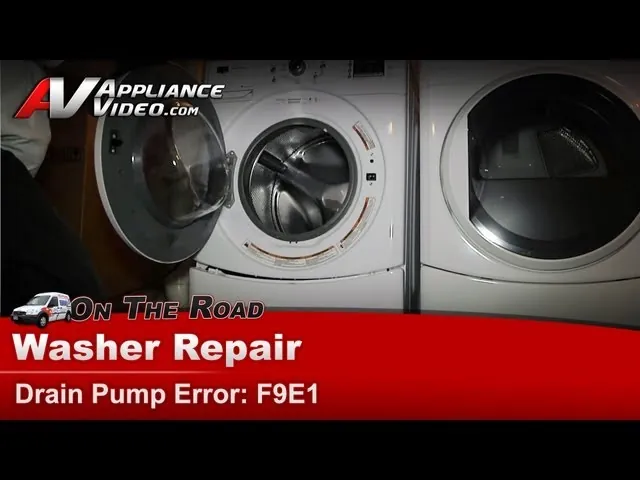
Forcing the pump filter cap when it’s stuck can snap the plastic tabs, requiring a full pump replacement. If the cap resists, stop immediately and use a silicone-based lubricant around the threads to break the seal. Attempting to pry it with a screwdriver often leaves the housing permanently scarred and leaking.
Ignoring the drain hose height leads to siphoning issues where water flows back into the tub, causing recurring errors. Ensure the drain hose sits at least 30 inches above the floor but no higher than 96 inches. If the hose sits too low, the machine will constantly drain and refill, wasting water and taxing the pump.
Using a non-compatible pump motor will cause the control board to reject the part and display the same code. Always match the exact manufacturer part number rather than relying on generic cross-references. A motor that draws even slightly different amperage will trigger a board fault, potentially frying the internal circuitry.
Forgetting to reset the power after a repair means the machine might still show the old, cached error code. Unplug the unit for at least ten minutes to bleed the capacitors.
Related guides
- 10 Best Under Sink Drain Pump Picks for Reliable Drainage in 2026
- Sump Pump vs Sewage Ejector Pump in 2026
- Best Air Mattress Pumps for Camping in 2026
Frequently asked questions
Can I run a washer with a drain code?
You shouldn’t run a washer while it shows this code, as the machine can’t safely remove water from the drum. If you try to run a cycle, the water will sit in the tub and could leak onto your floor or damage your clothes. Always clear the clog or replace the faulty pump before attempting a new load to prevent further mechanical stress on the system.
How long does a drain pump last?
A drain pump typically lasts for a significant duration, depending on the frequency of your laundry loads and the hardness of your water. If you notice the machine taking longer to drain than usual, the pump is likely reaching the end of its life. Check the pump’s performance by listening for grinding noises during the final spin cycle, which is a common sign of internal bearing wear.
Is it safe to fix this myself?
It’s safe to perform basic cleaning or hose inspections yourself, but you must keep the machine unplugged at all times. Don’t attempt to repair the control board or test live electrical components if you lack experience with high-voltage electronics. If the problem involves internal wiring or board diagnostics, call a licensed appliance technician to avoid risks of electrical shock or voiding your warranty.
What happens if I ignore the f9 e1 code?
Ignoring this code will eventually cause the washer to stop mid-cycle with a tub full of water, which is difficult to drain manually. The water weight puts extra strain on the suspension system and can lead to mold growth inside the drum. Addressing the issue early prevents these secondary problems and keeps your laundry room floor dry and safe from overflow.
Does it matter if I use a generic pump?
It does matter, as generic parts often lack the specific electrical resistance ratings required by the Maytag control board. Using an incompatible motor may cause the board to throw the same error code immediately after installation. Always verify your washer’s model number on the official manufacturer website to ensure the replacement part meets the exact specifications for your specific appliance.
How much does a replacement pump cost?
A replacement drain pump is inexpensive compared to a new machine, depending on your specific model and where you buy the part. You can find the exact price for your machine by searching the official parts catalog using your washer’s full model number. Remember that this price covers the part only; if you hire a technician, expect to pay additional fees for labor and diagnostic time.
Conclusion
If these efforts don’t get your machine running smoothly again, it’s time to reach out for professional help. A technician can quickly check if there’s a deeper wiring issue you can’t see. Don’t hesitate to call a repair service if you’re still stuck, as they’ll get your laundry routine back on track.
