
Are you dreaming of kitchen cabinets that shine with a sleek, high gloss finish? Imagine walking into your kitchen and seeing surfaces so smooth and reflective, they make the whole space feel brighter and more modern.
You don’t need to hire expensive professionals or spend weeks to get that stunning look. In this guide, you’ll discover simple, step-by-step tips to transform your cabinets into glossy masterpieces. Ready to give your kitchen the makeover it deserves? Keep reading to learn how you can achieve that high gloss shine yourself—fast, easy, and with amazing results.
Choosing The Right Materials
Choosing the right materials is key for shiny kitchen cabinets. Good materials make the finish smooth and long-lasting. Poor choices can cause peeling or dullness. Spend time on this step to get the best results.
Selecting High Gloss Paints
Pick paints labeled “high gloss” or “semi-gloss” for a shiny look. These paints reflect light well and look clean. Use water-based paints for easy cleaning and less smell. Check the paint’s drying time to plan your work.
Picking Quality Brushes And Rollers
Use soft, fine-bristle brushes for smooth edges. Foam rollers work great on flat cabinet surfaces. Avoid rough brushes that leave marks. Buy new tools for the best finish and avoid old, worn-out ones.
Preparing The Surface
Clean cabinets thoroughly to remove grease and dirt. Sand the surface lightly to help paint stick better. Fill any holes or cracks with wood filler. Wipe dust away before painting for a smooth coat.

Credit: showplacecabinetry.com
Preparing Kitchen Cabinets
Preparing kitchen cabinets is the first step to achieve a high gloss finish. Proper preparation ensures the paint sticks well and looks smooth. It involves cleaning, sanding, and fixing any damage. Taking time here saves effort later and improves the final shine.
Cleaning And Degreasing
Start by removing all dirt and grease from the cabinet surfaces. Use a good degreaser or a mix of warm water and dish soap. Wipe down every corner and edge. This step removes oils that stop paint from sticking. Let the cabinets dry completely before moving on.
Sanding For Smoothness
Sanding creates a rough surface for the paint to grip. Use fine-grit sandpaper, about 220 grit. Sand all cabinet faces gently but thoroughly. Focus on areas with old paint or rough patches. After sanding, wipe away dust with a damp cloth. Smooth surfaces help the gloss shine evenly.
Repairing Imperfections
Check the cabinets for dents, cracks, or holes. Fill small holes and cracks with wood filler. Let the filler dry, then sand it smooth. Larger damages may need extra patching or replacement parts. Smooth, even surfaces are key to a flawless high gloss look.
Priming For A Flawless Finish
Priming is the key to achieving a smooth and shiny finish on your kitchen cabinets. It creates a strong base for the paint to stick to. This step helps avoid uneven color and peeling later. Proper priming makes your cabinets look clean and new.
Skipping or rushing priming can cause flaws. Streaks, bubbles, and patches often appear without a good primer. Taking time to prime properly saves work and gives your cabinets a professional look.
Best Primer Types For Gloss
Choose a primer designed for glossy finishes. Oil-based primers work well for shiny surfaces. They stick tightly and block stains. Water-based primers dry faster and clean up easily. Use one labeled for cabinets or woodwork. This ensures smooth paint adhesion and durability.
Applying Primer Evenly
Apply primer in thin, even coats. Use a high-quality brush or a foam roller. Start from the edges and move to flat areas. Avoid thick layers that drip or bubble. Let each coat dry before adding the next. This prevents uneven surfaces and rough spots.
Drying And Sanding Primer
Allow primer to dry fully before sanding. Dry times vary by type and temperature. Use fine-grit sandpaper to smooth the surface. Sand lightly to remove bumps and brush marks. Wipe off dust with a clean cloth. A smooth base improves paint shine and finish.
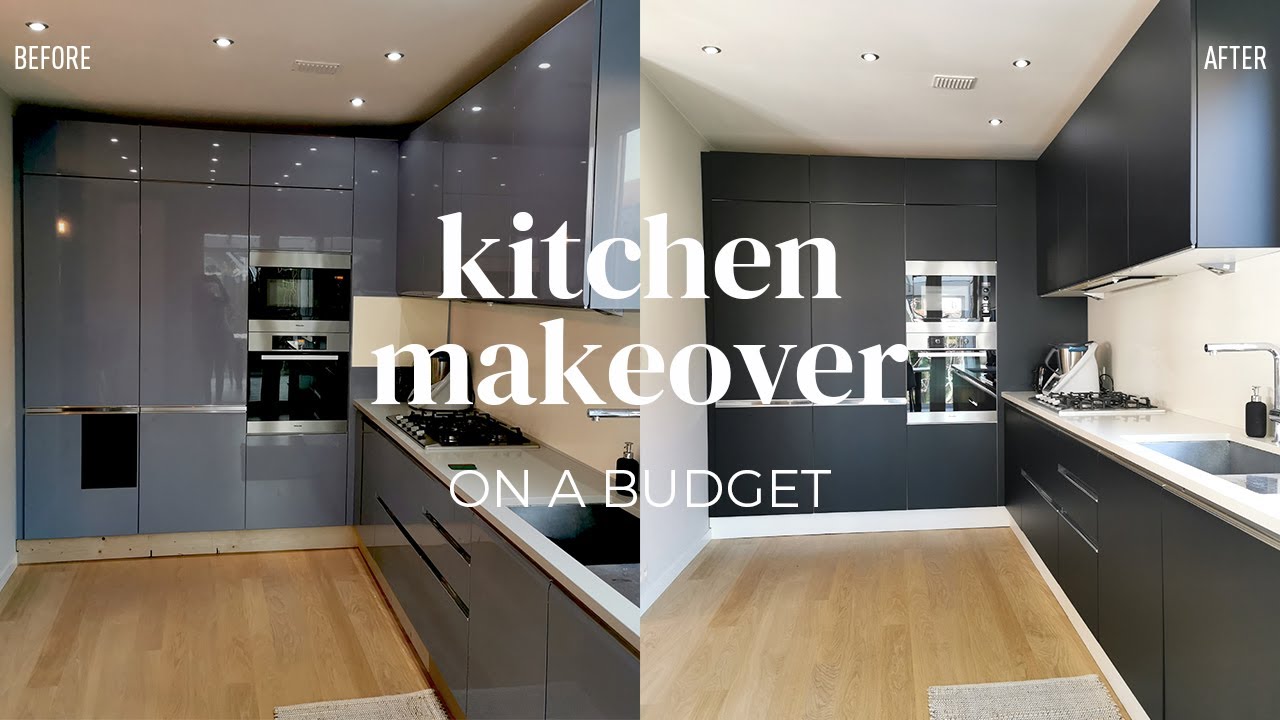
Credit: www.youtube.com
Applying High Gloss Paint
Applying high gloss paint on kitchen cabinets needs care and patience. This step gives the cabinets their shiny, smooth finish. A good paint job makes cabinets look new and clean. The paint needs to be spread evenly for the best look. Proper tools and techniques help avoid marks and bubbles on the surface.
Techniques For Smooth Coats
Use a high-quality brush or roller designed for gloss paint. Dip the brush lightly into the paint to avoid drips. Spread the paint in long, even strokes along the wood grain. Work on small sections at a time to keep edges wet. Avoid going over the same spot repeatedly. Let each coat dry before applying the next one.
Avoiding Brush Strokes And Bubbles
Choose a soft brush to reduce visible brush strokes. Rollers with fine foam work well for cabinets. Apply paint gently without pressing too hard. Avoid shaking the paint can to prevent bubbles. Stir paint slowly with a stick to keep it smooth. Keep the room dust-free and well-ventilated to help paint settle evenly.
Number Of Coats Needed
Two to three coats usually create a deep, high gloss finish. The first coat seals the wood and fills small holes. The second coat builds up the shine and smoothness. A third coat may be needed for full coverage and color depth. Let each coat dry fully before adding the next. Lightly sanding between coats helps the paint stick better.
Adding A Protective Clear Coat
Adding a protective clear coat is a key step to achieving high gloss kitchen cabinets. It gives the cabinets a shiny finish. It also protects the paint from scratches, stains, and moisture. The clear coat helps the cabinets last longer and stay beautiful.
Choosing the right clear coat and applying it correctly makes a big difference. The drying and curing process also needs care. These steps ensure the cabinets have a smooth and durable shine.
Choosing The Right Clear Coat
Select a clear coat made for kitchen cabinets. Look for one that is water-resistant and durable. Polyurethane and acrylic clear coats work well. They protect against heat and moisture. Choose a product labeled “high gloss” for the best shine. Make sure the clear coat is compatible with your paint type.
Application Tips
Use a clean, high-quality brush or a spray gun for even coverage. Apply thin coats to avoid drips and bubbles. Let each coat dry fully before adding the next. Lightly sand between coats with fine-grit sandpaper. This helps the next layer stick well. Work in a dust-free area to keep the finish smooth.
Curing Time And Care
Allow the clear coat to cure fully before heavy use. This can take several days to weeks. Avoid placing items or wiping cabinets too soon. Gentle cleaning with a soft cloth helps keep the shine. Avoid harsh chemicals that can damage the clear coat. Proper curing ensures a strong, lasting finish.

Credit: www.pakitchen.com
Maintaining Your Glossy Cabinets
Maintaining your high gloss kitchen cabinets keeps them looking fresh and shiny. Proper care protects the finish and extends the cabinet’s life. Regular attention prevents dullness, scratches, and stains. Follow simple steps to keep your cabinets beautiful every day.
Cleaning Without Damaging Finish
Use a soft cloth for dusting. Avoid abrasive scrubbers or harsh chemicals. Mild soap mixed with warm water works well for cleaning. Wipe gently in a circular motion. Dry the surface immediately with a clean cloth. This prevents water spots and streaks.
Touch-up Tips
Small scratches can be fixed with a gloss touch-up pen. Match the color closely to your cabinets. Apply carefully to the damaged area. Let it dry fully before touching the surface. For deeper damage, consider professional repair. This keeps the shine smooth and even.
Long-term Care Strategies
Use cabinet liners to protect interiors from spills. Keep the kitchen well-ventilated to avoid moisture buildup. Avoid placing hot pots or pans directly on cabinet surfaces. Regularly inspect for chips or peeling paint. Schedule a full polish or repaint every few years. This maintains the high gloss look for a long time.
Common Mistakes To Avoid
Creating high gloss kitchen cabinets requires care and patience. Many people make simple mistakes that affect the final look. Avoiding these errors helps achieve smooth, shiny cabinets that last long.
Skipping Surface Prep
Surface preparation is the first and most crucial step. Skipping sanding or cleaning leaves dirt and bumps. The paint will not stick well. Cabinets may look rough or peel later. Always sand surfaces smooth and clean off dust before painting.
Using Incorrect Tools
Choosing the wrong tools can ruin the finish. Use high-quality brushes or foam rollers made for glossy paint. Cheap tools cause streaks and bubbles. A spray gun works best for even coats. Avoid using old or worn-out brushes.
Rushing Drying Times
Patience is key for drying. Rushing this step traps moisture and dust. Paint can become sticky or cloudy. Follow the recommended drying time on paint cans. Allow each coat to dry fully before applying the next one.
Frequently Asked Questions
What Materials Create The Best High Gloss Kitchen Cabinets?
High gloss kitchen cabinets are best made from MDF or plywood. They offer a smooth surface ideal for glossy finishes. Using acrylic or polyurethane paints enhances the shine and durability of the cabinets.
How Long Does It Take To Make High Gloss Cabinets?
Making high gloss cabinets typically takes 3 to 7 days. This includes sanding, priming, painting, and drying between coats. Proper curing ensures a durable and flawless glossy finish.
Can I Make High Gloss Cabinets Without Professional Tools?
Yes, you can make high gloss cabinets without professional tools. However, investing in a good spray gun and sander helps achieve a smoother finish. Patience and careful preparation are key to great results.
What Is The Best Paint For High Gloss Kitchen Cabinets?
Polyurethane and acrylic enamel paints are best for high gloss cabinets. They provide a durable, shiny, and easy-to-clean surface. Choose paints labeled specifically for cabinetry or furniture for optimal results.
Conclusion
High gloss kitchen cabinets can brighten any space quickly. Follow the steps carefully for best results. Use good materials and take your time. Clean and prep surfaces before painting. Apply several smooth coats for a shiny finish. Let each coat dry fully.
Your kitchen will look fresh and modern. A little effort creates a big change. Enjoy your stylish new cabinets every day.