
Are you ready to turn your backyard pool into the ultimate summer spot? Installing a diving board on your existing concrete pool deck might sound tricky, but with the right steps, you can do it yourself.
Imagine the fun and excitement your friends and family will have, all thanks to your new diving board. In this guide, you’ll learn exactly how to install a diving board safely and securely without needing to replace your concrete. Keep reading—your perfect dive is just a few easy steps away!
Choose The Right Diving Board
Choosing the right diving board is key for a safe and fun pool experience. The board must fit your pool size and the strength of your concrete base. It should also match the style and use you want. Picking the right board helps avoid accidents and keeps the pool area looking great.
Types Of Diving Boards
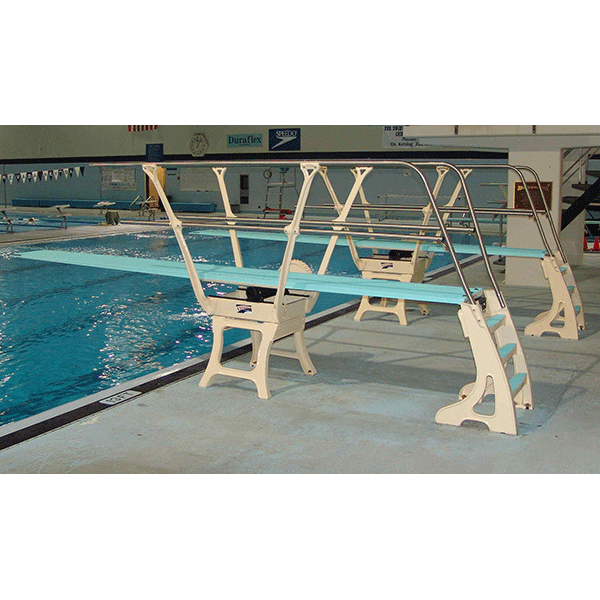
Diving boards come in various types. The most common are springboards and rigid boards. Springboards have some bounce, making jumps higher and softer. Rigid boards do not flex and are more stable. Pick a type that fits your diving style and pool design.
Board Length And Weight Capacity
Boards vary in length, usually from 6 to 16 feet. Longer boards give more bounce but need more space. Shorter boards fit small pools better. Check the weight capacity too. The board must hold the heaviest user safely without damage.
Material And Finish Options
Diving boards are made from materials like fiberglass, aluminum, or wood. Fiberglass is light and strong. Aluminum lasts long and resists rust. Wood has a classic look but needs more care. The finish should be slip-resistant for safety and comfort.
Prepare The Concrete Surface
Preparing the concrete surface is a vital step before installing a diving board. A strong, clean base ensures the board stays secure and safe. Take time to get the concrete ready for the best results.
Inspect The Existing Concrete
Look closely at the concrete area where you want to install the diving board. Check for uneven spots or rough patches that may affect the board’s stability. Make sure the surface is flat and firm enough to hold the board’s weight.
Clean The Installation Area
Remove dirt, leaves, and debris from the concrete surface. Use a broom or pressure washer to clean it thoroughly. A clean surface helps the mounting hardware stick better and prevents slipping.
Check For Cracks And Damage
Examine the concrete for cracks or chips. Small cracks can grow and weaken the area over time. Repair any damage with concrete patching material. Fixing the surface prevents future problems and keeps the board safe.
Gather Tools And Materials
Gathering all the right tools and materials is the first step to install a diving board on existing concrete. Having everything ready helps the job go smoothly and saves time. It also makes sure the installation is safe and strong.
Below is a clear list of what you need. Check each item before starting the work.
Required Tools List
- Power drill with masonry bits
- Socket wrench set
- Measuring tape
- Level
- Hammer
- Screwdriver set
- Chalk or marker
- Rubber mallet
Necessary Hardware And Anchors
- Diving board mounting bracket
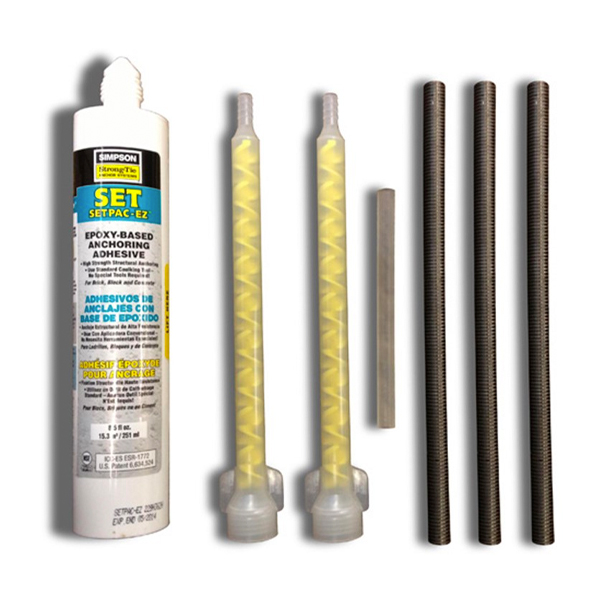
- Concrete expansion anchors or sleeve anchors
- Stainless steel bolts and washers
- Anchor sleeves matching the bolt size
- Threaded rods (if needed)
- Epoxy adhesive for concrete (optional)
Safety Equipment
- Safety goggles to protect your eyes
- Heavy-duty work gloves
- Ear protection for loud drilling
- Dust mask to avoid inhaling concrete dust
- Non-slip shoes for better grip
Credit: spectrumproducts.com
Mark The Installation Spot
Marking the installation spot is a key step before installing a diving board. This step ensures the board is safe and fits perfectly on the concrete surface. Take your time to mark the exact place. This will help avoid mistakes and extra work later on.
Measuring And Aligning
Start by measuring the length and width of the diving board base. Use a tape measure for accuracy. Mark the center point on the concrete where the base will sit. Align the marks with the pool edge. Make sure the board will extend properly over the pool water.
Positioning The Base Plate
Place the base plate on the marked spot. Check if it sits flat on the concrete. Adjust the position to make sure it is square and steady. The base plate must be exactly where the board will be fixed. Confirm all anchor holes line up correctly.
Ensuring Proper Clearance
Clearance is important for safety and usability. Measure the space around the diving board area. Make sure there is enough room for jumping and landing. Avoid obstacles like pool ladders, walls, or furniture. Mark any zones where clearance is too small.
Drill Anchor Holes
Drilling anchor holes is a key step in installing a diving board on existing concrete. These holes hold the anchors that secure the diving board firmly in place. Precise drilling ensures a strong and safe attachment. Careful preparation and attention to detail will help avoid damage to the concrete and guarantee stability.
Select The Correct Drill Bit
Choose a drill bit made for concrete or masonry. Carbide-tipped bits work best. Match the bit size to the anchor’s diameter. Using the wrong bit can cause loose holes or cracks. Check the diving board kit instructions for the right bit size.
Drilling Depth And Diameter
Drill each hole to the exact depth needed. Too shallow means weak support. Too deep wastes effort and can weaken the concrete. Use a depth gauge or tape on the drill bit. Keep the hole diameter consistent for a tight fit with anchors.
Cleaning Debris From Holes
Remove all dust and debris after drilling. Use a vacuum or compressed air to clean the holes. Debris reduces anchor grip and weakens the hold. Clean holes ensure the anchors set firmly and safely.
Credit: www.recreonics.com
Install Anchor Bolts
Installing anchor bolts is a key step to secure the diving board safely. The bolts hold the base plate firmly to the concrete. Proper installation prevents movement and keeps the board stable during use. Follow the steps carefully for a strong setup.
Types Of Anchors For Concrete
Choose anchors designed for concrete to ensure strength. Expansion anchors expand inside the hole to grip the concrete. Sleeve anchors use a metal sleeve that tightens as the bolt turns. Wedge anchors work by wedging into the hole when tightened. Select the right type based on your concrete thickness and load needs.
Securing The Base Plate
Place the base plate on the concrete where you drilled holes. Insert the anchor bolts through the plate holes into the concrete. Tighten each bolt evenly to avoid tilting the plate. Use a wrench to secure the bolts until the plate is firm and does not move.
Torque Specifications
Follow the manufacturer’s torque specifications for tightening. Use a torque wrench for accuracy. Over-tightening can damage the anchors or concrete. Under-tightening can cause instability. Proper torque ensures a safe and durable installation of the diving board.
Attach The Diving Board
Attaching the diving board is a crucial step in the installation process. It ensures the board is safe and secure for use. This part requires care and attention to detail. Follow the steps closely to avoid any issues later.
Mounting The Board To The Base
Start by positioning the diving board on the base. Align the holes on the board with those on the base. Use the bolts provided to secure the board in place. Hand-tighten the bolts first to keep the board steady. Check that the board sits flat on the base.
Adjusting For Level And Stability
Next, check the board’s level. Use a spirit level to see if it is even. Adjust the board by loosening the bolts slightly. Shift the board until it is perfectly level. Make sure the board does not wobble or tilt.
Tightening All Fasteners
Once the board is level and stable, tighten all bolts firmly. Use a wrench or socket to secure them. Tighten bolts evenly to prevent uneven pressure. Double-check that all fasteners are tight and secure. This step prevents the board from moving during use.
Test And Inspect The Installation
Testing and inspecting the diving board installation is a crucial step. It ensures the board is safe and secure before use. Skipping this part can lead to accidents or damage. Take your time to check every detail carefully. Safety matters most for a fun and worry-free experience.
Check For Movement And Stability
Stand on the board and gently rock it side to side. Watch for any wobbling or shifting at the base. The board should feel solid and not move. Inspect the bolts and screws to confirm they are tight. Loose parts can cause instability and risk injury.
Perform Safety Tests
Test the board’s bounce by pressing down firmly with your hand. It should flex smoothly without cracking or breaking. Check the surface for any rough edges or sharp spots. Ensure the board grips well and is not slippery. Safety tests help catch hidden problems early.
Make Necessary Adjustments
Tighten any loose bolts or screws found during the check. Use a wrench or screwdriver for secure fitting. Replace damaged parts or worn-out components immediately. Adjust the board’s angle if it feels off balance. Proper adjustments guarantee a safe diving experience.
Maintain The Diving Board
Maintaining the diving board is key to keeping it safe and long-lasting. Regular care helps avoid damage and keeps the board looking good. It also ensures the board stays stable and secure on the concrete base.
Regular Cleaning Tips
Clean the diving board often to remove dirt and algae. Use a soft brush and mild soap with water. Avoid harsh chemicals that can wear down the surface. Rinse the board well to remove soap residue. Dry the board to stop mold or mildew from growing.
Inspecting For Wear And Damage
Check the diving board regularly for cracks or chips. Look closely at the edges and the mounting area. Test the board for any wobbling or looseness. Tighten bolts and screws if needed. Replace parts that show signs of damage to keep safety high.
Seasonal Maintenance Guidelines
Before swimming season, check the board thoroughly. Remove any debris or buildup from winter. Apply a protective coating if recommended by the manufacturer. Cover the board or remove it during off-season months. Store it in a dry place to prevent damage from weather.
Credit: www.poolwarehouse.com
Frequently Asked Questions
What Tools Are Needed To Install A Diving Board On Concrete?
You need a drill, wrench, measuring tape, level, anchor bolts, and safety gear. These tools help secure the diving board safely on concrete.
How Do You Prepare Concrete For Diving Board Installation?
Clean the concrete surface and check for cracks or damage. Ensure the area is flat and strong enough to hold the diving board.
Can I Install A Diving Board On Any Concrete Pool Deck?
The concrete must be thick and strong, usually at least 6 inches. Thin or cracked concrete may not support the diving board safely.
How Deep Should Anchor Holes Be For A Diving Board?
Anchor holes should be about 6 to 8 inches deep. This depth secures the bolts firmly into the concrete for safety.
How Do You Level A Diving Board On Existing Concrete?
Use a spirit level during installation to adjust the base plate. Make sure the board is even side to side and front to back.
How Long Does It Take To Install A Diving Board On Concrete?
Installation usually takes 2 to 4 hours depending on experience. Time varies with tools available and surface condition.
Is Professional Help Needed To Install A Diving Board On Concrete?
Not always, but professional help ensures safety and proper installation. If unsure, hiring an expert is a good choice.
Conclusion
Installing a diving board on existing concrete can be simple and safe. Follow the steps carefully and use the right tools. Measure and mark the spots before drilling holes. Secure the base firmly to avoid any accidents. Check all bolts and nuts for tightness.
Regular maintenance keeps the board strong and ready for use. Enjoy your pool with confidence and fun. Safety always comes first with every dive.