
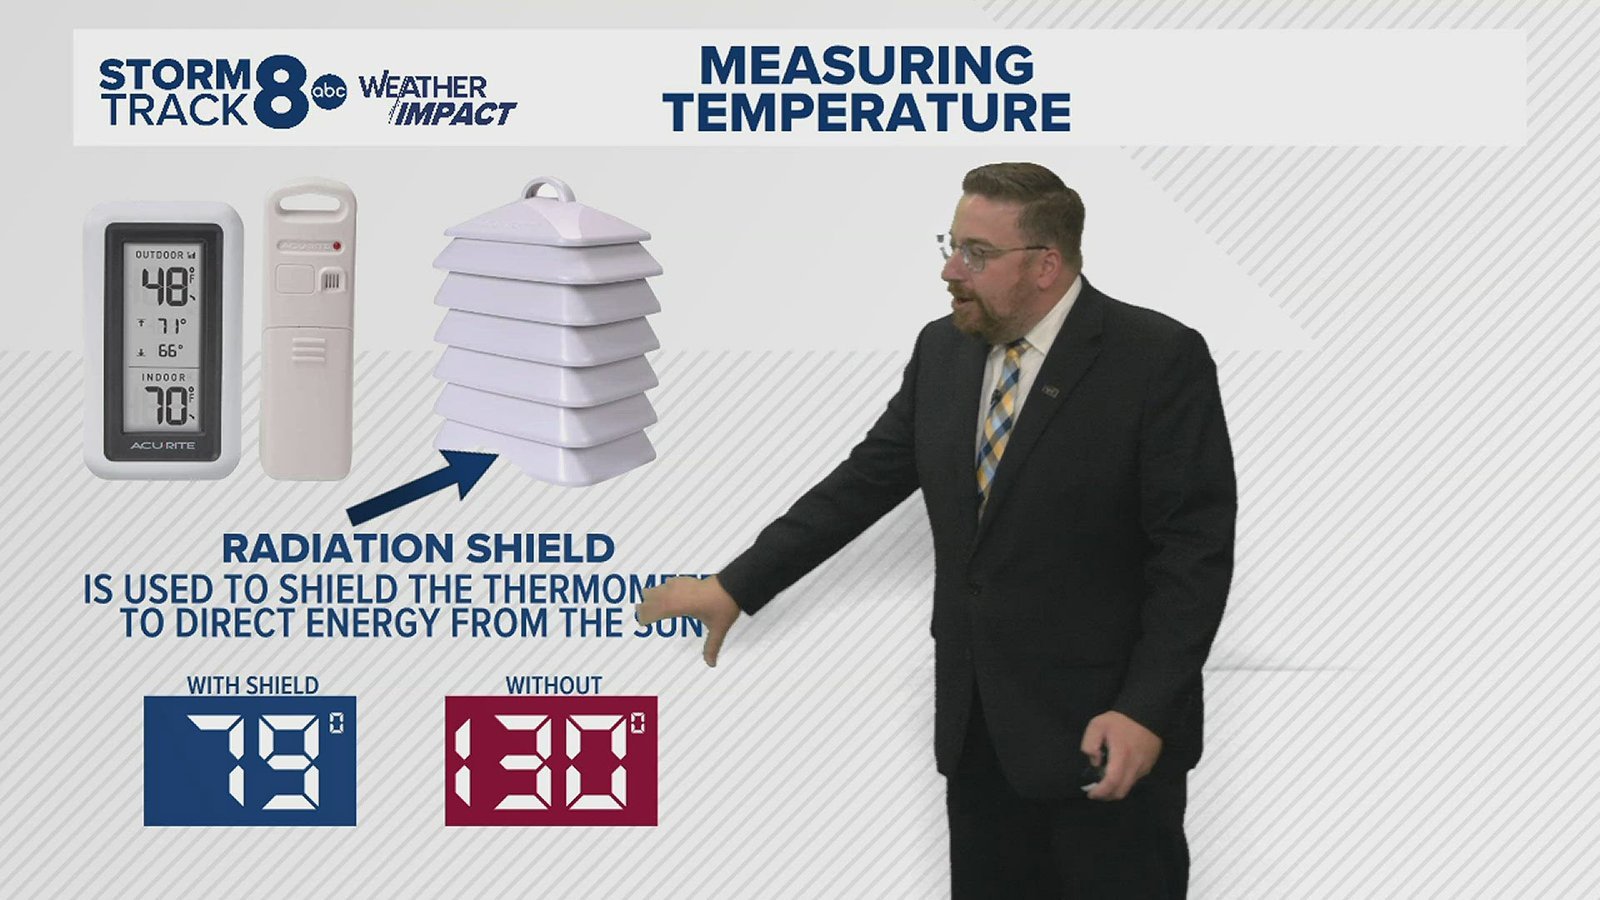
You can’t use an outdoor thermometer in direct sunlight if you want an accurate reading, because the device will measure the heat of the sun rather than the temperature of the air. When you place a sensor in direct rays, the reading will be significantly higher than the actual ambient temperature. You can use an outdoor thermometer in direct sunlight only if you house it inside a radiation shield that allows air to flow freely while blocking solar radiation.
The accuracy of your device depends on how well you manage the heat absorption of the sensor. If you place a thermometer against a brick wall or on a metal fence, the surface heat will skew your results. If you place the same device in a shaded, ventilated area, you’ll get a reading that matches official weather reports for your area.
Why your outdoor thermometer needs shade
Home gardeners, weather hobbyists, and people monitoring home energy efficiency often look for accurate data. A gardener needs to know if the air temperature has reached a point where specific crops might suffer from heat stress or frost. A weather enthusiast wants to compare their local data against official reports from a regional station. A homeowner might track temperatures to decide when to run an attic fan or open windows to cool the house naturally.
This page serves readers who want to move beyond “general backyard heat” and capture scientific air temperature. If you only want to know if it feels hot enough for a pool day, you don’t need this level of precision. The advice here assumes you own a digital or analog thermometer that’s meant for outdoor use but is currently giving erratic or high readings. If your device is designed for indoor use only, it will likely fail or leak fluid if left outside regardless of where you place it. Read the manufacturer’s label on your specific model to confirm its operating temperature range and environmental rating before mounting it.
Factors that shift your readings
The primary factor is solar radiation. When sunlight hits the sensor directly, it warms the casing and the internal components, causing the temperature to spike well above the true air temperature. You can check if your location is safe by placing your hand in the spot for five minutes; if it feels hot to the touch, your thermometer will read high.
Surface reflection is another major issue. Light-colored surfaces like concrete or white siding reflect heat upward, while dark surfaces like asphalt absorb heat and radiate it back toward your sensor. If you mount a thermometer within thirty centimeters of these surfaces, you’re measuring the ground’s thermal output instead of the air.
Airflow is essential for an accurate reading. If you trap a sensor inside a glass jar or a sealed box to keep it dry, you create a greenhouse effect. The air inside will heat up, and your thermometer will show a value that’s much higher than the outside air. You need a setup that allows wind to pass through the housing.
The height of the sensor also changes the data. The National Weather Service guidance on temperature measurement states that standard air temperatures should be measured at a height of one point two to two meters above the ground. This ensures that the reading isn’t affected by the immediate ground temperature. Many people make the mistake of mounting sensors too low, which costs them accuracy during the early morning and late evening hours.
Setting up your sensor
- Choose a location on the north side of your building to keep the sensor in the shade throughout the day.
- Mount your thermometer at a height of at least one point five meters above the ground.
- Ensure the location is at least two meters away from any concrete, brick, or metal surfaces that hold heat.
- Install a louvered radiation shield around your sensor to block the sun while allowing air to move.
- Secure the housing using weather-resistant screws so it doesn’t sway in the wind.
- Verify the position by checking the sensor at midday; if it’s in direct light, add a small piece of wood or plastic to create a shadow.
- Clean the radiation shield regularly to remove dust and spiderwebs that block airflow.
- Compare your reading to a nearby professional weather station to calibrate the device if necessary.
The difference between a job done properly and one that looks finished is the airflow. If you wrap your sensor in a solid box, it will look neat, but the temperature will be wrong. A proper setup uses an open, louvered design that keeps the sensor in the dark but lets the breeze pass through.
Comparison of placement locations
| Location | Accuracy | Effort | Potential Issue |
|---|---|---|---|
| Direct sunlight | Very low | None | High heat bias |
| Under a deck | Low | Low | Radiated ground heat |
| North-facing wall | High | Medium | Building heat soak |
| Open shade | High | Medium | Rain exposure |
| Radiation shield | Highest | High | Cost of parts |
Direct sunlight is the most common mistake for beginners. Placing a sensor here can inflate temperature readings by up to 15 degrees Fahrenheit during peak afternoon hours. You should only choose this location if you have no other options and are willing to accept a massive margin of error.
If you choose a north-facing wall, ensure the sensor sits at least six inches away from the structure. This gap prevents the building’s thermal mass from skewing your data during the evening. If the wall is brick or stone, increase that distance to twelve inches to account for slower heat dissipation.
Open shade offers the best balance for most users, but you must account for moisture. A simple plastic housing with ventilation holes is mandatory. Without this protection, a single heavy storm will likely short the circuit board.
Use a radiation shield if you require professional-grade data for climate modeling or agricultural planning. While the kit is a cheap part, it’s the only way to eliminate reflected infrared radiation. If your sensor is mounted over grass rather than concrete, you can often settle for open shade instead.
Maintaining high sensor accuracy
Proper ventilation
You must ensure that the housing for your sensor isn’t airtight. If you use a DIY shield, drill holes in the bottom and sides to ensure air moves constantly. A sensor that feels warm to the touch after being in the shade for an hour isn’t being ventilated well enough. If you can’t get the temperature to match local reports, move the sensor at least one meter further away from the nearest wall.
Avoiding thermal mass
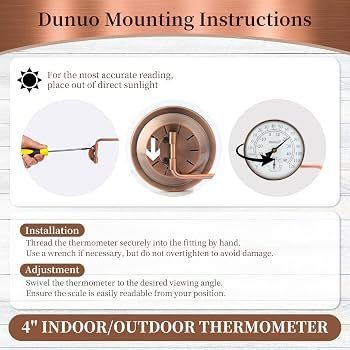
You should never mount a thermometer directly to a large object like a tree trunk or a thick brick wall. These objects store heat during the day and release it slowly at night, which keeps your sensor reading higher than the actual air temperature during the evening. If you must mount it to a wall, use a spacer to create a five-centimeter air gap between the thermometer and the surface.
Common sensor errors
| What you notice | What it usually means | What to do first | How to stop it |
|---|---|---|---|
| Reading is too high | Direct sun exposure | Move to deep shade | Install a shield |
| Reading is too low | Blocked air flow | Clear the vents | Improve ventilation |
| Rapid, erratic jumps | Faulty connection | Check battery life | Replace batteries |
| Stuck at one number | Sensor failure | Test in ice water | Replace the unit |
Most users assume a high reading implies a calibration error, but radiant heat is the true culprit. If your sensor sits within three feet of a brick wall or asphalt, it’s likely absorbing reflected heat. Move it to a grassy area at least five feet off the ground to see if the bias disappears.
Erratic jumps often stem from voltage drops rather than internal hardware failure. If your battery level sits below 20%, the sensor may struggle to maintain a stable signal. Replace the batteries before assuming the circuit board is fried.
Distinguishing between a dead sensor and a temporary glitch requires a simple ice-water test. Submerge the probe in a slurry of 50% crushed ice and 50% water. If the reading doesn’t stabilize at 32°F within three minutes, the sensor may be inaccurate or require recalibration.
The biggest mistake is ignoring the “stuck” reading by waiting for it to self-correct. If the value remains static during the ice test, the unit is compromised. Continuing to use a failed sensor leads to corrupted data logs that can ruin long-term trend analysis.
Regulations and standards
The World Meteorological Organization sets the global standard for how temperature should be captured to ensure data consistency. They define air temperature as the temperature of the air in the shade, protected from direct solar radiation and surface heat.
If you’re participating in a citizen science project, check their specific mounting requirements. They often demand a specific type of Stevenson screen or aspirated radiation shield. Using an unshielded sensor leads to “solar gain,” where your device reports temperatures up to 10 degrees Celsius higher than the actual ambient air.
These regulations ensure your data remains useful to others. If you live in a region with extreme weather, ensure your thermometer is rated for that specific range. Many consumer models fail if the temperature drops below negative twenty degrees Celsius.
Check the technical specifications on the packaging of your device to verify it meets these international standards for durability and range. If you’re in a high-humidity environment, look for an IP65 rating or higher to prevent internal sensor corrosion.
The decision rule is simple: if your sensor is exposed to direct sunlight for more than two hours daily, it must be housed in a multi-plate radiation shield. If it’s mounted within two meters of a concrete or asphalt surface, you must adjust your expectations for accuracy, as ground-level heat radiation will skew your readings regardless of shielding.
Real costs of accurate monitoring
The cost of an accurate setup is mostly time and effort rather than high equipment prices. A standard digital outdoor thermometer is a cheap part. However, adding a commercial-grade radiation shield can add another cost to your project.
If you’re on a budget, you can build a shield using white plastic plant saucers, but this requires an hour of labor and precise drilling to maintain airflow. If the holes are too small, heat traps inside the shield, causing your temperature readings to spike by as much as five degrees during peak sunlight.
The hidden cost is the maintenance of the site. If you fail to keep the area clear of debris, the data becomes useless within a few weeks. A common mistake is placing sensors too close to concrete or asphalt, which radiate stored heat long after sunset. This placement error can skew your nightly minimums by three to seven degrees.
Always consider the time you’ll spend checking and cleaning the sensor location against the value of the data you need. If you require precision for agricultural planning, invest the extra money in a professional shield. If you only need general trends for hobbyist gardening, the DIY saucer approach is sufficient, provided you commit to cleaning the unit regularly.
Long term sensor care
You should check your thermometer regularly to ensure the housing remains clean and the sensor isn’t damaged by moisture. If you notice the reading is drifting away from the local forecast, place the sensor in a cup of ice and water for ten minutes. It should read exactly zero degrees Celsius. If it does not, your sensor has lost its calibration and needs to be replaced.
Don’t attempt to repair internal electronic sensors yourself. Opening the case breaks the factory-applied weather seal, which leads to permanent failure within weeks due to humidity.
If the display begins to fade, change the batteries immediately. A common mistake is waiting until the screen goes blank, but dying batteries can leak electrolyte, which can corrode the circuit board.
Use the decision rule: if the device shows a low-battery icon, replace the cells within 48 hours. If the device remains unresponsive after a fresh battery swap, the unit is likely defective.
When to use a different approach
If you need to measure the temperature of a specific plant or a small soil patch, a standard air thermometer is the wrong choice. Use a soil probe or an infrared surface thermometer instead. These tools are designed to read the temperature of the object itself rather than the surrounding air. If you need to monitor temperatures for a legal or insurance dispute, don’t rely on hobby equipment. Hire a certified professional who uses calibrated, NIST-traceable instruments. They can provide a signed report that holds up in legal proceedings, whereas your personal recordings won’t be accepted as evidence.
Can I leave my thermometer out all winter?
Yes, most digital outdoor thermometers are built to withstand freezing temperatures, but check the manual first. If your specific model isn’t rated for sub-zero conditions, the liquid crystal display may freeze and crack. Always verify the minimum operating temperature on the manufacturer’s official product page before leaving it out.
Why does my thermometer read higher than the news?
It’s likely catching reflected heat from a wall or the ground. Even if your thermometer is in the shade, it can absorb heat from nearby surfaces that have been baking in the sun. Try moving your sensor further away from your house to get a more accurate result.
Is it safe to put my thermometer in a box?
No, a solid box will trap heat and create a false high reading. You need a louvered shield that allows air to pass through while blocking the sun. If you must use a box, drill at least ten holes in the sides and bottom to provide enough ventilation for the sensor.
How long does a battery last in an outdoor sensor?
Most high-quality wireless sensors last about twelve to eighteen months on a fresh set of lithium batteries. If you use standard alkaline batteries in freezing weather, they will lose power much faster. Switch to lithium batteries if your area experiences cold winters to ensure your sensor stays powered throughout the season.
Does the color of the thermometer housing matter?
Yes, you should always choose a white or light-colored housing for your sensor. Dark colors absorb solar radiation and transfer that heat to the sensor, which will cause your readings to be inaccurate. If your sensor is dark, you can paint the housing with a high-quality, weather-resistant white paint to reflect the sun.
What is a radiation shield?
A radiation shield is a set of stacked, white, louvered plates that protect a temperature sensor from direct sunlight and rain. They’re designed to let air flow freely around the sensor while blocking all solar radiation. This is the industry-standard way to ensure that you’re measuring the actual air temperature.
How often should I calibrate my thermometer?
You should perform an ice-water test at least once a year to verify that your thermometer is still accurate. If the reading is off by more than the manufacturer’s stated accuracy tolerance, the sensor may be unreliable. There’s no simple way to adjust the internal calibration, so you should replace the unit.
Start by moving your sensor to a north-facing wall or into an open area away from concrete. You’ll know you have succeeded when your readings stop jumping during the heat of the day and begin to align with official weather reports. If the temperature remains inconsistent even after you have improved the shade and airflow, the sensor itself is likely damaged and should be replaced.
Related guides