
For most residential plumbing tasks, a flexible braided supply line is the better choice because it’s easier to install in tight spaces and handles minor misalignments without leaking. If you’re working on a high-end custom bathroom where the pipes are fully visible, a rigid supply line is the superior option for its clean, professional appearance.
Comparing supply line types

Choosing between these lines depends on your workspace, your experience level, and the final look you want to achieve. Each type has specific strengths that make it suitable for different parts of your home.
| Method | How long | Effort | Cost | Best for |
|---|---|---|---|---|
| Braided stainless steel | 10–15 mins | Low | Medium | Tight spaces |
| Chrome-plated rigid | 30–60 mins | High | High | Visible piping |
| Plastic/PVC flex | 5–10 mins | Low | Low | Quick repairs |
If you’re a beginner, avoid rigid lines. They require exact measurements and precise pipe bending. If you get the length wrong by even a few millimeters, the connection won’t seat properly. This error often leads to slow, hidden leaks behind your vanity that rot cabinetry over months.
Use braided stainless steel when you can’t see the connection clearly. The flexible mesh allows for minor adjustments during installation, which compensates for slight misalignments between the wall valve and the faucet shank. These lines are your safest bet for high-pressure areas where you can’t monitor the connection daily.
Choose plastic or PVC flex only for temporary fixes or low-pressure gravity drains. While they’re the cheapest option, they degrade faster than metal when exposed to harsh cleaning chemicals. If your supply lines sit near a window or under a sink with heavy chemical storage, the plastic may become brittle and crack within three years.
Always check your local plumbing code before starting. Some municipalities strictly forbid plastic lines in multi-story buildings due to fire safety ratings. If your home is in a high-rise, stick to braided stainless steel to ensure you remain compliant with insurance requirements.
Using braided supply lines
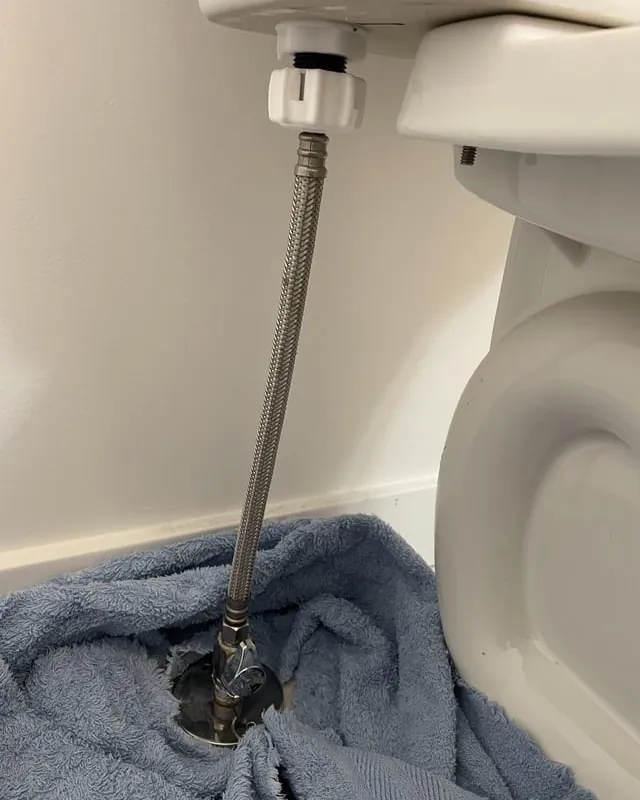
These lines consist of a rubber inner tube protected by a stainless steel mesh. They’re forgiving and don’t require special tools to install.
Turn off the water supply at the shut-off valve under the sink or toilet. Drain the remaining pressure by opening the faucet until the flow stops completely.
Hand-tighten the coupling nut onto the fixture tailpiece until it’s snug. Use a wrench to turn the nut an additional quarter-turn to ensure a proper seal. Don’t exceed this rotation. Over-tightening crushes the internal rubber gasket, which creates a permanent leak path that no amount of extra torque can fix.
Open the valve slowly and check for any moisture around the connection points. If you see a bead of water, close the valve and check the gasket for debris before retightening.
These lines are excellent for areas where the connection is hidden inside a cabinet. They can bend around corners easily, which saves you from needing to use multiple adapters or elbows.
The main weakness is that the outer mesh can rust over many years in damp environments, which may eventually lead to a pinhole leak. If you notice brown staining or “furry” oxidation on the braid, replace the line immediately.
If you’re working in a tight crawlspace, verify the line isn’t kinked. A sharp bend radius restricts flow and puts uneven stress on the crimped collar. If the hose doesn’t form a smooth, sweeping arc, use a longer line to prevent mechanical fatigue.
Installing rigid supply lines
Rigid lines provide a classic, polished look perfect for pedestal sinks where plumbing is part of the room’s design. They’re usually made of brass or copper with a chrome finish.
Measure the exact distance from the valve outlet to the fixture inlet. Cut the rigid pipe to size using a tubing cutter to ensure a perfectly square edge. Slide the compression nut and sleeve onto the pipe before inserting it into the valve. Tighten the nut firmly, which compresses the sleeve to create a watertight seal.
These lines are incredibly durable and won’t collapse or kink like flexible plastic alternatives. They offer the cleanest aesthetic for open-concept plumbing.
The main weakness is the lack of flexibility. If your wall valve isn’t perfectly aligned with your fixture, you’ll struggle to connect the line without putting dangerous stress on the threads. To test your alignment, hold a straightedge against the wall valve and extend it toward the fixture inlet. If the gap between the straightedge and the inlet exceeds one-eighth of an inch, a rigid line will likely leak or crack over time.
In these cases, use a rigid line with a built-in slip joint or opt for a flexible braided stainless steel hose hidden behind a decorative shroud. Many installers make the mistake of forcing a rigid pipe into a misaligned valve.
This creates hidden tension that causes the compression nut to vibrate loose after a few months. If the pipe doesn’t slide into both the valve and the fixture inlet with zero resistance, stop. You must either adjust the valve position or choose a more forgiving connection method.
Selecting your supply line
Deciding which product to use depends on the specific requirements of your plumbing project.
When you’re in a hurry, use a braided supply line. It’s a plug-and-play solution that you can install in minutes without needing to measure or cut metal pipes. If you’re working in a cramped vanity cabinet where a wrench barely rotates, the flexibility of a braided line is your only practical choice.
When you’re doing this for the first time, choose a braided supply line. The flexible nature of these hoses allows for small mistakes in alignment, which protects your home from leaks while you learn the ropes. Beginners often over-tighten rigid connections, which can crack a fragile shut-off valve; braided lines feature rubber gaskets that create a watertight seal with only a quarter-turn past hand-tight.
When you want the best possible result, opt for a rigid supply line. While it takes much more time and patience, the finished look is professional and avoids the cluttered appearance of excess flexible hose coiled behind a sink. Use rigid piping if your supply valves are perfectly aligned with the faucet inlets; if the pipes are offset by more than an inch, the stress on a rigid connection will cause a slow, persistent drip.
The primary trade-off is between ease of use and aesthetic impact. Flexible lines save you time, while rigid lines provide a permanent, high-quality look. If you’re installing a pedestal sink where the plumbing remains visible to guests, the aesthetic upgrade of rigid chrome or copper tubing justifies the extra hour of labor required for precise bending and cutting.
Safety and installation standards
Regardless of the material you choose, you must ensure your parts meet local plumbing codes. The Uniform Plumbing Code provides the standards for safe water distribution systems in North America. Always verify that your supply lines are rated for the pressure of your home’s water system. If your home has a pressure-reducing valve, ensure the lines handle at least 80 psi to account for potential spikes.
Before starting, clear out the area under your sink to give yourself plenty of room to move your wrench. A common mistake is failing to place a bucket directly beneath the joint before loosening the nut; this oversight often leads to water damage in the cabinet base.
Check your work after the water is turned on by wiping a dry paper towel around every connection. If the towel stays dry, you have a good seal. If the towel shows even a faint damp spot, tighten the fitting by a quarter-turn, but don’t overtighten, as this can crack plastic threads.
If the job requires soldering or complex pipe modifications, call a licensed plumber. Attempting to modify copper lines without proper certification often voids your home insurance policy in the event of a leak. If you see signs of corrosion on the existing shut-off valves, replace them entirely rather than trying to adapt them to new lines. A valve that feels stiff or gritty when turned is a liability that will likely fail during your installation process.
Frequently asked questions
How long does a braided supply line last?
The rubber inside eventually dries out and becomes brittle, which increases the risk of a sudden burst. You should check the exterior mesh for signs of rust or fraying once a year and replace the line immediately if you see any corrosion.
Is it safe to reuse an old supply line?
No, you should never reuse a supply line after disconnecting it from a fixture. The internal rubber washer or sleeve often deforms to fit the old connection, and it will rarely create a perfect seal a second time. Using a new supply line costs very little and is the only way to ensure your connection remains leak-free.
Why is my rigid supply line leaking at the nut?
A leak at the nut usually happens because the pipe isn’t square or the compression sleeve isn’t seated correctly. If you didn’t cut the pipe perfectly straight, the sleeve can’t press evenly against the valve body. You’ll likely need to cut a small amount off the end of the pipe to get a fresh, flat edge to try again.
Can I bend a rigid supply line to fit?
No, you can’t bend rigid lines by hand without kinking or breaking them. If you need a specific shape, you must use a dedicated pipe-bending tool designed for the specific diameter of your tubing. For most DIYers, it’s much easier to buy a line that’s already the correct length rather than trying to bend a straight piece of metal.
What happens if I overtighten the connection?
Tighten the nut until it feels firm, then add only a slight turn to secure it. Overtightening can crack plastic nuts or strip threads on rigid lines. Avoid forcing the connection, as crushing the internal washer will cause the seal to fail.
Conclusion
Ultimately, your decision comes down to whether you prioritize simple maintenance or a polished look. Before you head to the hardware store, check the distance between your shut-off valve and the faucet connection. You’ll want to measure twice so you don’t have to make an extra trip back for the right length.