
If your toilet is running constantly, making a hissing sound, or taking an eternity to refill the tank, you’re likely dealing with a faulty fill valve. Finding the best toilet fill valves is a straightforward process once you understand your specific toilet configuration and the material quality of the components involved. Replacing this part is one of the most cost-effective home repairs you can perform yourself, typically costing between $12 and $35 for the replacement part and requiring only basic tools like an adjustable wrench and a bucket to catch excess water.
Key Takeaways

- Measure your tank height before purchasing to ensure the new valve fits under the lid.
- Universal fill valves are compatible with most standard residential toilets, but check for specialty dual-flush or pressure-assisted systems.
- Always shut off the water supply valve behind the toilet and drain the tank before beginning any replacement work.
- Replace the tank-to-bowl gasket or the supply line if they show signs of dry rot or mineral buildup during your repair.
- Adjustable height valves offer the most versatility for different tank depths and water pressure requirements.
What is a fill valve?
The fill valve, often referred to as the ballcock assembly in older plumbing terminology, is the mechanism responsible for refilling the toilet tank after a flush. It connects to the water supply line and uses a float mechanism to detect the water level. Once the tank reaches the appropriate level, the valve closes the water flow.
If the rubber seal inside this valve degrades or the float mechanism malfunctions, water will continue to run into the overflow tube, wasting significant amounts of water and increasing your utility bills. Proper plumbing fixture water efficiency standards are essential for maintaining a sustainable home, as even a small leak can waste thousands of gallons annually.
How to identify your toilet type
Before you can choose a replacement, you must identify whether you have a gravity-fed toilet or a pressure-assisted system. Most residential homes use gravity-fed toilets, which have a simple tank-and-bowl design. Pressure-assisted toilets, often found in high-traffic areas or older homes with weak plumbing, use a pressurized vessel inside the tank and require specific, non-universal valve components.
- Gravity-fed toilets: Use standard universal valves.
- Pressure-assisted toilets: Require manufacturer-specific replacement kits.
- Two-piece toilets: The tank and bowl are separate, allowing for easy access to the fill valve nut.
- One-piece toilets: The tank and bowl are integrated, which can sometimes make the nut harder to reach without a specialized basin wrench.
Top rated fill valve brands
When looking for the best toilet fill valves, reliability is the most important factor. You want a product that resists corrosion and features a robust float mechanism. The following brands consistently rank highest among professional plumbers and DIY enthusiasts for their ease of installation and long-term durability.
- Fluidmaster: Known for the 400A universal model, which is the industry standard for most residential repairs.
- Korky: Famous for their quiet-fill technology and high-quality rubber seals that resist chlorine degradation.
- Kohler: Offers premium OEM valves designed specifically for their proprietary toilet models.
- Toto: Provides high-end fill valves that are essential for maintaining the performance of their specific gravity-flush systems.
Comparison of popular fill valve models
| Model Name | Best Feature | Installation Difficulty | Compatibility |
|---|---|---|---|
| Fluidmaster 400A | Universal fit | Easy | Most standard toilets |
| Korky 528MP | Quiet operation | Easy | Universal |
| Kohler 1058287 | OEM precision | Moderate | Kohler models |
| Toto TSU99A.X | High pressure | Moderate | Toto systems |
When should you replace the valve?
You don’t always need to replace the entire valve assembly. Sometimes, cleaning the existing valve or replacing the rubber washer is enough to stop a leak. However, if the plastic parts are cracked, the float is waterlogged, or the valve is more than ten years old, a full replacement is the most reliable path forward.
- Constant hissing: Suggests a worn-out seal or a float that’s set too high.
- Slow refill: Often caused by mineral buildup inside the fill valve inlet.
- Water leaking on the floor: Usually points to a failing tank-to-bowl gasket or a cracked supply line nut.
- Ghost flushing: Occurs when the water level drops slowly, triggering the fill valve repeatedly.
Do you need professional tools?
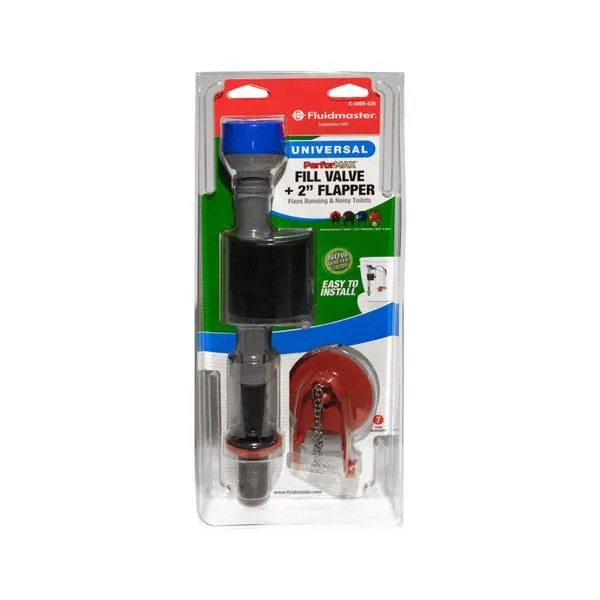
Replacing a fill valve is a beginner-friendly project. You don’t need a full professional plumber’s kit to finish the job effectively. In fact, most people find that they already have the necessary items in their home tool collection.
- Adjustable wrench: For loosening the supply line nut and the fill valve shank nut.
- Bucket or bowl: To catch the remaining water when you disconnect the supply line.
- Towel or rag: To wipe up any minor drips during the process.
- Plier set: Useful if the plastic nut is stuck or difficult to grip by hand.
Pro Tip: Always place a towel or a small plastic basin directly under the supply line connection before you loosen it to prevent water from soaking into your bathroom floor or cabinet base.
Step-by-step installation guide
Installing a new valve takes approximately 20 to 45 minutes for an average user. By following a structured approach, you can ensure a watertight seal and proper operation.
- Shut off the water: Turn the handle behind the toilet clockwise until it stops.
- Drain the tank: Flush the toilet and hold the lever down to remove as much water as possible.
- Remove old components: Use your wrench to disconnect the supply line and the locknut holding the valve to the tank.
- Install the new valve: Place the new valve into the tank, ensuring the gasket is seated correctly against the hole.
- Tighten the nut: Hand-tighten the locknut, then use a wrench for one additional quarter-turn to secure it.
- Reconnect supply: Attach the water supply line and turn the water back on slowly to check for leaks.
Troubleshooting your new valve
If the toilet continues to run after you have installed the new valve, don’t panic. Most issues stem from minor calibration errors rather than a defective part. Check the following areas if your toilet isn’t performing correctly immediately after installation.
- Float height: Ensure the float isn’t touching the side of the tank or the tank wall.
- Refill tube: Make sure the small plastic tube is clipped securely to the overflow pipe but not pushed so far down that it creates a siphon effect.
- Supply pressure: If the water pressure is too high, the valve may struggle to close properly, requiring a slight adjustment at the wall shut-off valve.
How to adjust the water level
Every toilet tank has a water line marked on the back wall, usually etched into the porcelain. If your water level is too high, it will spill into the overflow tube, causing the valve to run endlessly. If it’s too low, you won’t have enough pressure for a strong flush.
- Float cup adjustment: Most modern valves have a plastic screw or a clip that allows you to move the float cup up or down.
- Rod adjustment: Older style ball-and-rod valves require you to bend the metal rod slightly to lower or raise the ball.
- Testing: After each adjustment, flush the toilet and observe the final water level to ensure it sits about one inch below the top of the overflow pipe.
Dealing with hard water buildup
If you live in an area with hard water, mineral deposits are the primary enemy of your toilet fill valve. Over time, calcium and magnesium build up inside the valve inlet, restricting flow and preventing the internal diaphragm from closing properly.
- Vinegar soak: If your valve is slow, you can sometimes clean it by turning off the water and soaking the valve head in white vinegar for an hour.
- Water softener: Installing a whole-home water softening system will significantly extend the life of all your plumbing fixtures.
- Mesh filters: Some valves come with a small mesh screen in the inlet; check this periodically to ensure it isn’t clogged with sediment.
Maintaining your toilet plumbing
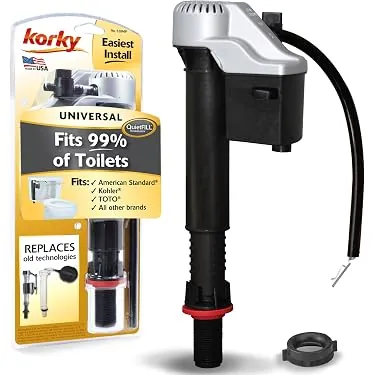
Regular maintenance prevents emergency leaks and saves you money on water bills. You should inspect the inside of your toilet tank at least once every six months to ensure all components are in good working order.
- Check the flapper: A warped or degraded flapper is a common cause of a running toilet, often mistaken for a fill valve issue.
- Tighten connections: Vibrations can cause supply line nuts to loosen slightly over time; a quick check prevents slow drips.
- Inspect the supply line: If the braided metal or plastic supply line looks frayed or brittle, replace it immediately to avoid a catastrophic leak.
Warning: Never use chemical “drop-in” tank tablets that contain bleach or high concentrations of chlorine, as these can rapidly degrade the rubber seals and plastic components of your new fill valve, leading to premature failure.
Related guides
- Best Toilet Seat With Price in 2026
- Best Self Cleaning Bidet Toilet Seats in 2026
- Foosball Table Replacement Parts Grip Wraps Fix in 2026
Frequently Asked Questions
Is it hard to replace a toilet fill valve?
Replacing a fill valve is considered a beginner-level plumbing task. It requires only a few standard tools and about 30 minutes of time. Most universal replacement kits include clear instructions that guide you through every step, from turning off the water to making the final adjustments for the perfect water level. It’s a very manageable project for most homeowners.
How do I know if I have the right size valve?
Most residential toilets use a standard universal fill valve that fits 99% of tanks. The only thing you need to verify is the height of your tank. Ensure the new valve is adjustable so you can set it to fit under your tank lid. If you have an exceptionally tall or short specialized tank, check the manufacturer’s specifications before purchasing your replacement.
Why does my toilet keep running after a new valve?
If the toilet runs after a new installation, the water level is likely set too high. Check the refill tube to ensure it isn’t submerged in the overflow pipe, which can create a siphoning effect. Also, verify that the tank flapper is seating correctly; if the flapper is old or warped, the water will leak into the bowl, forcing the valve to run constantly.
How often should I replace the fill valve?
A high-quality fill valve typically lasts between five and ten years, depending on your water quality. If you have very hard water, the internal components may degrade faster due to mineral buildup. If you notice persistent hissing, weak flushing, or constant running that can’t be fixed by simple adjustments, it’s time to replace the unit entirely to prevent water waste.
Can I fix a fill valve without turning off the water?
You should always turn off the water supply at the shut-off valve located behind the toilet before attempting any repairs. Trying to replace a valve with the water turned on will result in water spraying uncontrollably into your bathroom once the supply line is disconnected. Always ensure the water is fully shut off and the tank is drained before you start the work.
Conclusion
Taking the time to replace a failing component now will save you from the frustration of a constantly running toilet and the expense of wasted water. Start by turning off your water supply and checking your tank height to ensure you pick the correct replacement model. With a new valve installed, your toilet will operate quietly and efficiently for years to come.