
Installing a dual-pump system with a high-capacity deep-cycle battery is the most reliable way to protect your home from basement flooding. These setups provide automatic protection during power outages or main pump failures. This guide covers how to select the right capacity, proper installation practices, and the maintenance needed to ensure your equipment runs when the water rises.
Understanding Emergency Pumping Equipment
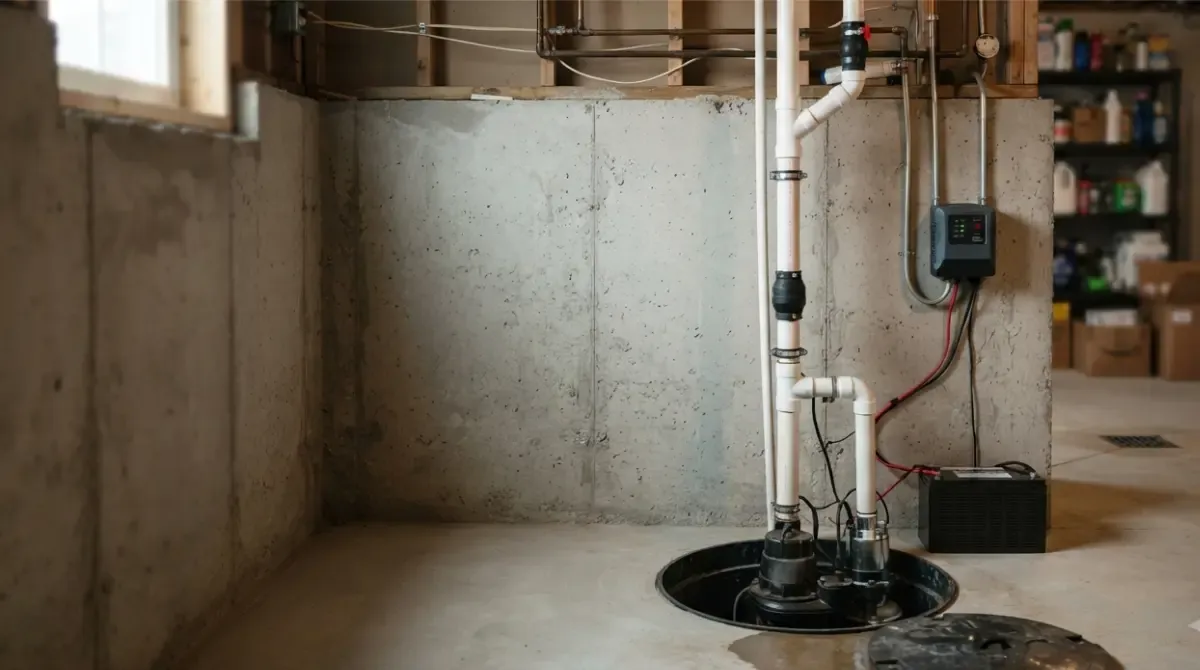
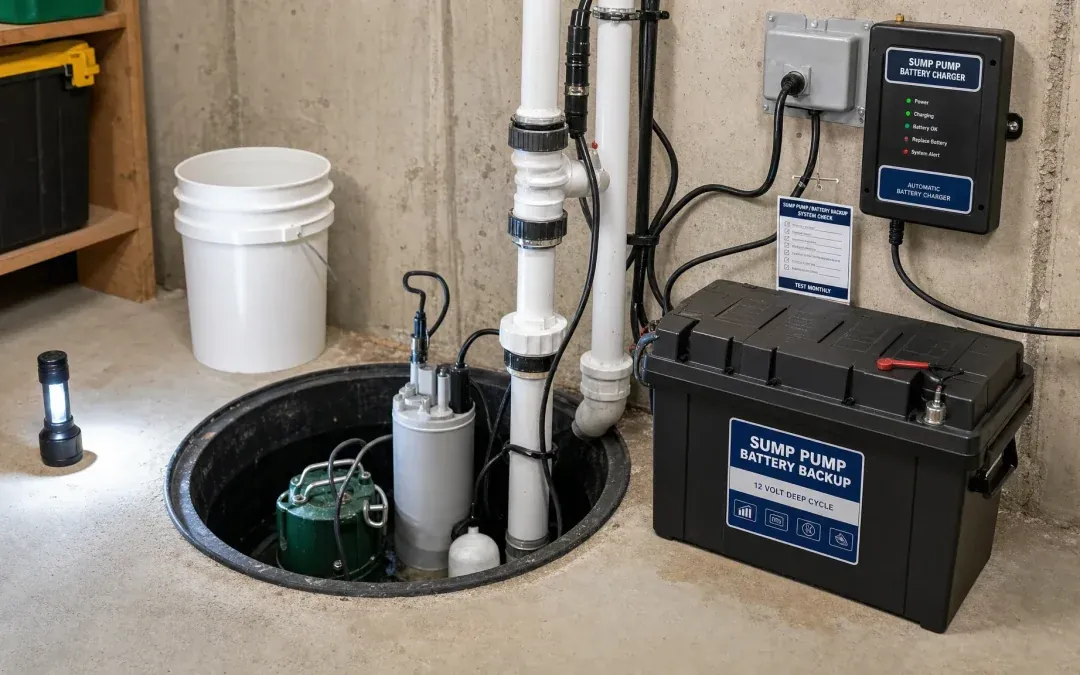
A backup sump pump is a secondary device designed to operate when the primary pump loses power or can’t handle the volume of water entering the pit. These systems use a 12-volt DC battery to run a separate pump, keeping your basement dry even if the main AC-powered pump stops. They’re vital for homes in flood-prone areas or locations where power grid stability is a known concern.
A common misconception is that all backup pumps have the same power as primary pumps. In reality, most battery-powered units have lower flow rates, meaning they’re designed for emergencies rather than constant daily use. The mechanism relies on a float switch that detects rising water levels; when the switch triggers, it draws current from the battery to move water out of the sump basin.
If you have a high water table, you need a system with a higher “gallons per hour” (GPH) rating to match your incoming flow. If your basement is rarely wet, a smaller, lower-cost unit might be sufficient. Always check the manufacturer’s manual for specific battery chemistry recommendations, as using the wrong type can significantly shorten the unit’s lifespan.
Installing Your Backup Pumping System
- Turn off the power to your main sump pump at the circuit breaker before you begin any work.
- Clean the sump pit of debris and old silt to ensure the new float switch operates without catching on anything.
- Install the backup pump at least 2 to 3 inches above the primary pump’s intake to ensure the main unit always does the heavy lifting first.
- Mount the battery box in a cool, dry location off the floor, using a battery tray to prevent leaks from damaging your floor.
- Connect the discharge pipe from the backup pump into a separate discharge line or use a Y-connector with individual check valves to prevent backflow into the inactive pump.
- Plug the system into a standard outlet for charging and connect the battery terminals according to the American Society of Plumbing Engineers guidelines for residential drainage.
- Test the system by pouring 5 gallons of water into the pit to verify the pump activates and drains the basin effectively.
The most important judgement call is placing the float switch at the correct height. If the switch is too low, the pump will cycle too often and drain your battery; if it’s too high, water may overflow the pit before the backup system starts.
Essential Performance Figures
| Situation | Recommended Pump Type | Typical Runtime | What to Watch For |
|---|---|---|---|
| Frequent power loss | Dual-pump system | 12–24 hours | Battery charge level |
| Occasional heavy rain | Standard DC backup | 6–10 hours | Float switch clarity |
| High water table | High-capacity pump | 4–8 hours | Discharge pipe flow |
| Low basement risk | Entry-level backup | 3–5 hours | Corrosion on terminals |
This assumes a standard 1/3 horsepower primary pump and a 75-amp-hour deep-cycle battery. For larger basins or higher lift heights, you should increase the battery capacity to ensure the runtime remains sufficient.
If your home sits at the bottom of a slope or in a known floodplain, treat these runtime estimates as absolute minimums. You must increase your battery capacity to account for the increased debris and silt common in flood-prone areas, which is a task that should be performed by a qualified technician.
Most homeowners make the mistake of using a standard automotive battery rather than a deep-cycle marine version. A car battery will fail quickly because it can’t handle the repeated deep discharges required for sump operations; consult a technician to ensure you select the correct unit for your specific system.
If your discharge pipe rises more than eight feet vertically, the pump loses significant efficiency. In these cases, install a check valve at the lowest point to prevent backflow. If the water drains back into the pit after every cycle, the pump will run twice as often as necessary.
This constant cycling burns out the motor prematurely and cuts your effective battery life in half. Always verify that your float switch is mounted at least two inches above the primary pump’s intake to prevent false starts.
Getting the Best Results
Experienced installers always prioritize the integrity of the discharge line. They use separate pipes or a Y-connector with individual check valves to ensure the two pumps don’t interfere with each other. If the pumps share a pipe without proper valves, water from the active pump will simply cycle back into the pit through the inactive pump’s intake.
Another detail experts get right is the battery maintenance. They never use standard automotive batteries because those are designed for short bursts of power, not the deep, long-term discharge a sump pump requires. Using a marine-grade deep-cycle battery ensures you get the full stated runtime during a storm.
Finally, keep the area around your sump pit clear. Don’t store boxes or heavy items near the pump, as these can fall into the pit and block the float switch. Checking the system once every six months is the standard for ensuring the battery is holding a charge and the pump motor is free of sediment buildup.
Troubleshooting Common Issues
| What you notice | What it usually means | What to do first |
|---|---|---|
| Pump runs constantly | Stuck float switch | Clear debris from switch |
| Alarm beeping | Low battery power | Check terminal connections |
| Water not moving | Air lock in pipe | Drill a small weep hole |
| Pump hums but fails | Obstructed impeller | Inspect intake for grit |
If the pump runs constantly, check the float switch for physical obstructions like plastic ties or mineral buildup. If the switch moves freely but the pump stays on, the switch mechanism has likely failed in the closed position. You must replace the switch assembly immediately to prevent the motor from burning out.
When the alarm beeps, start by checking the terminal connections for corrosion. A blue-green crust indicates a failing connection that prevents the battery from charging; if the connections are clean, have a technician test the battery to determine if it requires replacement.
If you drill a weep hole to clear an air lock, keep the diameter at exactly 1/8 inch. A hole larger than this reduces the pump’s head pressure, causing it to work harder and shorten its lifespan. Always drill the hole on the discharge pipe between the pump and the check valve.
If the pump hums but fails to move water, check the intake screen for small pebbles or grit. If the intake is clear, the impeller might be jammed by debris inside the volute. Use a screwdriver to manually rotate the impeller shaft. If it doesn’t spin freely, the bearings are seized.
If you notice a burning smell, disconnect the unit immediately from the power source and the battery. Never attempt to service the motor housing yourself. Electrical components and capacitors can hold a lethal charge even when unplugged. Contact a licensed plumber or electrician for professional repairs.
Regulatory Requirements and Rules
Local building codes often dictate how a sump pump must discharge water. Many municipalities strictly prohibit discharging sump water into the sanitary sewer system, as this can overwhelm wastewater treatment facilities during heavy rain. Instead, you must route discharge to a storm drain or onto the lawn at least 10 feet away from the foundation.
Failure to comply can result in municipal fines or a forced re-plumbing of your entire system at your own expense. Check with your local building department to verify the specific discharge requirements for your zip code.
If your home is in a high-risk flood zone, insurance providers often require a professional installation to validate your coverage. Don’t assume a DIY setup qualifies; many policies contain clauses that void flood protection if the equipment lacks a certified installer’s signature.
A professional installation also ensures the system meets the manufacturer’s warranty requirements. These warranties frequently specify that the unit must be installed by a qualified person to remain valid. If you install it yourself, you may inadvertently forfeit the protection of a multi-year warranty.
Always keep your receipts and a copy of the installation date for your home maintenance records. If your home sits on a slope, you must ensure the discharge point is downhill from the foundation. If you discharge toward the house, gravity will simply cycle the water back into your basement, rendering the pump useless.
If you live in an area with freezing winters, ensure your discharge pipe includes a freeze-guard fitting. This prevents ice blockages from causing a backpressure failure that could burn out your pump motor during the most critical spring thaw.
Maintaining Your Backup System
Once the installation is complete, your focus shifts to long-term reliability. Every six months, unplug your primary pump to force the backup system to activate, confirming that the battery and the pump motor are in working order. If the pump struggles to start, check the battery terminals for white, crusty buildup. This oxidation blocks electrical flow and is the most common cause of system failure during a storm.
Clean the terminals with a mixture of baking soda and water to ensure a solid connection. If you have a lead-acid battery, check the water level if it’s a serviceable type; if the plates are exposed, add distilled water to the line. Never use tap water, as the minerals will damage the internal chemistry.
Batteries typically last for a duration that depends on the number of discharge cycles they experience. When the runtime during your test drops significantly, consult your owner’s manual for guidance on when to replace the unit, as the frequency of service depends entirely on your specific usage.
Distinguish between a failing battery and a failing pump by checking the voltage under load. If the pump runs at full speed when connected to a fresh power source but lags on the battery, the battery is the culprit. If the motor hums or vibrates without moving water, the pump itself has likely seized.
Many homeowners make the mistake of leaving the backup system idle for years, only to find the battery dead when the power fails. If you hear an alarm, don’t simply silence it. Check the diagnostic light; a solid red light usually indicates a low battery charge, while a flashing light points to a pump wiring fault. Always keep a spare float switch on hand, as this inexpensive component is the most frequent point of mechanical failure.
When to Choose Alternatives
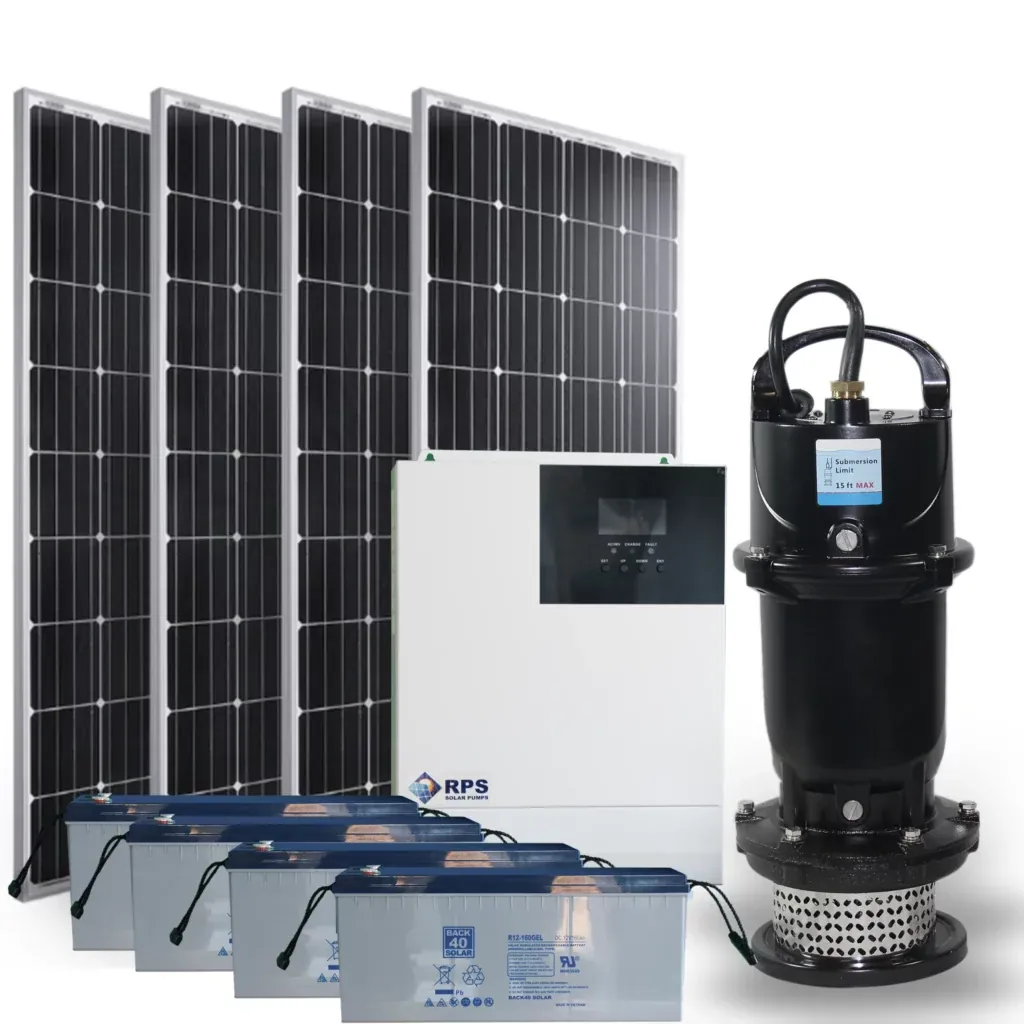
In some situations, a battery backup is the wrong choice. If you experience power outages that last for multiple days, even the best battery will eventually drain. In these cases, a water-powered backup pump is a better alternative. These systems use your home’s municipal water pressure to create a vacuum that pulls water out of the pit. They require no electricity and work as long as your city water supply is running.
You can verify if this is your best path by checking your local water pressure. If your gauge reads below 40 PSI, a water-powered pump will lack the suction power to clear your pit effectively. In that scenario, stick to a secondary battery system or a generator.
Another situation where battery backups fall short is in homes with extremely high-volume water ingress. If your pit fills up every few minutes during a storm, a battery pump can’t keep up with the volume. Most battery pumps move roughly 2,000 gallons per hour, which sounds sufficient until you calculate your actual inflow rate during a deluge. If your foundation drain is overwhelmed, you need a higher capacity.
In this case, look into a portable gasoline-powered pump as a secondary emergency measure. Keep the unit in a dry, accessible location and test the engine every three months to ensure the fuel hasn’t gummed the carburetor.
Many homeowners make the mistake of relying on a single pump regardless of the storm intensity. This oversight costs thousands in basement repairs when a single mechanical failure occurs. If you see water rising faster than your primary pump can discharge it, you must move to a secondary system immediately.
Finally, consult a foundation specialist to address the source of the water ingress through exterior drainage improvements. If your gutters dump water within five feet of the foundation, no pump will ever solve the underlying problem. Extending downspouts at least ten feet away often renders the backup pump a safety net rather than a primary defense.
Related guides
Frequently asked questions
How long does a battery backup sump pump last?
A high-quality battery backup pump system typically lasts 10 to 15 years. The battery itself wears out fastest, usually needing replacement every 3 to 5 years.
Is it safe to install a backup pump myself?
Yes, most homeowners can safely install a backup sump pump because the systems operate on low-voltage DC power. If your installation requires complex plumbing or electrical modifications, hire a licensed plumber to ensure the work meets local codes.
How often should I test my backup sump pump?
You should test your battery backup sump pump every six months to ensure the battery is charged and the float switch moves freely. Unplug your main pump and pour 5 gallons of water into the pit to verify the backup activates.
Can I use a regular car battery for my sump pump?
No, you shouldn’t use a regular car battery because they’re designed for short bursts and will fail quickly under a sump pump load. A deep-cycle marine battery is designed to provide the consistent power necessary for long-term use during power outages.
What happens if the power goes out for more than 24 hours?
A standard battery backup system will likely run out of power if the outage lasts more than 24 hours. Consider adding a secondary battery in parallel to double your capacity or installing a water-powered backup pump if you experience frequent, long-term outages.
Conclusion
Peace of mind starts with a reliable safety net beneath your home. Once you’ve chosen your setup, don’t wait for the next storm to test it. Schedule a professional inspection or run a quick manual check this weekend. You’ll sleep much better knowing your basement won’t flood when the power goes out.