
Choosing between sharkbite vs copper fittings depends on your skill level and the urgency of your plumbing repair. For most homeowners, push-to-connect fittings are the best choice because they require no soldering or specialized tools to create a reliable seal. However, professional plumbers often prefer traditional soldered copper for its long-term durability and lower cost in large-scale installations.
Comparing SharkBite and copper fittings
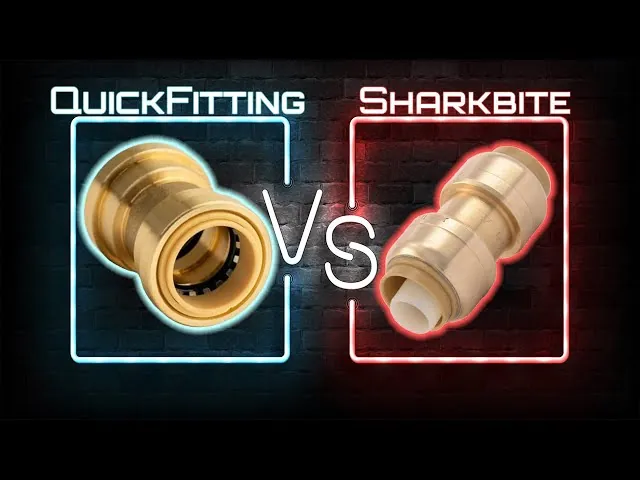
Understanding the differences between these systems helps you pick the right one for your project. While push-to-connect fittings save time, copper remains the standard for permanent, hidden wall installations.
| Method | How long | Effort | Cost | Best for |
|---|---|---|---|---|
| Push-to-connect | Seconds | Low | High | Quick repairs |
| Solder (Sweat) | Minutes | High | Low | New construction |
| Compression | Minutes | Medium | Medium | Tight spaces |
Push-to-connect fittings rely on an internal O-ring to create a seal against the pipe wall. This allows for a fast, tool-free installation that works on copper, PEX, or CPVC pipes. If you’re a beginner, this method eliminates the risk of fire or leaks caused by poor heat control.
Avoid using push-to-connect fittings inside closed walls or under floors where you can’t reach them for future maintenance. These O-rings degrade over time, often failing after fifteen to twenty years. If the joint is buried behind drywall, a slow leak can cause thousands of dollars in mold and structural damage before you notice the problem.
Solder joints create a permanent, molecular bond that lasts as long as the pipe itself. Use this method for behind-the-wall work where longevity is the priority. If you see a bead of solder forming a complete, shiny ring around the entire circumference of the pipe, the joint is secure.
Compression fittings offer a middle ground for tight spaces where you can’t safely use a torch. These rely on a brass ferrule that bites into the pipe. Always tighten the nut until it feels firm, then add a quarter-turn more. Don’t overtighten, as this can deform the ferrule and create a permanent leak path.
Using push-to-connect fittings
These fittings are designed for speed and simplicity, making them ideal for emergency fixes or temporary setups. You simply push the pipe into the fitting until it hits the internal stop.
Cut the copper pipe cleanly and ensure the end is free of burrs or deep scratches. If you use a hacksaw, the jagged edges will slice the internal O-ring, leading to a slow, hidden leak behind your walls. Use a dedicated tubing cutter instead.
Use a deburring tool to smooth the outer edge so it doesn’t damage the internal seal. If the pipe end isn’t perfectly smooth, the fitting will fail under pressure within days.
Mark the insertion depth on the pipe using the manufacturer’s depth gauge. If you fail to mark the pipe, you have no way to verify if it has seated past the O-ring or if it’s merely resting against it.
Push the pipe into the fitting firmly until you reach the mark. If you feel resistance before the mark, pull the pipe out, inspect the O-ring for debris, and try again.
These fittings are excellent for reaching pipes in tight cabinets or restricted crawl spaces. The main weakness is the rubber O-ring inside, which can degrade over several decades compared to a metal-to-metal bond.
If you’re working with PEX, ensure you use a stiffening insert to prevent the pipe from collapsing under the fitting’s grip. Without this insert, the connection will eventually pull apart.
Always ensure the components you use are certified by the NSF for use in potable water systems. Avoid using these fittings inside closed walls if you can’t verify the pipe is square and free of surface oxidation.
Soldering traditional copper pipes
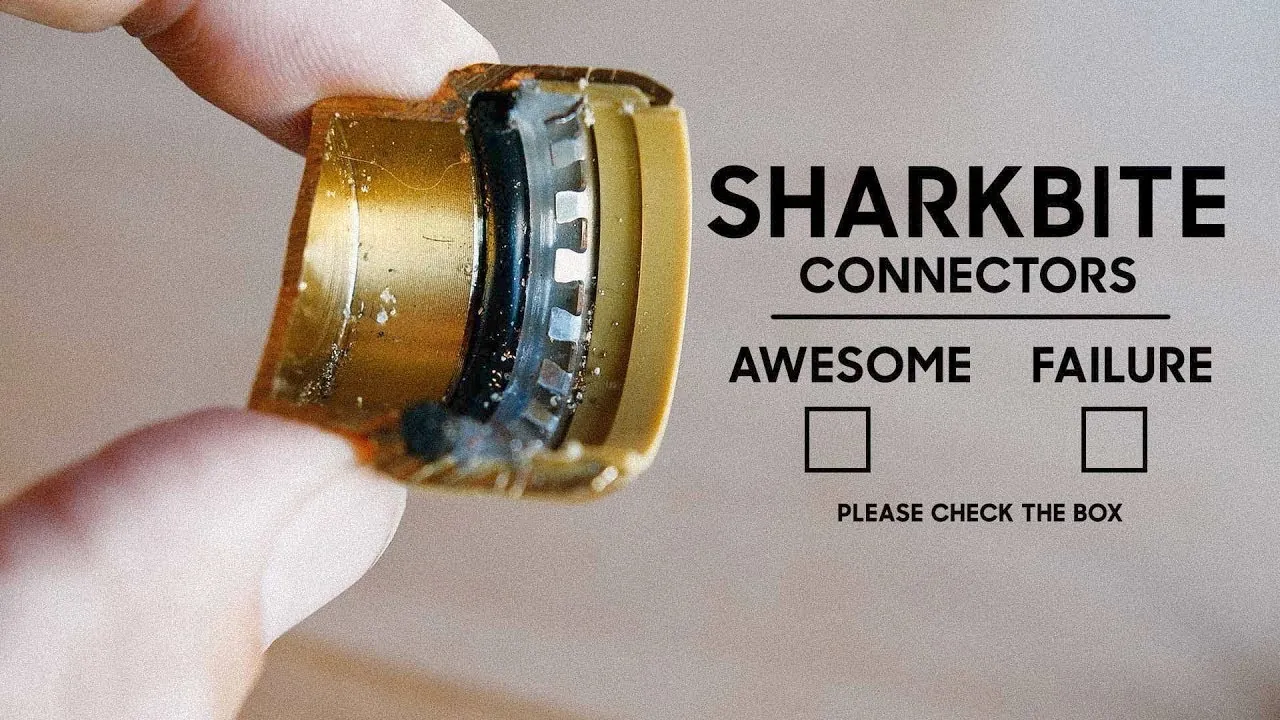
Soldering creates a permanent, monolithic bond between the pipe and the fitting using molten metal. This is the industry standard for longevity and is required by many local building codes for pipes hidden behind finished walls.
Clean the outside of the pipe and the inside of the fitting with a wire brush until the copper shines like a new penny. If you see dark spots or dull oxidation, the solder will fail to adhere, leading to a slow drip that’s impossible to seal later.
Apply a thin, even layer of flux to the cleaned surfaces to prevent oxidation during the heating process. Use a small brush to ensure the coating is uniform, as excess flux can cause internal corrosion that eats through the pipe wall over time.
Heat the fitting evenly with a propane torch, focusing the flame on the thickest part of the fitting rather than the pipe itself. If the pipe gets too hot before the fitting, the solder will bead up on the surface instead of flowing into the joint.
Touch the solder wire to the joint, allowing it to be pulled into the gap by capillary action. You should see the solder disappear into the seam instantly. If it doesn’t flow, remove the heat and let the metal cool before trying again.
A common mistake is overheating the joint, which burns the flux and prevents the solder from bonding. This mistake costs you a complete leak-prone joint that must be cut out and replaced. If the flux turns black or charred, you have gone too far.
If you’re working near wood framing, keep a spray bottle of water nearby. If the copper is too hot to touch with a damp rag, you’re risking a fire behind the wall.
Choosing the right connection for your project
When you’re in a hurry, use push-to-connect fittings to restore water flow in minutes. If you’re doing this for the first time, these fittings are also the best choice because they remove the learning curve of heat management and metal prep. When you want the best possible result for a permanent, hidden installation, traditional soldered copper remains the winner due to its proven, multi-decade reliability.
The trade-off is simple: you pay a premium for the convenience and speed of push-to-connect, or you invest your time and labor to save money and ensure a permanent bond with solder. If your local building code mandates specific materials for behind-the-wall plumbing, you must follow those rules regardless of your personal preference.
Push-to-connect fittings rely on internal O-rings to create a seal. Because these rubber gaskets can degrade over time, avoid burying them inside concrete slabs or inaccessible wall cavities where a slow leak could cause structural rot before you notice it. Use these fittings only in exposed areas, such as under a sink or in an accessible utility closet.
Soldering is the superior choice for high-pressure lines or areas subject to vibration, like near a well pump. If you’re joining pipes in a tight crawlspace, the fire risk of an open torch often makes push-to-connect the safer, albeit more expensive, alternative.
Before starting, check your pipe material. Push-to-connect fittings require perfectly round, deburred copper or PEX. If your existing pipe is pitted or deeply scratched from old pipe wrenches, the fitting won’t seal. In those cases, you must cut back to clean, smooth pipe or use a traditional compression fitting instead.
Safety and installation standards
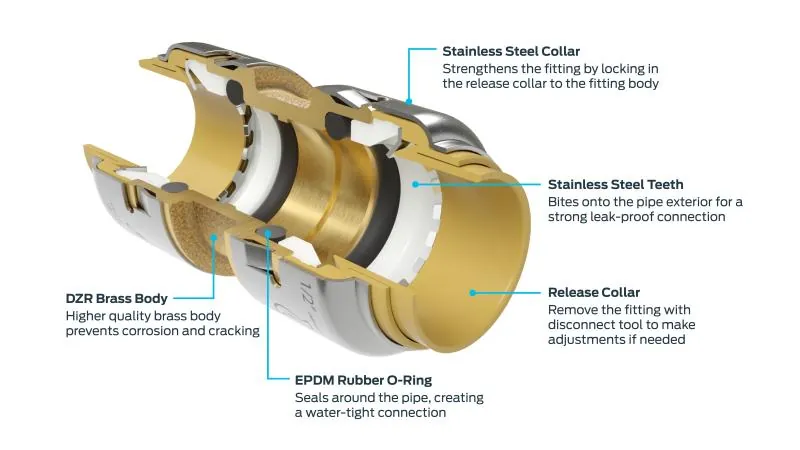
Regardless of the method you choose, proper pipe preparation is the most important step to prevent future leaks. Always ensure the pipe is round and free of debris before attempting any connection. If the pipe is dented or out of round, neither a push-to-connect fitting nor a solder joint will hold pressure reliably.
Use a deburring tool to remove sharp edges from the pipe ends. A single burr left inside the tube acts like a knife, slicing through rubber O-rings in push-to-connect fittings. This mistake often costs homeowners a slow, hidden leak that causes significant water damage behind drywall. If the pipe surface feels rough to the touch, sand it with fine-grit emery cloth until it shines.
If you’re working with older, corroded pipes, check the condition of the metal before you start. If the copper is too thin or pitted, you may need to cut back to a section of healthy pipe to ensure a good seal.
If you see green or white oxidation, clean the area thoroughly before applying heat or pressure. If the pipe is wet, you must dry it completely, as even a small amount of moisture will compromise a solder bond. Whenever you’re unsure about the safety of your plumbing work, contact a licensed plumber to inspect your progress or handle the final connections. Professional oversight is mandatory if you’re working near a main shut-off valve or a high-pressure line.
Related guides
- Mini Pebble vs Pebble Tec: Which Pool Finish Wins in 2026
- Pleatco vs Unicel: Which Pool Filter Lasts Longer? in 2026
- Spa Frog vs Nature 2: Which Mineral Sanitizer Wins in 2026
Frequently asked questions
Can I reuse sharkbite fittings?
Yes, you can remove and reuse these fittings if you use a special disconnect tool to release the internal teeth. However, manufacturers generally recommend using a new fitting if the internal O-ring shows any signs of damage or wear.
Is it safe to bury push-to-connect fittings in walls?
No, it’s generally recommended to keep these fittings in accessible areas where you can reach them for inspection. Most building codes require that any mechanical connection hidden behind a wall must be left accessible or use a permanent method like soldering.
How long does a soldered copper joint last?
A well-soldered joint can last for a very long time, often outlasting the structure itself. The actual lifespan depends on the water chemistry in your area and whether the pipes are protected from external corrosion.
What happens if I don’t deburr the copper pipe?
If you skip deburring, the sharp edges on the end of the pipe will cut the internal rubber O-ring inside a push-to-connect fitting. This causes an immediate or slow leak that’s difficult to repair without replacing the entire fitting.
How much space do I need for a torch?
You need at least 6 inches of clearance around the joint to safely operate a propane torch without damaging surrounding wood or plastic. If you can’t get that much space, you must use a heat shield or switch to a different connection method.
Do I need a permit for plumbing repairs?
It depends on your local city or county ordinances, which vary significantly by location. You should check your local building department website before starting any work that involves moving or modifying major water lines.
Conclusion
The choice between these methods depends on your budget and the location of the repair. Push-to-connect fittings offer unmatched speed, while soldered copper provides a permanent, low-cost solution for those with the skill to install it correctly.