
The number of return jets you need depends on your pool’s size and pump flow rate. A standard 15,000-gallon pool with a 40 GPM pump usually works well with two return jets placed on opposite walls. If your system has a higher flow or a larger volume, you might need three or four to keep the water moving without creating dead spots.
The right count changes based on your pump’s gallons per minute (GPM), the shape of your pool, and where you place the skimmers. You can find the exact number by matching your equipment’s output to the surface area you need to cover in one hour.
Who needs to return jets

This page helps homeowners who own an in-ground concrete or vinyl pool and are planning a new build or a full renovation. You likely have a basic understanding of your pump’s horsepower but aren’t sure how that translates to jet placement. You need a clear rule to decide between two, three, or four returns before you cut into the deck or buy fittings.
This guide doesn’t serve commercial pool operators managing large lap pools or zero-clearance spas with specialized circulation systems. Those projects require engineered plans from a licensed professional who calculates hydraulic pressure and turnover rates using complex software. This article assumes you’re working with a residential system under 30,000 gallons.
If you’re looking for a quick fix for a clogged filter or a broken valve, read a troubleshooting guide instead. We focus on the design phase where you choose the number of outlets to install. The advice here assumes your pump is correctly sized for your total water volume, which is the first thing you must verify.
What decides the final count
If your pump pushes 60 gallons per minute (GPM) through only two small jets, the water shoots out too fast and creates strong currents that push debris back against the walls. If you split that same flow across four jets, the speed drops, and the water circulates gently enough to clean the entire surface. Check your pump’s label for the GPM rating at your specific head pressure.
The shape of your pool matters just as much as the pump power. Long, narrow pools often need jets at both ends to create a loop that moves water from one side to the other. Wide, rectangular pools might need jets on the short ends to prevent dead zones in the middle corners. Round pools usually work best with jets spaced evenly around the perimeter to avoid a spinning vortex.
Skimmer placement drives the third major decision. Water must flow toward the skimmers to pull floating leaves and bugs out of the water. If you put all your return jets on one wall, the current might miss the skimmers entirely. You want the water to hit the skimmer mouth directly. Many people get this wrong by placing jets too close together, which causes the water to recirculate locally instead of cleaning the whole pool.
Step-by-step installation plan
- Calculate your required turnover rate by dividing your total pool volume in gallons by 8 hours to find the needed GPM. For example, a 20,000-gallon pool needs 2,500 GPH, or about 42 GPM.
- Check your pump’s performance curve chart to see the actual GPM it delivers at your system’s head pressure. Use the manufacturer’s official data sheet for this number.
- Decide on a target velocity of 3 to 5 feet per second for each jet opening. This range cleans well without causing excessive splashing or noise.
- Choose a standard jet size, such as 1.5 inches or 2 inches, and calculate how many fit your total area requirement.
- Sketch your pool layout and mark jet locations so they aim diagonally toward the skimmers on the opposite wall.
- Install the plumbing pipes to these marked spots, ensuring the slope drains toward the main drain if possible.
- Attach the adjustable jet heads and turn on the pump to test the flow pattern.
- Adjust the angle of each jet until the water flows smoothly toward the skimmers without hitting the water surface too hard.
- Verify that there are no stagnant areas by dropping a leaf in different spots and watching it move toward the skimmer.
The single judgment call that separates a good job from a bad one is balancing flow speed against coverage. If you use too few large jets, the water moves too fast and wastes energy. If you use too many small jets, the pressure drops, and the water barely moves. Aim for the middle ground where the stream reaches the far wall but breaks up gently before hitting it.
Common setup variations at a glance
Different pool shapes and sizes require different approaches to jet placement and count. The table below shows typical scenarios and the best way to handle them.
| Pool Situation | Best Action | Time/Cost Effort | Watch For |
|---|---|---|---|
| Small rectangular pool | Use two jets on opposite short walls | Low cost, easy install | Avoid aiming directly at skimmers |
| Large freeform pool | Use three or four jets around curves | Moderate cost, more pipe | Prevent dead zones in corners |
| Deep diving well | Add one extra jet near the deep end | High effort, custom plumbing | Ensure flow reaches bottom |
| Pool with waterfall | Reduce return jets by one | Save on pump sizing | Maintain enough suction at skimmers |
| Saltwater system | Use corrosion-resistant jet bodies | Higher material cost | Check for white residue buildup |
| Spa combo system | Isolate spa jets from pool jets | Complex valve setup | Prevent cross-contamination of chemicals |
Details pros get right
Placement angles and depth
Experienced installers never place return jets straight down or straight up. They angle the jets slightly downward, about 10 to 15 degrees below the waterline. This pushes the water under the surface layer, forcing the dirty top water down and pulling fresh water up from the bottom. Beginners often point jets horizontally, which just stirs up the surface and leaves the bottom dirty.
Pros also bury the jet body deeper than beginners do. They set the center of the jet 6 to 12 inches below the finished water level. This ensures the stream enters the water quietly and mixes well. If the jet sits too high, it creates loud splashing and sends air bubbles into the filtration system, which can damage the pump over time.
Flow distribution checks
A pro always tests the flow before finishing the plaster or tile work. They run the pump and watch how long it takes for a dye tablet dropped in the corner to reach the skimmer. If it takes more than 2 minutes, the flow is too weak or blocked. Beginners skip this step and finish the job, only to find out later that the pool doesn’t clean itself properly.
They also check for “short-circuiting,” where water goes straight from a jet to a nearby skimmer without cleaning the rest of the pool. To stop this, they adjust the jet angle to shoot across the pool rather than directly at the intake. This simple adjustment ensures every part of the water gets filtered regularly.
Troubleshooting common issues
When things go wrong with your return jets, the symptoms usually point to a specific cause. The table below matches what you see with the most likely fix.
| What you notice | What it usually means | What to do first | How to stop it happening again |
|---|---|---|---|
| Loud splashing at surface | Jet aimed too high | Lower the jet angle | Set jets 10 degrees below waterline |
| Debris stuck in corners | Dead zone with no flow | Move jet to aim at corner | Re-check skimmer placement |
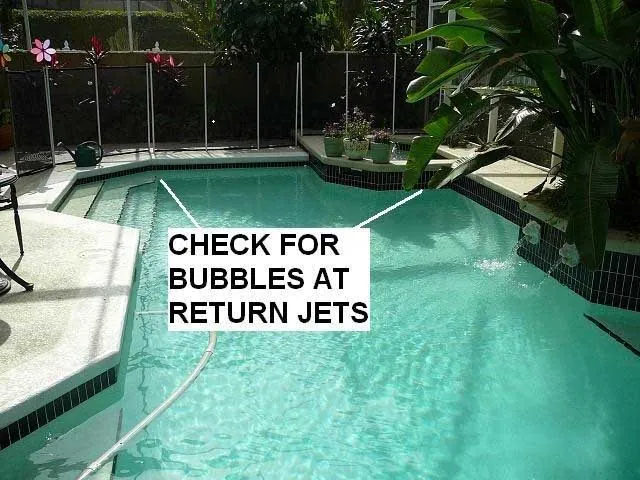
| Air bubbles in lines | Leaking suction side | Tighten unions and valves | Lubricate O-rings annually |
| Weak stream force | Clogged filter or valve | Backwash filter fully | Clean baskets weekly |
| Water not reaching skimmer | Pump too small for size | Upgrade pump or add jet | Match GPM to pool volume |
| Uneven chemical levels | Poor circulation pattern | Adjust all jet angles | Run pump 8+ hours daily |
Rules and safety limits
Local building codes often dictate the minimum number of return jets based on pool size. Always check with your local building department before starting construction. They publish the specific requirements for your county or city on their official website.
Safety rules also apply to jet placement near steps or ladders. While this mostly applies to suction outlets, strong return currents can also be dangerous if they trap a swimmer’s limbs. Follow the manufacturer’s instructions for safe distances.
You must also follow electrical codes if your jets include lights or heaters. These components require a Ground Fault Circuit Interrupter (GFCI) outlet installed by a licensed electrician. Never attempt to wire these yourself unless you hold the proper license. Violating these codes can void your insurance and lead to serious injury.
Real costs to expect
The cost of adding return jets varies widely based on whether you’re building new or renovating. For a new build, the materials for two standard 1.5-inch jets are inexpensive relative to hiring a plumber for labor, including the fittings and PVC pipe.
Renovations are much more expensive because they involve breaking concrete or digging up decks. Labor alone for each new jet is costly relative to a new build, plus the cost of repairing the surrounding surface. If you need to upgrade your pump to handle more jets, the unit and installation add further expense.
Time is also a cost. Installing two new jets in a new pool takes about 2 hours of labor. In a renovation, it could take a full day to break, install, and patch the deck. Prices change by region, so call three local contractors for quotes before committing to a budget.
Don’t assume your current pump can handle extra flow without testing. Most existing systems lose pressure when you add jets beyond their design capacity, turning strong streams into weak trickles. If your current pump runs at less than 75% of its maximum horsepower rating, you might get away with one or two additions. If it already runs near full capacity, skipping the pump upgrade will cost you more in energy bills and poor performance than the hardware itself.
A common mistake is hiring a general handyman for the plumbing work. They often lack the specific knowledge to balance the hydraulic head pressure correctly. The result is uneven water distribution where some jets spray hard while others barely bubble. This imbalance forces you to pay for a second visit to fix the system properly. Always verify that the contractor specializes in pool hydraulics before signing a contract.
If your pool has a saltwater generator, compatible fittings add extra expense relative to standard parts. Standard brass parts corrode quickly in saline environments, leading to leaks within a year. Using stainless steel or plastic alternatives prevents this failure but requires ordering parts specifically for salt systems.
Maintenance after installation
Once your jets are installed, check them every month during the swimming season. Look for hairline cracks in the plastic housing or wear marks where the water strikes the wall. If the jet body wiggles when you push it, tighten the mounting nut immediately to prevent leaks that can rot the surrounding structure.
Clean the jet face weekly to remove algae or mineral buildup. Use a soft brush and a mild vinegar solution; never use harsh acids that cloud or crack the plastic. If the water flow feels weaker than usual, check the filter pressure gauge right away. A reading five pounds above normal means the filter needs cleaning or backwashing before the pump strains.
Replace the jet assembly every 10 to 15 years, even if it looks fine. Plastic degrades from UV exposure and chlorine, becoming brittle until it snaps under pressure. Check the manufacturer’s warranty card for the specific replacement interval for your model. Keeping one spare jet on hand saves you from waiting days for delivery when a unit fails mid-season. If you notice a persistent hissing sound, shut off the pump and inspect the O-ring seal before attempting any repairs.
When to skip this method
Don’t try to add return jets if your pool has a variable-speed pump that can’t handle the extra resistance.
Check your pump’s performance curve before buying any parts. If the total dynamic head is already near the top of that curve, stop. In this case, you should consult a pool engineer to redesign the system.
Avoid installing new jets if your plumbing lines are already corroded or cracked. Cutting into old pipes can cause a major leak that floods your yard.
Instead, replace the entire plumbing system before adding any new features. This job requires a professional with excavation equipment.
Finally, don’t attempt this if your local code requires a permit for structural changes. Working without a permit can lead to fines and force you to tear out the work later. Call your city’s building department to confirm the rules before you start digging.
Frequently asked questions
Can I add more jets to my existing pool?
Yes, you can add more jets, but you must ensure your pump can handle the increased flow resistance. Check your pump’s maximum head pressure rating before buying new fittings.
Why does my pool have dead spots?
Dead spots happen when water flow doesn’t reach certain areas, usually due to poor jet placement or too few returns. Adjust the angle of your jets to direct water toward those corners.
How long do return jets last?
Return jets eventually wear out before the plastic becomes brittle or cracks. Replace them sooner if you notice leaks or reduced water flow.
Is it safe to swim near active jets?
It’s generally safe, but strong currents can be dangerous for young children or weak swimmers. Keep jets angled away from steps and ladders to reduce risk.
What happens if I use too many jets?
Using too many jets reduces water pressure, making the stream weak and ineffective at cleaning. It can also strain your pump if the system isn’t designed for it.
Does jet size matter for flow?
Yes, larger jets allow more water to pass through but reduce speed, while smaller jets increase speed but limit total volume. Match the size to your pump’s GPM.
Your next steps
Measure your pool’s volume and check your pump’s GPM rating to calculate the ideal number of jets, adjusting angles or adding units as needed for better circulation. If you notice air bubbles, pressure drops, or motor hum, stop immediately and have a professional inspect the system before running it again.