
Solid brass, stainless steel, and zinc alloy diverter valves are the most durable options for managing water flow between showerheads. These metal-bodied units typically offer a longer service life than plastic alternatives. Ensure your pipe threads match the standard half-inch NPT size and check manufacturer specifications for your home’s water pressure.
Shower diverter options at a glance
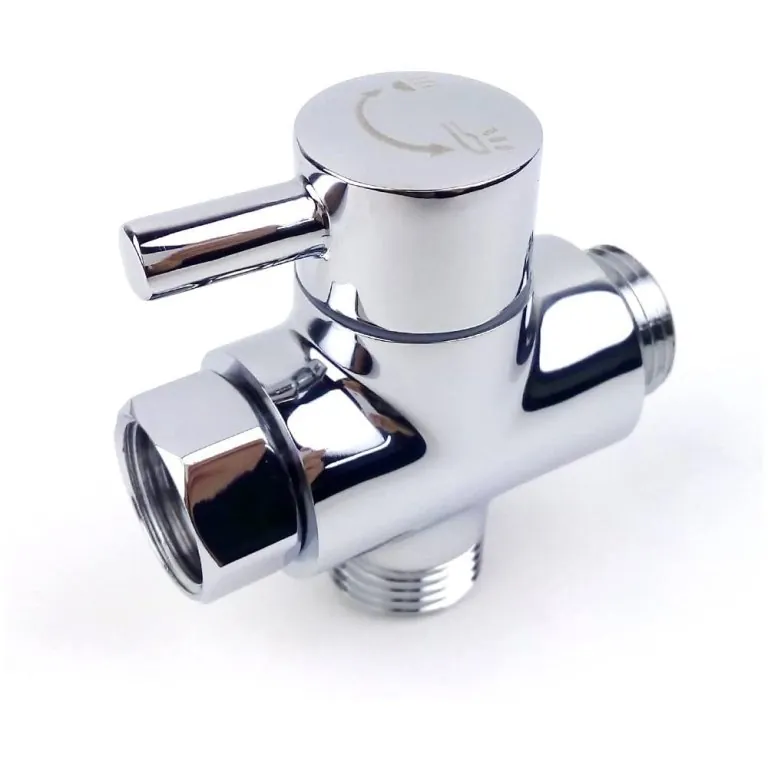
Choosing the right valve depends on your existing shower setup and whether you need to mount the unit at the wall or directly onto the shower arm.
| Valve Type | Best For | Concrete Example |
|---|---|---|
| Shower arm mount | Standard shower heads | 3-way arm diverter |
| Wall-mount valve | Built-in shower systems | In-wall diverter trim |
| Tub spout diverter | Bathtub shower combos | Pull-up spout diverter |
| Handheld slide bar | Adjustable height needs | Slide bar integrated valve |
If your shower arm is threaded directly into the wall pipe, choose an arm-mounted diverter. These are simple to install with an adjustable wrench. Avoid over-tightening the brass nut, as this often cracks the internal rubber gasket and leads to constant, annoying drips.
If you possess a tub-shower combination, look at the spout itself. If the diverter pin is located on the top of the spout, you have a pull-up model. If the pin is underneath, you have a lift-and-turn style.
You must match the new spout to the existing pipe length protruding from your wall. Measure the distance from the finished tile to the end of the copper pipe before buying. If your pipe is too short, the new spout won’t seal, causing water to spray behind your wall.
For multi-head systems, use a wall-mount valve. These require access behind the tile to plumb the water lines. If you aren’t comfortable sweating copper pipe, hire a licensed plumber. A mistake here causes leaks that rot your wall studs over time.
If you share the shower with people of varying heights, prioritize a slide bar. It allows the head to move vertically across a 24-inch rail. Ensure the bar is anchored into wood blocking, not just drywall, to prevent the fixture from pulling loose under the weight of the hose.
3-way shower arm diverter
A 3-way shower arm diverter is a simple attachment that screws directly between your fixed shower arm and the showerhead. It suits users who want to add a handheld sprayer without opening the wall or changing existing plumbing. It allows you to switch between the main head, the handheld unit, or both at once.
Most units rely on a brass or reinforced plastic internal ball valve. If your water pressure is already weak, running both heads simultaneously will split the volume, leaving you with a disappointing dribble from both. If you have a tankless water heater, ensure the diverter doesn’t restrict the flow rate below the heater’s minimum activation threshold, or the water will turn cold mid-shower.
To install, remove the current showerhead, wrap the threads with Teflon tape, and screw the diverter onto the arm. Tighten it until the handle faces the front. If it leaks, don’t overtighten, as you might crack the internal rubber washer or strip the threads. A quarter-turn past hand-tight is usually sufficient to seat the seal.
Choose a diverter based on the material of the internal toggle. Plastic toggles often fail within eighteen months due to mineral buildup, while solid brass versions withstand hard water years longer. If the diverter feels heavy, you may need a sturdier shower arm flange to prevent the pipe from sagging inside the wall.
When selecting a unit, check the thread compatibility. Most residential setups use a standard half-inch NPT connection. If your shower arm is an older wall-mount pipe, verify that the diverter includes a rubber gasket to prevent seepage at the connection point.
If the lever is difficult to turn, apply a small amount of silicone-based plumber’s grease to the internal stem. This prevents the mechanism from seizing when calcium deposits accumulate over time. Always test the flow with the diverter in each position before finalizing the installation to ensure the internal seal is properly seated.
In-wall diverter valve
An in-wall diverter valve acts as the central traffic controller for custom shower systems. It sits permanently behind the tile, allowing you to toggle water flow between a rain head, a handheld wand, or body sprays. Because the mechanical guts remain hidden, the shower wall stays uncluttered.
Standard diverters rely on a simple push-pull mechanism, but high-end in-wall models use a ceramic disc cartridge. This design lasts longer and prevents the annoying “drip-drip” sound common in older fixtures. If your handle feels stiff or requires excessive force to turn, the internal cartridge likely needs a flush or replacement.
You must choose between a shared-flow or a dedicated-flow valve. A dedicated-flow valve forces you to use one outlet at a time, which preserves water pressure in homes with smaller pipes. If you want the rain head and body sprays running simultaneously, you must specify a shared-flow valve during the planning phase. Installing the wrong type is a common mistake that costs hundreds in labor to correct once the tile is set.
Before you commit, verify your wall cavity depth. Most in-wall valves require at least 3.5 inches of clearance to accommodate the valve body and the necessary pipe fittings. If your wall is built with 2×3 studs rather than standard 2x4s, the valve handle may protrude too far or hit the backer board.
Always anchor the valve body directly to a horizontal piece of blocking installed between your wall studs. If you rely solely on the copper or PEX supply lines to hold the valve in place, the constant torque from turning the handle will eventually loosen the connections. This vibration creates microscopic cracks in the solder joints, leading to hidden leaks that can rot your wall studs before you ever see a drop of water on the floor.
If you aren’t comfortable sweating copper pipes or working with PEX fittings, hire a licensed plumber. A professional ensures the valve is perfectly plumb and level, which is critical for the trim plate to sit flush against your finished tile. A gap of even an eighth of an inch between the trim and the wall will allow moisture to penetrate the waterproof membrane, potentially causing long-term structural damage.
Tub spout diverter
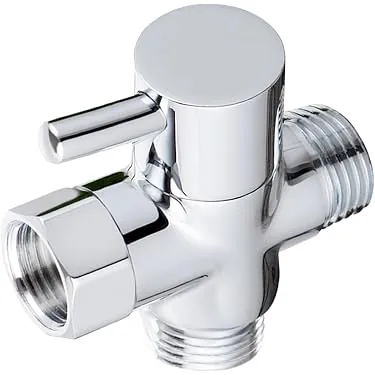
A tub spout diverter includes a small gate inside the spout that redirects water from the tub faucet to the showerhead. It suits users who have a bathtub and shower combination and want a simple way to switch modes. You pull up on a small pin or lever on the spout to engage the shower.
- Simplifies the transition between tub and shower modes.
- Works well with standard bathtub plumbing setups.
- Requires minimal space as it’s built into the spout itself.
If the pin on your tub spout stops staying up, the internal seal is likely worn out or clogged with mineral deposits. You can often fix this by cleaning the spout or replacing the entire unit if the diverter gate no longer seals against the water pressure.
Always check the spout connection type, as some are threaded onto a pipe nipple, while others use a slip-fit with a set screw. A common mistake is using too much force to pull the diverter; this can snap the plastic internal parts.
Slide bar integrated diverter
A slide bar integrated diverter features a valve built into a vertical bar that allows you to move your handheld showerhead up and down. It suits users who need to adjust the height of their showerhead frequently, such as families with children or people of different heights. This setup combines the diverter and the mounting hardware into one unit.
- Offers flexible height adjustment for the handheld sprayer.
- Keeps the handheld unit secure while in use.
- Provides a modern, organized look for your shower wall.
These units are heavier than standard diverters and require secure mounting to the wall to support the weight of the bar and the showerhead. If your wall is tiled, use a masonry drill bit and plastic anchors to ensure the bar doesn’t pull away from the surface over time.
If the diverter handle feels loose, check the mounting screws behind the decorative covers; tighten them just enough to stop the wobble. One common error is mounting the bar too high, making it difficult for shorter users to reach the spray head.
Other shower diverter styles
Dual-outlet thermostatic valves are for advanced systems where you need precise control over the temperature of two separate shower heads. These are for users who want to ensure a consistent, safe water temperature even when other fixtures in the house are running. If you experience sudden temperature spikes when a toilet flushes, this valve is your primary defense. It uses a wax element to balance pressure instantly, preventing scalding.
Rotary diverter valves use a dial to switch water flow between outlets, often found on modern, high-end shower panels. They’re best for those who prefer a smooth, turning motion rather than a lever to change settings. If you have limited clearance behind your vanity or wall, choose this style because it requires less rotational space than a swinging lever. Be aware that these seals wear out faster than simple pull-style diverters due to constant friction.
Push-button diverters allow you to change shower modes by pressing a button instead of turning a handle or pulling a lever. These are ideal for users who have limited hand strength or prefer a quick, one-touch change in water direction. If your button feels “mushy” or fails to pop back out, it’s usually a sign of mineral buildup from hard water. You can often fix this by soaking the button assembly in white vinegar for an hour.
If your shower setup includes a hand-held sprayer, verify the diverter has a “positive shut-off” feature. Without this, water will continue to trickle from the main shower head while you use the sprayer, wasting pressure. If you see a constant drip from the unused outlet, the internal O-ring has likely failed and requires a full cartridge replacement rather than a simple cleaning.
Choosing the right diverter valve
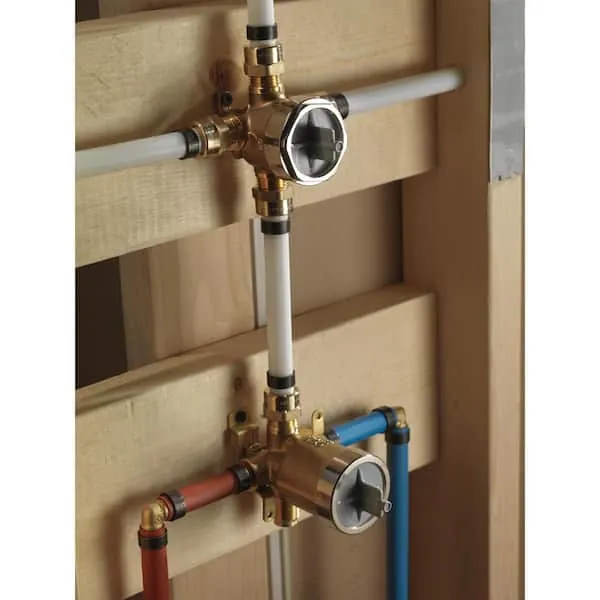
Your choice depends on your current plumbing layout, how much effort you want to spend, and the specific functionality you need. If you’re working with an existing shower arm, you must choose a shower arm diverter because it requires no changes to the wall or pipes.
If you’re performing a full bathroom renovation, you have the freedom to choose an in-wall diverter. This offers a cleaner look but requires significant plumbing work. Your available budget and the time you can dedicate to the project are the main variables. A simple arm mount takes ten minutes, while an in-wall unit can take days of labor.
If you pick a surface-mounted unit, you can combine it with any existing shower head. If you choose an in-wall valve, you’re generally committed to that system until the next major renovation.
Most homeowners make the mistake of choosing a valve based solely on aesthetics without verifying the pipe diameter behind the wall. If your supply lines are less than half an inch, an in-wall diverter will restrict water pressure to a trickle. Always check your pipe size before purchasing.
Use this rule to decide: if you can access the pipes through an existing service panel, choose the in-wall model for a minimalist finish. This prevents the high cost of cutting into finished walls. If you notice your current flow rate is already low, avoid complex multi-port diverters entirely. These units often contain internal restrictors that further degrade performance. Stick to simple, single-path valves to maintain the pressure you currently enjoy.
Related guides
- Best Adhesive for Shower Corner Shelf in 2026
- How to Use Metal Out in a Pool: Dose, Circulate, Clean in 2026
- 8 Best Adhesive for Shower Shelf Picks for Every Wall Type in 2026
Frequently asked questions
Can I install a diverter valve by myself?
You can install most shower arm diverters yourself using only an adjustable wrench. In-wall diverter valves require professional plumbing experience because they involve soldering or connecting pipes behind the wall. If you’re unsure about your ability to seal pipes properly, contact a plumber to avoid leaks.
Why is my shower diverter valve leaking?
Leaks usually occur because internal rubber seals or washers have become brittle or worn over time. If tightening the packing nut fails to stop the dripping, you must replace the internal O-rings. Always ensure the water is turned off at the main supply before opening the valve body.
How long do shower diverter valves last?
High-quality brass diverter valves typically last 10 to 15 years, while plastic units usually last 3 to 5 years. The lifespan depends heavily on proper care and regular cleaning to remove mineral buildup. Hard water is the primary variable that restricts flow or prevents the gate from closing.
Is it safe to use a diverter with high water pressure?
You can safely use a diverter valve with high water pressure if the unit is rated for your home’s PSI. Most residential valves handle standard pressure, but you should verify the manufacturer’s documentation for the maximum rating. Extremely high pressure may require a pressure-reducing valve to protect internal seals.
What happens if I choose the wrong size diverter?
Choosing the wrong size prevents the threads from connecting to your shower arm, resulting in a loose fit. Most residential shower arms use a standard half-inch NPT thread, though some systems vary. Verify the thread size using a gauge or manual before purchasing to ensure a secure, leak-free connection.
Does it matter if I use Teflon tape on the threads?
Using Teflon tape is essential for creating a watertight seal on threaded connections between the shower arm and the diverter. Wrap the tape clockwise around the threads 3 to 4 times to ensure it stays in place. Avoid using excessive tape, which can cause cross-threading and damage the metal threads.
Conclusion
Start by turning off your water supply and removing the existing showerhead to inspect the threads on your shower arm. Once you have the correct diverter for your setup, wrap the threads with plumber’s tape and tighten the valve until it sits in the correct orientation.