
Planning to rough in a shower drain in your basement? Whether you’re finishing a new space or upgrading an old one, getting this step right is crucial.
You might wonder how to do it without costly mistakes or delays. You’ll discover simple, clear guidance to help you install your basement shower drain correctly the first time. Keep reading to learn the key steps and avoid common pitfalls that could save you time and money.
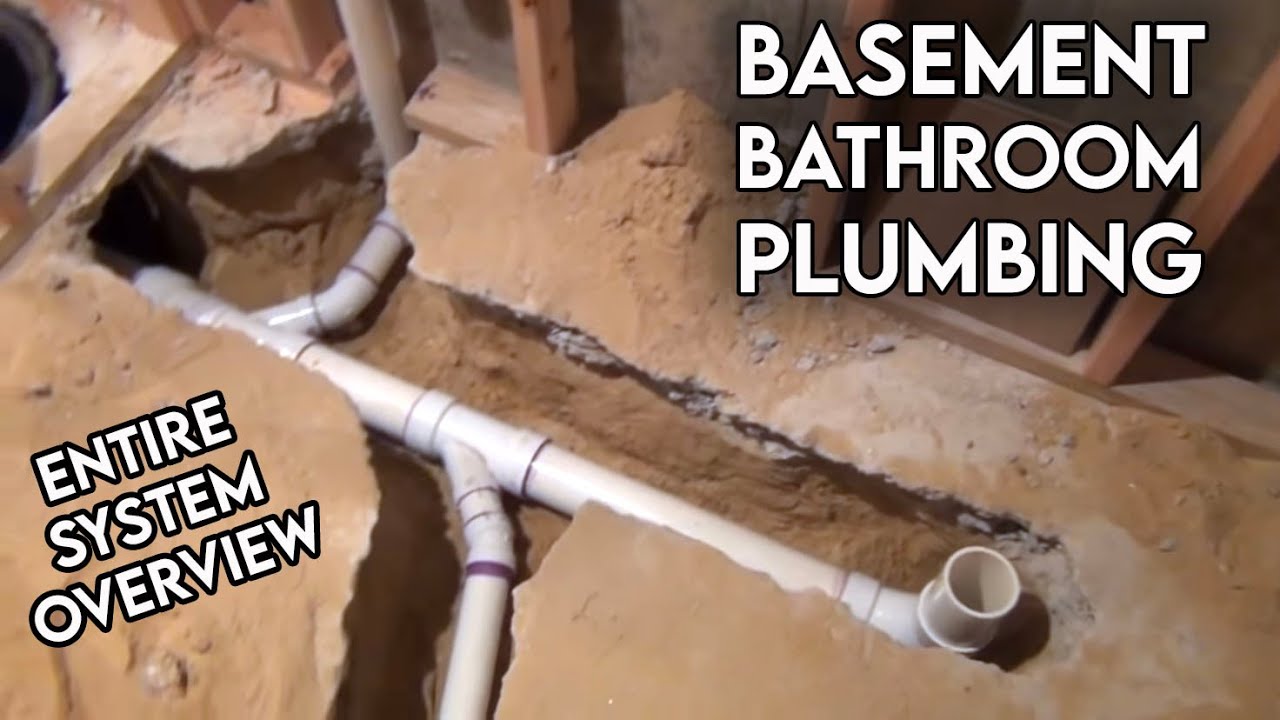
Your basement bathroom project starts here!

Credit: www.youtube.com
Planning Your Basement Shower Drain
Planning your basement shower drain is the first step to a successful installation. It affects how well the shower will work and avoid future water problems. Careful planning saves time and money later.
Think about the space, plumbing, and rules before starting. This helps you find the best spot for the drain. A good plan also makes sure water flows smoothly.
Assessing Basement Layout
Check the basement space to see where the shower fits best. Look for walls and corners that can hold a shower. Notice any low or high spots on the floor.
Also, find where current plumbing lines run. This helps reduce extra work. Make sure the space allows enough room for the shower and movement.
Choosing Drain Location
Pick a drain spot near existing pipes to save on plumbing costs. The drain should be at the lowest floor point to stop water buildup. Avoid placing it where it might freeze in cold weather.
Think about easy access for cleaning and maintenance. The drain’s location affects how water flows and how easy it is to fix problems.
Checking Local Codes
Every area has rules about basement plumbing and drains. Check local building codes before starting work. These rules cover drain size, venting, and pipe materials.
Following codes avoids fines and makes your basement safe. Sometimes, you need a permit or inspection for the work. This ensures your drain meets all safety standards.
Gathering Tools And Materials
Starting a rough-in shower drain in your basement needs careful preparation. Gathering the right tools and materials first saves time and avoids mistakes. Each item plays a key role in making the drain work properly.
Every part must fit well and meet local plumbing rules. Safety is important too. Wearing the right gear keeps you safe from harm during the project.
Essential Plumbing Tools
Have these tools ready to make your job easier. A pipe wrench helps tighten or loosen pipes. A hacksaw cuts pipes to the right length. A tape measure ensures accurate pipe placement. A level checks that pipes slope correctly for drainage. A pipe cutter gives clean cuts without crushing pipes. Plumber’s putty seals joints to stop leaks. Don’t forget a bucket to catch water spills.
Selecting Drain Components
Choose drain parts that fit your basement shower setup. Use PVC pipes and fittings for most basement drains. Pick the right size pipe, usually 2 inches wide. Get a shower drain assembly with a grate and strainer. Make sure the drain connects to your home’s main waste line. Select a P-trap to prevent sewer gases from entering your basement.
Safety Gear And Supplies
Protect yourself with safety gear. Wear gloves to keep hands clean and safe. Use safety glasses to shield your eyes from debris. A dust mask helps if you cut or sand pipes. Have a flashlight handy for dark basement corners. Keep a first aid kit nearby for minor injuries. Dress in clothes that cover your arms and legs.
Preparing The Basement Floor
Preparing the basement floor is a key step before installing a rough-in shower drain. This process makes sure water flows correctly and avoids leaks. Taking time to prepare the floor will save problems later. Careful work now means a smooth shower setup.
Marking Drain Position
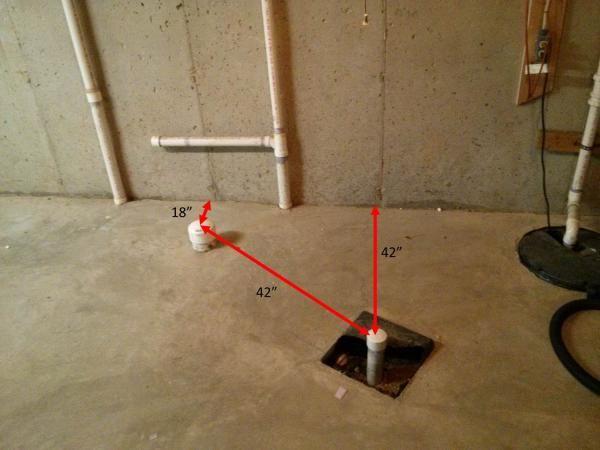
First, find the best spot for the drain on the basement floor. Mark this area clearly with a pencil or chalk. Check that the location lines up with existing plumbing pipes. The drain should be near the main soil pipe for easy connection. Accurate marking helps avoid mistakes during cutting.
Cutting Floor Opening
Next, cut an opening in the basement floor where you marked. Use a concrete saw or similar tool for a clean cut. Make sure the hole is the right size for the drain assembly. Wear safety gear like gloves and goggles while cutting. Keep the edges smooth to fit the drain tightly.
Ensuring Proper Slope
After cutting, check the floor slope toward the drain. The floor should slope down slightly, about 1/4 inch per foot. This slope helps water flow naturally to the drain. Use a level tool to measure the angle. Adjust the floor with mortar if the slope is too flat or uneven.
Credit: www.youtube.com
Installing The Shower Drain
Installing a shower drain in your basement is an important step for a proper shower setup. It helps water flow away and prevents leaks or flooding. The process requires careful fitting, connecting, and sealing to ensure a strong, long-lasting drain system.
Fitting The Drain Assembly
Begin by placing the drain assembly into the drain hole. Make sure it fits snugly without gaps. Adjust the drain height to match the shower floor level. Tighten the drain flange to hold it firmly in place. Check that the drain grate sits flush with the floor surface.
Connecting To Plumbing Lines
Next, attach the drain pipe to your home’s plumbing system. Use the correct pipe size for a secure fit. Connect the drain pipe to the P-trap to prevent sewer gases. Apply plumber’s tape or sealant on threaded joints to avoid leaks. Ensure the pipe slopes downward for proper water flow.
Sealing And Securing Drain
Seal around the drain flange with waterproof sealant. This step stops water from leaking under the floor. Press the sealant evenly to cover all edges. Secure the drain tightly to the subfloor with screws. Double-check for any loose parts or gaps before finishing.
Testing Drain Functionality
Testing the drain functionality is a crucial step after roughing in a shower drain in your basement. It ensures the drain works correctly and prevents future water problems. A well-tested drain helps avoid costly repairs and water damage. Checking the drain early saves time and effort later.
Water Flow Check
Start by pouring water into the drain. Watch how the water moves down the pipe. It should flow smoothly without any slow spots. Slow water flow can mean a blockage or poor pipe slope. Use enough water to fill the drain and observe if it empties quickly. This simple test confirms the drain’s basic function.
Leak Detection
Next, look for leaks around the drain and pipe joints. Use a flashlight to spot any wet areas or drips. Even small leaks can cause big damage over time. Check the connections and seals carefully. You might want to place a dry cloth under the drain to catch any drips. Early leak detection saves your basement from water damage.
Adjustments And Troubleshooting
If you see slow water flow or leaks, adjustments are needed. Tighten loose connections or replace faulty seals. Clear any blockages with a drain snake or plunger. Adjust the pipe slope if water pools in the drain. Testing again after fixes ensures the drain works properly. Keep testing until the flow is smooth and no leaks appear.
Credit: www.doityourself.com
Finishing Basement Shower Drain
Finishing the basement shower drain is a crucial step to ensure proper water flow and avoid leaks. This stage involves covering the rough plumbing work and preparing the floor for the shower installation. Careful attention is needed to secure the drain and create a solid base for the shower.
Backfilling And Floor Repair
After installing the shower drain pipe, backfilling fills the trench or hole. Use gravel or sand to provide good drainage and support. Compact the material to prevent settling over time. Next, repair the concrete floor by pouring a patch mix. Smooth the surface to match the existing floor level. This creates a stable, even base for the shower pan.
Installing Shower Pan Or Base
The shower pan catches water and directs it to the drain. Choose a pan that fits your shower space and drain location. Place the pan carefully over the drain opening. Check for a tight seal around the drain to prevent leaks. Secure the pan with adhesive or screws as needed. Confirm the pan slopes slightly towards the drain for proper water flow.
Final Plumbing Connections
Connect the drain pipe to the shower drain fitting tightly. Use plumber’s putty or a gasket to seal the joint. Attach the trap to prevent sewer gases from entering the basement. Test the connections by running water through the drain. Check for leaks or slow drainage. Tighten fittings or reseal joints if necessary before finishing the shower walls.
Common Mistakes To Avoid
Installing a shower drain in a basement requires care and attention. Mistakes can cause leaks, bad smells, or slow drainage. Avoiding common errors helps keep your basement dry and safe. Here are key mistakes to watch out for.
Improper Slope Issues
The shower drain pipe must have the right slope. Too flat, and water will not flow well. Too steep, and water can move too fast, causing noise and damage. A slope of about 1/4 inch per foot is best. Check the angle carefully before sealing the pipes.
Incorrect Drain Placement
Placing the drain in the wrong spot can cause water to pool. The drain should be at the lowest point of the shower floor. Avoid placing it near walls or corners where water may get trapped. Plan the location based on the shower size and floor shape.
Ignoring Code Requirements
Building codes set rules for safe and proper drain installation. Ignoring these rules can lead to fines or costly repairs later. Codes cover pipe sizes, venting, and trap placement. Always check local codes before starting the rough-in. Follow them strictly to avoid problems.
Frequently Asked Questions
What Is A Rough-in Shower Drain In A Basement?
A rough-in shower drain is the initial plumbing setup for a basement shower. It includes piping and drain placement before the shower is installed.
How Do You Locate The Best Spot For A Basement Shower Drain?
Choose a low point in the floor for natural water flow. Ensure easy access to existing drain lines for connection.
What Materials Are Needed To Rough In A Basement Shower Drain?
Common materials include PVC pipes, drain fittings, a shower drain kit, and plumbing cement. Tools like a saw and level are also needed.
How Deep Should A Basement Shower Drain Be Installed?
The drain pipe should slope downward about 1/4 inch per foot for proper drainage. Depth depends on basement floor thickness and plumbing layout.
Can I Rough In A Shower Drain Without Breaking The Concrete Floor?
Yes, if there is a crawl space or accessible plumbing below the basement. Otherwise, cutting into the concrete may be necessary.
How Long Does It Take To Rough In A Basement Shower Drain?
Typically, it takes 2 to 4 hours for an experienced plumber. Time varies based on complexity and access to plumbing.
What Are Common Mistakes When Roughing In A Basement Shower Drain?
Incorrect slope, poor pipe connections, and choosing the wrong drain location are common errors. These can cause leaks and drainage problems later.
Conclusion
Roughing in a shower drain in your basement sets the stage for a good bathroom. It helps prevent water damage and keeps things dry. Knowing the right steps saves time and money later. Plan carefully and follow local rules for best results.
A proper drain makes your basement safer and more comfortable. Take your time, measure twice, and work with care. Small efforts now lead to big benefits later. Your basement shower will work smoothly and last longer. Simple steps. Solid results.