
Have you noticed chipped paint ruining the look of your kitchen cabinets? It can be frustrating to see those small flaws steal the shine from your entire kitchen.
But don’t worry—you don’t need to hire a professional or spend a fortune to fix it. You’ll discover simple, step-by-step methods to repair chipped paint and make your cabinets look brand new again. Keep reading, and you’ll be amazed at how easy it is to restore your kitchen’s charm with just a few smart tricks.
Identify The Damage
Before fixing chipped paint on your kitchen cabinets, it is important to identify the damage. This step helps you understand how much work is needed. It also guides you in choosing the right repair method. Careful inspection saves time and ensures better results.
Check The Extent Of Chipping
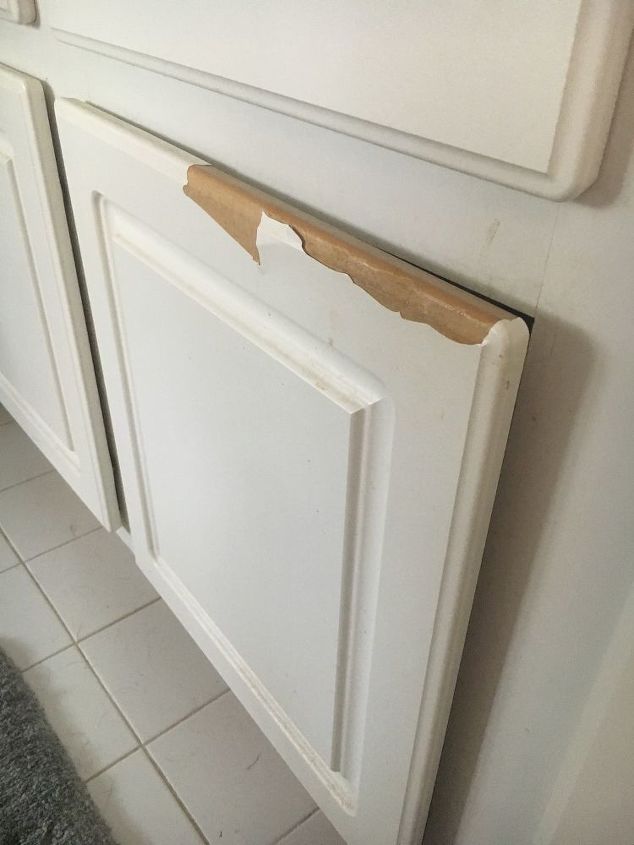
Look closely at the chipped areas on the cabinets. Note how many spots have paint missing. See if the chips are small or cover large sections. Check if the wood underneath is exposed or damaged. This helps decide if a simple touch-up or full repaint is needed.
Assess The Type Of Paint
Find out what kind of paint is on your cabinets. It could be oil-based or water-based paint. Oil-based paint feels slick and takes longer to dry. Water-based paint dries fast and feels smooth. Knowing the paint type helps pick the right repair paint. This makes the fix blend well with the old paint.
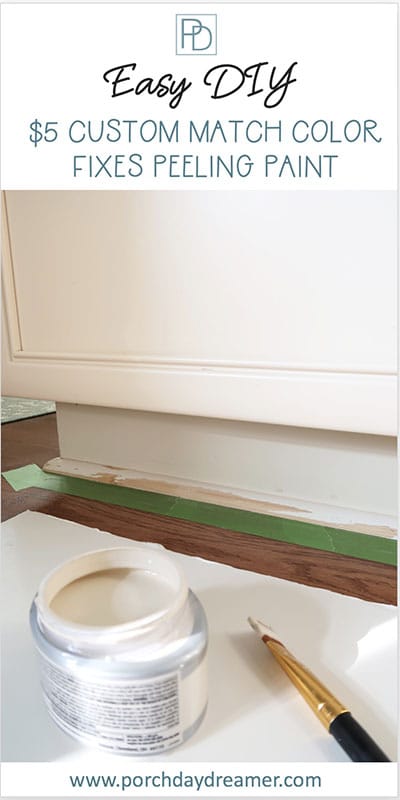
Credit: porchdaydreamer.com
Gather Necessary Tools
Before fixing chipped paint on kitchen cabinets, gather all the tools. Having the right supplies makes the job easier and faster. It also helps you get a smooth, clean finish. Organize your workspace and prepare everything you need.
Essential Repair Supplies
- Sandpaper (fine and medium grit) to smooth edges
- Putty knife for applying wood filler or putty
- Wood filler or putty to fill chips and cracks
- Primer to prepare the surface for paint
- Paint matching your cabinet color
- Small paintbrush or foam brush for touch-ups
- Clean cloth to wipe dust and debris
- Painter’s tape to protect surrounding areas
Optional Tools For Better Results
- Electric sander to speed up sanding
- Putty spreader for smoother filler application
- Paint sprayer for an even coat
- Magnifying glass to inspect small chips closely
- Work gloves to keep hands clean
- Drop cloth to protect floors and counters
Prepare The Surface
Preparing the surface is the first step to fix chipped paint on kitchen cabinets. This step helps the new paint stick well and look smooth. Without proper preparation, the paint may peel or look uneven. Spend enough time to get this right for the best results.
Clean The Cabinet Area
Start by cleaning the chipped area thoroughly. Use a damp cloth with mild soap to remove dirt and grease. Dirt stops paint from sticking properly. Rinse with clean water and dry the spot completely. A clean surface ensures the paint will bond well.
Sand The Chipped Spot
Next, gently sand the chipped spot using fine-grit sandpaper. Sanding smooths rough edges around the chip. It also helps the paint layer stick better. Sand just enough to blend the chipped area with the rest of the cabinet. Wipe away dust with a dry cloth before painting.
Choose The Right Paint
Choosing the right paint is crucial for fixing chipped kitchen cabinets. The paint must blend well with the existing color and finish. It must also suit the cabinet material and kitchen environment. Picking the wrong paint can cause poor coverage and peeling. This section guides you to select the best paint for a lasting repair.
Match Color And Finish
Find paint that matches your cabinet’s color exactly. Use small paint samples or take a cabinet door to the store. Compare colors under natural light for accuracy. The finish also matters. Choose satin, semi-gloss, or gloss to match your current cabinets. This keeps the repair less visible and more professional-looking.
Select Suitable Paint Type
Pick paint made for kitchen cabinets or wood surfaces. These paints resist moisture and cleaning chemicals. Acrylic latex paint is a good choice for durability and easy cleaning. Oil-based paint offers a hard finish but takes longer to dry. Consider your cabinet material and kitchen conditions before choosing the paint type.
Apply Primer And Paint
After sanding and cleaning the chipped area, it is time to apply primer and paint. This step helps the paint stick better and last longer. Proper priming prevents peeling and uneven color on your kitchen cabinets. Painting small areas requires some care to keep the finish smooth and neat.
Use Primer For Better Adhesion
Primer creates a strong base for the paint. It fills in tiny cracks and seals the surface. This stops the paint from soaking into the wood or old paint. Choose a primer made for wood or cabinets for best results. Apply a thin, even coat using a small brush. Let the primer dry fully before adding paint. This step improves paint durability and keeps the repair hidden.
Techniques For Painting Small Areas
Use a fine brush to paint the chipped spot. Dip the brush lightly to avoid drips. Paint in thin layers, not thick ones. Let each layer dry before adding another. Blend the edges carefully with the old paint. Avoid brushing over the same spot too much. This keeps the finish smooth and natural. Patience helps achieve a perfect touch-up on your cabinets.
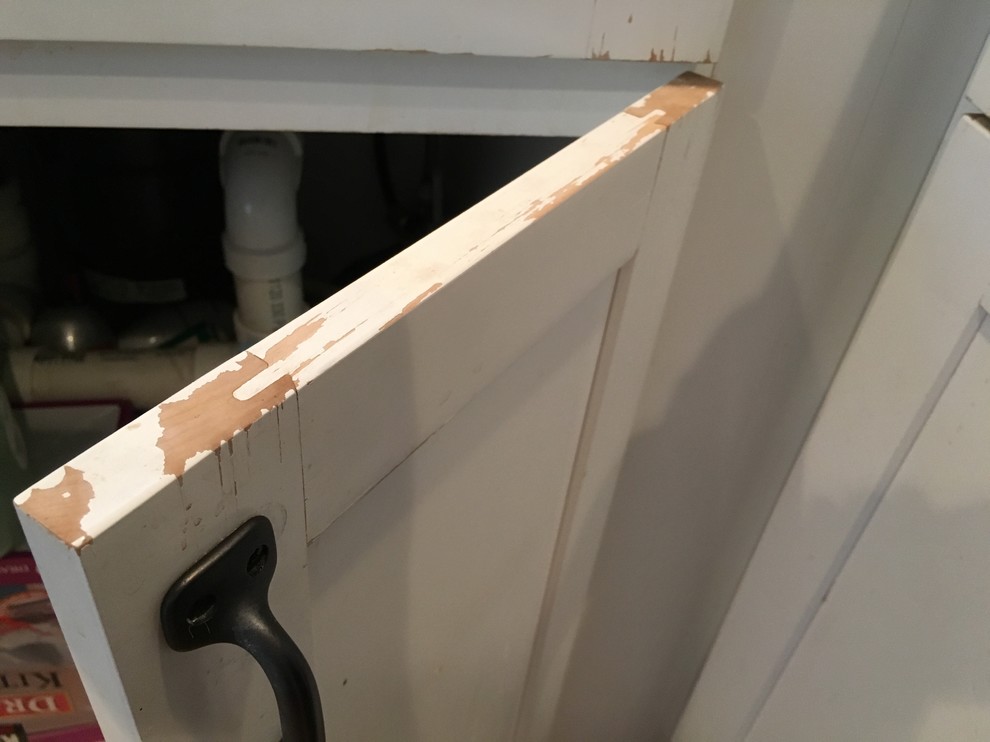
Credit: www.houzz.com
Smooth And Blend The Repair
Smoothing and blending the repair is a key step to fix chipped paint on kitchen cabinets. It ensures the patch looks natural and fits perfectly with the rest of the surface. This step makes the repair less visible and more durable.
Careful sanding and blending help remove rough edges and create a smooth finish. The goal is to make the repaired area match the surrounding paint seamlessly. Take your time and work gently for the best results.
Sand Between Coats
Lightly sand the patched area after each paint coat. Use fine-grit sandpaper to avoid scratches. This helps remove bumps and smooths the surface. Sanding also improves paint adhesion for the next layer. Clean the dust off with a soft cloth before applying more paint.
Feather Edges For Seamless Look
Feather the edges of the repaired paint to blend with the old paint. Use a soft brush or sanding block. Gently smooth the edges so they fade into the surrounding paint. This technique hides the repair and creates a natural look. Avoid harsh lines or ridges for the best finish.
Protect The Repaired Area
Protecting the repaired area of your kitchen cabinets keeps them looking fresh longer. After fixing chipped paint, the surface remains delicate. It needs a shield to avoid new damage. This step helps the repair blend well with the rest of the cabinet. The protection also prevents moisture and dirt from harming the paint. A simple layer of clear coat or sealant can do this job well.
Apply Clear Coat Or Sealant
Choose a clear coat or sealant made for wood or painted surfaces. Use a small brush to apply a thin, even layer over the repaired spot. Let it dry completely before touching the area. This coat strengthens the paint and adds a smooth finish. It stops peeling and chipping from happening again. For best results, apply two thin layers, letting each dry fully.
Maintain Cabinets After Repair
Keep cabinets clean with a soft cloth and mild cleaner. Avoid harsh chemicals that wear down the paint and sealant. Wipe spills right away to stop stains or damage. Check repaired areas regularly for signs of wear. Touch up small chips quickly to prevent bigger problems. Regular care helps your kitchen cabinets look great for years.
Troubleshoot Common Issues
Fixing chipped paint on kitchen cabinets can be tricky. Some common problems may slow down your progress. Troubleshooting these issues helps get a smooth finish. It saves time and avoids frustration.
Understanding common problems makes repairs easier. Two frequent issues are paint bubbles and peeling. Another challenge is matching the paint color. These problems are fixable with the right steps.
Fixing Paint Bubbles And Peeling
Paint bubbles appear when moisture or air gets trapped. Peeling happens when paint loses grip on the surface. Both need careful preparation to fix properly.
Start by scraping off loose paint with a putty knife. Sand the area smoothly to remove rough edges. Clean the surface to remove dust and grease. Use a primer made for kitchen cabinets. Apply it evenly to help paint stick better. Finally, repaint with thin, even coats. Let each coat dry fully before the next one.
Dealing With Color Mismatches
Matching old paint color is tough. Paint fades or changes over time. New paint can look different even if it is the same brand.
Test small spots of paint before full application. Use a paint chip or sample to compare colors. Mix custom colors at the store if needed. Apply paint in natural light to see the true shade. Blend edges carefully to avoid sharp contrasts. Patience helps achieve a seamless match.
Credit: www.hometalk.com
Frequently Asked Questions
How Do I Repair Chipped Paint On Kitchen Cabinets?
Start by cleaning the area and sanding the chipped paint smooth. Apply a matching primer, then repaint with matching cabinet paint. Finish by sealing the surface for durability.
What Materials Are Needed To Fix Chipped Cabinet Paint?
You will need fine-grit sandpaper, primer, matching paint, a paintbrush, and a clear sealant. Clean cloth and painter’s tape help ensure neatness.
Can I Fix Chipped Paint Without Sanding?
Light sanding is recommended for best adhesion, but you can use a liquid deglosser to prep the surface if sanding is not possible.
How Long Does It Take To Fix Chipped Cabinet Paint?
The process takes about 1 to 3 hours, including drying time between sanding, priming, painting, and sealing.
Conclusion
Fixing chipped paint on kitchen cabinets is easier than it seems. With simple tools and a little patience, you can restore your cabinets’ look. Small chips don’t need costly repairs or replacements. Carefully sanding, priming, and painting brings back a smooth finish.
Take your time and work in small sections. Your kitchen will feel fresh and clean again. A neat, well-done paint job makes a big difference. Enjoy your renewed cabinets and a brighter kitchen space.