
A brand new hot tub leaking usually means a loose connection, an air bubble in the plumbing, or a minor seal issue that can be fixed without replacing the unit. Most leaks appear at the pump unions, filter housing, or where pipes join inside the cabinet. You can often stop the water by tightening a union nut or bleeding trapped air from the system. This guide covers how to find the exact spot, what tools you need, and when to call your installer instead of trying it yourself.
What actually causes this leak
Water doesn’t find a hole. It follows the path of least resistance under pressure or gravity.
Most leaks blamed on bad seals actually start with thermal expansion. Two joined materials heat up at different rates during the day.
That mismatch pulls the joint apart by fractions of a millimeter every afternoon. At night, cooling snaps it shut again.
Water enters through that permanent gap.
People make this worse by choosing a rigid caulk for a moving joint. The caulk cracks within one season instead of stretching.
If your joint crosses two different materials, you need an elastomeric sealant rated for movement. Anything less just hides the problem.
Check the failure pattern before you buy a replacement. A clean split means movement; a crumbly edge means UV damage.
When you buy a new spa, you expect it to hold water perfectly. A leak right after installation is almost always a setup error, not a broken part. The most common cause is a union fitting that wasn’t tightened enough during assembly.
Another frequent issue is air trapped in the lines, which pushes water out of the weakest point until the air escapes. Some people think the acrylic shell has cracked, but that’s rare in a fresh unit unless it was dropped or hit hard during delivery.
The plumbing inside a hot tub uses flexible hoses and rigid PVC pipes joined by threaded fittings. If these joints aren’t sealed with Teflon tape or if the O-rings are dry, water will seep out under pressure. The pump creates high pressure when it runs, forcing water through any tiny gap. Once the pump stops, the leak might slow down or stop completely, making it hard to see.
You must understand that a small drip doesn’t mean the whole tub is ruined. Many installers leave a few connections slightly loose so they can adjust them later. If you notice water pooling under the cabinet or hear a hissing sound while the jets run, check the pump area first. Don’t assume the worst; most new tubs have simple fixes that take less than an hour.
Steps to find and fix the leak
- Turn off the power to the hot tub at the breaker box before touching anything inside the cabinet. Water and electricity are dangerous together, so wait 30 seconds for capacitors to discharge.
- Dry the entire bottom of the cabinet and all visible pipes with a clean towel. Use a flashlight to look for wet spots, but don’t touch the electrical components yet.
- Fill the tub to the normal level and turn the pump on for five minutes. Watch the plumbing closely while the system is pressurized. Look for dripping water at the pump unions, filter housing, and heater connections.
- If you see a drip, turn the pump off again and tighten the union nut about one-quarter turn. Don’t overtighten, as this can crack the plastic or damage the O-ring.
- Check the O-rings on all fittings. If they look dry or flat, apply a small amount of silicone lubricant made for spas. Never use petroleum jelly, as it damages rubber seals over time.
- Bleed the air from the system by loosening the highest union fitting slightly while the pump runs. Let a little water spray out until a steady stream appears, then tighten it back up quickly.
- Run the pump for another ten minutes and watch the same spots. If the leak stops, let the tub sit for an hour to ensure no slow drips return.
If the leak comes from inside the acrylic shell or you can’t find the source after checking all fittings, stop working. These issues require special tools or knowledge of the internal layout. Trying to force a repair here can void your warranty or make the problem worse. Call your dealer or the original installer immediately. They know the specific model and can access the hidden parts safely.
Key numbers and settings at a glance
| Situation | What to use | How long | What to watch for |
|---|---|---|---|
| Loose union nut | Adjustable wrench | 1/4 turn max | Cracking sounds or stripped threads |
| Dry O-ring | Silicone lubricant | Apply once | Grease on the water surface |
| Air in lines | Pump running | 5-10 minutes | Hissing noise stopping |
| Filter housing gap | Gasket replacement | Immediate fix | Water spraying from the top |
| Heater connection | Teflon tape | Re-seal before use | Steam or heat loss |
| Shell hairline crack | Epoxy repair kit | 24 hours cure | Leak returning after drying |
| Cabinet condensation | Dehumidifier fan | Continuous | Mold growth or rust |
Use a six-inch adjustable wrench for union nuts. Larger wrenches give you too much leverage and split the plastic fitting before you feel resistance.
Stop turning the moment you hear a sharp click. That sound means the threads are already deforming inside the collar.
Buy silicone lubricant made specifically for pool equipment. Petroleum jelly degrades rubber O-rings over time.
You’ll know someone used the wrong grease when an oily film floats on the water surface. Wipe it with a paper towel immediately.
Bleed air starting at the filter valve farthest from the pump. Working backward traps pockets that make the impeller cavitate and overheat.
If the hissing stops but the pump still vibrates, a second air pocket is hiding in the return line. Open that bleeder next.
Match the old gasket diameter exactly when replacing a filter housing seal. A gasket even slightly too wide pinches unevenly under pressure.
Water spraying upward from the housing lid means the clamp band needs tightening. Do this while the pump is completely off.
Wrap heater connections with three layers of Teflon tape. Always wind clockwise so the threads pull the tape tighter instead of unraveling it.
Steam escaping near the heater header tells you the joint is failing. Shut down the system before mineral deposits ruin the element.
Anything longer flexes when the shell heats up and breaks the patch loose again.
Sand the cracked area with eighty-grit paper before mixing the resin. Smooth fiberglass gives the epoxy nothing to grip onto.
Mount the dehumidifier fan near the lowest point inside the cabinet. Moisture pools there first and rots the wooden base frame.
Check the fan intake screen every month. Dust clogs it quickly and forces the motor to run hot enough to trip your breaker.
Details that separate good results from bad ones
Experienced technicians know that patience beats force every time. When you tighten a fitting, you should feel resistance increase gradually. If you have to twist hard to get it snug, you likely cross-threaded the connection. This happens when the nut starts crooked, and forcing it ruins the seal permanently. A good result comes from backing the nut out completely and starting again carefully.
The order of checks matters too. Always start at the pump and work toward the jets. The pump creates the pressure, so leaks there are loudest and fastest. If you skip this step and check the far end of the plumbing first, you might miss the main source.
Also, never ignore the sound of the system. A hissing noise usually means air is escaping, while a steady drip points to a water leak. Listening helps you locate the problem faster than looking alone.
A critical factor is the type of lubricant used. Many people grab whatever grease is in their garage. Petroleum-based products swell and rot the rubber O-rings found in spas. This leads to more leaks later, even if the current one seems fixed. Only use pure silicone lubricant designed for pool and spa equipment. It keeps the seals soft and watertight without damaging the material.
Finally, check the water level before running the pump. Running a pump with low water sucks air into the system, causing cavitation and leaks. Keep the water above the skimmer line or the manufacturer’s mark. This simple habit prevents many false alarms and protects the pump motor from burning out.
Quick fixes for a brand new hot tub leaking
| What you notice | What it usually means | What to do first |
|---|---|---|
| Drip only when pump runs | Loose union or bad O-ring | Tighten the fitting gently by a quarter turn. Don’t force it, as overtightening cracks plastic unions and creates a worse leak. If water persists after tightening, the O-ring is likely flattened or nicked; replace it with a silicone ring rated for your specific pump model. |
| Water under cabinet, no pump | Condensation or slow leak | Dry area and wait 2 hours. If moisture returns without the pump running, check the drain line slope. A flat or upward-sloping pipe traps water that eventually overflows. Re-pipe the section so it drops at least one inch per foot toward the floor drain. |
| Hissing sound near jets | Air trapped in plumbing | Bleed air from highest point. Open the highest jet valve fully while the pump runs until a steady stream emerges. If hissing continues, inspect the skimmer basket; a clogged intake starves the pump of water and pulls air into the system instead. |
| Spray from filter lid | Missing or worn gasket | Replace the filter O-ring. Clean the groove thoroughly before installing the new seal, then lubricate it with a drop of silicone grease. Never use petroleum jelly, which degrades rubber seals within weeks and causes sudden failures during high-pressure cycles. |
| Wet floor near control panel | Electrical box leak (rare) | Shut power and call pro. Don’t attempt to dry this yourself if water has entered the breaker box. Even a small amount of moisture inside can cause arcing that destroys the timer board or starts an electrical fire. Wait for a licensed electrician to verify safety. |
| Leaking after cleaning chemicals | Corroded metal parts | Flush system and inspect. Acidic cleaners eat through brass fittings faster than expected. If you see green residue on threads, the metal is compromised. Replace corroded parts with stainless steel or PVC equivalents immediately, as rust weakens joints until they burst under pressure. |
Rules that apply to repairs
Your warranty is the most important rule here. Most manufacturers state that any unauthorized repair voids the coverage. If you open the cabinet or touch the plumbing yourself, the company may refuse to pay for future fixes. Always check your warranty document before doing anything beyond tightening a visible nut.
Safety codes also apply to hot tubs. In the US, the National Electrical Code (NEC) requires strict grounding and disconnect rules for spas. If you suspect an electrical issue, such as water near wires, you must stop and call a licensed electrician. Working on live circuits can cause severe shock or fire. The Consumer Product Safety Commission (CPSC) provides guidelines on safe installation and maintenance.
Local building codes may require permits for permanent installations. Moving a tub or changing its plumbing might need approval from your city. Ignoring these rules can lead to fines or problems when selling your home. Always verify local requirements before making big changes.
Keeping it working afterwards
Check the water level weekly. Evaporation and splash-out lower the water, which can pull air into the pump and cause leaks. Top it up with fresh water to keep the system full. If the water drops below the jets, the pump will run dry within minutes, destroying the internal seals. Never use hot tap water for topping off; the minerals in city water can cloud the spa faster than distilled water.
Inspect the pump area monthly for signs of moisture. Catching a small drip early saves you from a major flood later. Look specifically at the union fittings where pipes connect to the pump housing. A wet spot here usually means a loose clamp rather than a cracked pipe. Tighten the clamp by hand first; if you force it with pliers, you risk cracking the plastic fitting entirely.
Clean the filter regularly according to the manual. A clogged filter increases pressure in the lines, stressing the joints and seals. Rinse it as needed based on usage and soak it in a cleaner following the owner’s manual guidelines, since frequency depends on conditions. This keeps the flow smooth and reduces strain on the plumbing. If the filter looks gray or slimy after soaking, replace it immediately. Running a dirty filter restricts flow and reduces heating efficiency.
Lubricate the O-rings every six months. Even if no leak is visible, the rubber dries out over time. A thin coat of silicone keeps them flexible and tight. Store your tub cover properly to prevent debris from falling into the plumbing vents. This simple care routine extends the life of your unit and keeps leaks away.
When to use a different approach
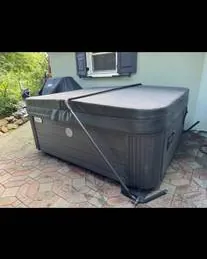
Don’t try to fix a leak if the water is coming from inside the acrylic shell. These cracks need professional epoxy injection and structural support. DIY attempts often fail because the stress on the shell is too high for simple glue. Call your dealer for a certified repair technician.
A surface patch might hold water for a week before peeling away under pressure. The flexing of the shell during normal use breaks that bond quickly. Epoxy injection fills the crack from the inside out to restore rigidity.
If the leak returns after you tighten a fitting, stop trying to force it. The thread might be stripped or the plastic damaged. Continuing to tighten will break the pipe. At this point, the part needs replacement, not adjustment. Your installer has the correct spare parts and tools to swap it out safely.
Listen for a faint hissing sound when the pump runs but no jets are active. That noise usually means air is being pulled through a compromised seal. A visual drip might not appear until the system shuts down completely.
Avoid chemical cleaners if you suspect a leak near metal parts. Harsh acids can corrode brass or steel fittings, making the hole bigger. Stick to mild, pH-balanced cleaners recommended by the manufacturer. If the leak persists despite all checks, it’s time to bring in a pro rather than guessing.
Related guides
- 5 Best Inflatable Hot Tub for Winter Picks for Cold Weather in 2026
- 10 Best Space Heaters for Hot Yoga: Our Expert Picks
- How to Find IP Address for Camera: Quick Router Method
Frequently asked questions
Is a brand new hot tub leaking normal?
No, a new tub shouldn’t leak. While minor drips from loose fittings happen during setup, continuous leaking indicates a problem. Contact your installer immediately if water pools under the cabinet or sprays from joints.
How long does a leak fix take?
Most simple leaks take 30 to 60 minutes to fix. Tightening a union or replacing an O-ring is quick. Complex issues like shell cracks or internal pipe breaks can take several hours or days depending on parts availability.
Can I walk on the hot tub cover?
No, walking on the cover can crack the shell or bend the frame. This often leads to leaks that weren’t there before. Always step on the deck around the tub, never on the cover itself.
Why is my new hot tub leaking after filling?
Air trapped in the plumbing is the usual cause. As the pump runs, air pushes water out of weak spots. Bleeding the system or tightening loose unions usually solves this within an hour.
Is it safe to use the tub while leaking?
It’s unsafe if water is near electrical components. Turn off the power at the breaker immediately. If the leak is just a small drip away from wires, you can run the tub briefly to test, but shut it off if the leak grows.
What happens if I ignore a small leak?
Ignoring a leak can ruin your deck, cause mold, or damage the pump. Water finds its way into places you can’t see, leading to expensive repairs. Fix it now to avoid bigger costs later.
How often should I check for leaks?
Check weekly after filling and monthly during regular use. Look for wet spots under the cabinet and listen for hissing sounds. Early detection keeps the problem small and easy to fix.
Conclusion
Once you’ve dried the area and checked for drips, let the tub run for a few hours to be sure. If water still appears, don’t hesitate to call your installer; they can fix it under warranty without costing you a dime. Enjoying your new hot tub should feel relaxing, not stressful, so get that leak sorted out today.