
Are you ready to give your kitchen a bold new look? Staining your cabinets darker can instantly transform the entire space, making it feel warmer, richer, and more inviting.
But you might be wondering how to get that perfect deep color without making a mess or wasting time. In this guide, you’ll discover simple, clear steps to stain your kitchen cabinets darker like a pro. Keep reading, and you’ll learn how to bring out the beauty of your wood, protect your cabinets, and create a stunning kitchen you’ll love showing off.
Choosing The Right Stain
Choosing the right stain is key to darkening kitchen cabinets successfully. The stain color sets the tone for your entire kitchen. It can either brighten the space or make it feel cozy and warm. Selecting a stain involves understanding the types available, finding the right shade, and testing samples on your wood. This helps you avoid surprises and get the look you want.
Types Of Stains
Oil-based stains soak deep into wood and last longer. They bring out the natural grain and give a rich, warm finish. Water-based stains dry quickly and have less odor. They clean up easily with soap and water. Gel stains are thick and sit on top of the wood. They work well on cabinets with uneven surfaces or soft wood. Each type changes the wood’s color and texture differently.
Picking The Perfect Shade
Dark stains range from deep espresso to rich walnut or mahogany. Choose a color that matches your kitchen style. Lighter dark stains keep the room open and bright. Darker stains add drama and elegance. Think about your countertop, floor, and wall colors. Your stain should blend well with these elements for a balanced look.
Testing Stain Samples
Always test stains on a hidden cabinet spot first. Wood absorbs stain unevenly. Testing shows the true color and finish. Apply a small amount and let it dry fully. Check the color in different lights. Natural daylight and indoor lighting can change how the stain looks. Testing prevents costly mistakes and helps you decide with confidence.

Credit: www.thekimsixfix.com
Preparing Cabinets For Staining
Preparing kitchen cabinets for staining is a key step to get a smooth and even finish. Good preparation helps the stain stick better and last longer. It also makes the darker color look richer and more natural. Start by clearing the work area and gather all tools before you begin.
Removing Cabinet Doors And Hardware
Take off all cabinet doors carefully. Use a screwdriver to remove hinges and screws. Label each door and its hardware to keep track. This step makes staining easier and prevents stains on hinges or knobs. Lay doors flat on a covered surface for sanding and staining.
Cleaning And Sanding Surfaces
Clean all cabinet surfaces with a mild detergent and water. Remove grease, dirt, and dust completely. Let them dry fully before sanding. Use fine-grit sandpaper to sand the surfaces gently. Sanding removes the old finish and opens the wood pores. Wipe off the dust with a tack cloth or damp rag afterward.
Repairing Imperfections
Check all cabinet surfaces for dents, scratches, or holes. Fill small holes and cracks with wood filler. Let the filler dry according to instructions. Sand the filled areas smooth to blend with the wood. Fixing imperfections creates a flawless base for staining.
Applying The Stain
Applying stain to kitchen cabinets is a careful process that changes their look and feel. It brings out the wood’s texture and gives the cabinets a fresh, darker color. Doing this right means choosing the right tools, using good techniques, and knowing when to let the stain dry.
Selecting The Right Tools
Choose brushes or cloths made for staining wood. A natural bristle brush works well for smooth surfaces. Use a clean, lint-free cloth for wiping off extra stain. Avoid cheap brushes; they can leave streaks and bristles behind. Also, keep a small foam brush handy for tight corners.
Techniques For Even Application
Start by applying the stain in the direction of the wood grain. Work in small sections to keep the stain wet. Use long, smooth strokes to avoid blotches. Wipe off extra stain quickly with a clean cloth to prevent dark spots. Apply thin coats; thick layers can drip and look uneven.
Managing Stain Drying Time
Let the stain dry fully between coats. Check the product label for exact drying times. Avoid touching the cabinets while drying to keep the surface smooth. Keep the room well-ventilated to help the stain dry faster. Patience here gives better color and finish.
Sealing And Finishing
Sealing and finishing kitchen cabinets is a key step after staining them darker. This process protects the wood and keeps the new color looking fresh. A good finish also makes cleaning easier and stops damage from moisture and heat.
Choosing the right finish and applying it carefully can make your cabinets last longer. It also gives them a smooth and polished look. Let’s explore how to pick the best finish and apply sealant properly for strong, beautiful cabinets.
Choosing A Protective Finish
Pick a finish that fits your kitchen’s use and style. Polyurethane is popular for its strong protection and shine. Water-based finishes dry fast and keep the dark stain’s true color. Oil-based finishes add warmth but take longer to dry. Satin finishes hide scratches, while gloss finishes offer more shine. Choose a finish that matches your taste and needs.
Applying Sealant For Durability
Apply sealant in thin, even coats to avoid bubbles and drips. Use a high-quality brush or foam applicator for smooth coverage. Let each coat dry fully before adding the next. Lightly sand between coats with fine sandpaper. This helps the next layer stick better and smooths rough spots. Two to three coats give the best protection.
Tips For A Smooth Finish
Work in a dust-free area to prevent particles from sticking. Stir the finish gently to avoid bubbles. Avoid shaking the can. Move the brush in long, even strokes along the grain of the wood. Wipe off extra finish quickly to prevent drips. Keep a steady hand and take breaks if needed. Patience creates a clean, polished look.
Maintaining Dark Stained Cabinets
Dark stained kitchen cabinets bring warmth and style to your space. Keeping them looking fresh takes some care. Proper maintenance helps preserve their rich color and smooth finish. Follow simple steps to keep your cabinets beautiful for years.
Cleaning Tips
Use a soft cloth or sponge for daily cleaning. Avoid harsh chemicals that can strip the stain. Mild soap mixed with warm water works best. Wipe spills immediately to stop stains from setting. Dry the surface with a clean towel after cleaning.
Handling Wear And Tear
Dark cabinets show scratches and dings more clearly. Use felt pads on furniture to prevent scratches. Avoid leaning or placing heavy objects on cabinet doors. Fix small nicks with a matching wood marker. Regularly check hinges and handles for loose screws.
Refreshing The Stain Over Time
Over time, the stain may fade or look dull. Lightly sand the surface with fine-grit sandpaper before reapplying stain. Use the same color to keep the look consistent. Apply stain with a cloth and wipe off excess quickly. Finish with a clear protective coat to seal and shine.
:max_bytes(150000):strip_icc()/Urbanology_ProjectHighlandParkPhase2_CostaChristPhotography_8-3458b26e9a33485aa3dc9dd7f9fe6b1f.jpeg)
Credit: www.thespruce.com
Common Mistakes To Avoid
Staining kitchen cabinets darker can change your kitchen’s look completely. Avoiding common mistakes helps you get a smooth, even finish. These errors can waste time and damage your cabinets. Focus on the right steps to save effort and get great results.
Over-sanding
Sanding prepares wood for stain by smoothing the surface. Sanding too much removes the wood’s natural texture. It can make the stain look uneven or blotchy. Use fine-grit sandpaper and sand gently. Stop sanding once the surface feels smooth.
Applying Too Much Stain
Applying too much stain causes drips and blotches. Thick layers take longer to dry and look patchy. Use a clean cloth or brush to apply thin, even coats. Let each coat dry fully before adding another layer. This helps achieve a rich, consistent color.
Skipping The Sealant
Sealant protects your stained cabinets from moisture and damage. Skipping this step leaves the wood vulnerable to stains and scratches. Apply a clear sealant or polyurethane after the stain dries. This keeps your cabinets looking fresh for years.
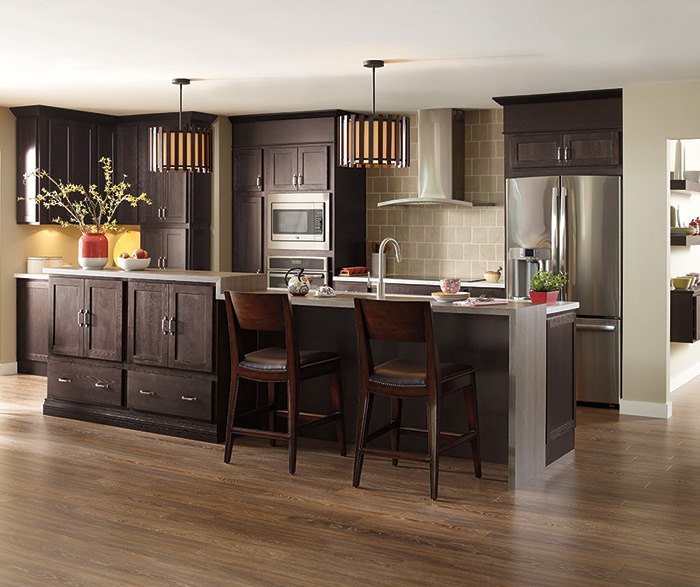
Credit: www.kempercabinets.com
Frequently Asked Questions
How Do I Prepare Cabinets Before Staining Darker?
Start by cleaning all cabinet surfaces thoroughly. Remove hardware and lightly sand to ensure even stain absorption. Wipe off dust with a tack cloth before applying any stain.
What Type Of Stain Works Best For Darker Cabinets?
Oil-based stains provide rich, deep colors and last longer. Water-based stains dry faster and have less odor but may require multiple coats for darker tones.
Can I Stain Kitchen Cabinets Without Sanding?
Light sanding is highly recommended for best results. It helps the stain adhere better and prevents blotchy finishes. Avoid skipping sanding for a uniform darker look.
How Many Coats Of Stain Are Needed For Dark Cabinets?
Typically, 2 to 3 coats of stain are applied. Allow each coat to dry fully before applying the next for an even, rich color.
Conclusion
Darkening your kitchen cabinets can change the whole room’s look. Follow the steps carefully for the best results. Take your time and choose the right stain color. Always test on a small area first. Clean and sand the wood well before staining.
Apply stain evenly and let it dry fully. A darker finish adds warmth and style easily. Enjoy your fresh, beautiful cabinets that fit your home perfectly. Keep your tools clean for future projects too. Simple steps make a big difference in your kitchen.