
Are you tired of your kitchen appliances looking messy or gathering dust? Making covers for your kitchen appliances is a simple way to keep them clean, protect them, and even add a touch of style to your space.
Imagine how much better your kitchen will look with neat, custom covers that fit perfectly. You’ll learn easy steps to create covers that match your kitchen’s vibe and keep your appliances safe. Keep reading, and you’ll discover how quick and rewarding this project can be for you and your home!
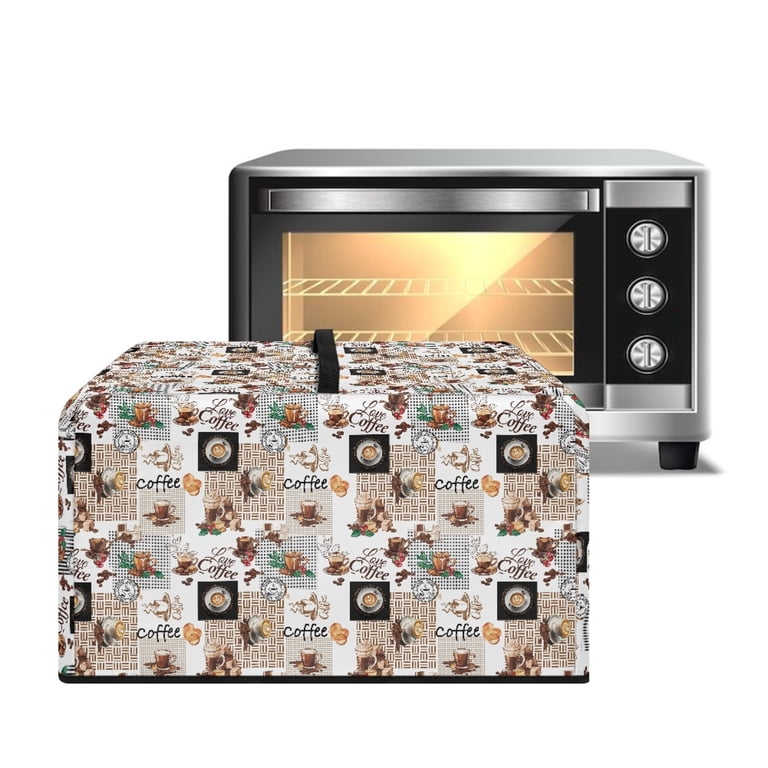
Credit: www.walmart.com
Choosing The Right Fabric
Choosing the right fabric is key to making effective covers for kitchen appliances. The fabric needs to protect appliances and fit well in your kitchen space. It should handle daily use and stay easy to clean. Picking fabric with the right features will keep your covers looking good longer and working better.
Durability And Washability
Durable fabric lasts through frequent use without wearing out. Kitchen covers face spills, heat, and stains daily. Choose fabric that holds up well under these conditions. Washable fabric is important for easy cleaning. Machine-washable materials save time and keep covers fresh. Avoid fabrics that shrink or lose shape after washing.
Color And Pattern Options
Fabric color and pattern affect your kitchen’s look. Pick colors that match or complement your décor. Patterns can hide stains and spills better than plain fabric. Light colors show dirt quickly, so darker shades work well. Choose simple patterns for a timeless style. Bright colors add energy but may fade over time.
Water-resistant Materials
Water-resistant fabric protects appliances from spills and moisture. It prevents water from soaking into the fabric and damaging the cover. This type of material dries quickly and cleans easily. Ideal for busy kitchens with lots of cooking and splashes. Look for fabrics labeled as water-resistant or treated with a protective coating.
Measuring Your Appliances
Measuring your kitchen appliances is the first step in making perfect covers. Accurate measurements help ensure the cover fits well and looks neat. Taking your time to measure carefully avoids mistakes and wasted materials.
Taking Accurate Dimensions
Use a tape measure to get the height, width, and depth of the appliance. Measure from the widest points to cover the entire surface. Check the front, sides, and top to capture all needed sizes.
Hold the tape measure straight and tight for precise numbers. Measure twice to be sure of your results. Small errors can cause the cover to be too tight or loose.
Allowing For Seams And Ease
Add extra space to your measurements for seams and ease. Seams need room for stitching without making the cover too tight. Ease allows the cover to slip on and off easily.
Usually, adding one to two inches to each measurement works well. This space prevents the cover from stretching or tearing. It also helps the cover fit over any buttons or handles.
Recording Measurements
Write down all measurements clearly on paper or your phone. Label each measurement by its position, like height or width. Keep these notes handy while cutting fabric or sewing.
Organize the numbers to avoid confusion during the making process. Accurate records help you create a cover that fits perfectly. Double-check your notes before starting to cut fabric.
Selecting The Cover Style
Choosing the right cover style for your kitchen appliances is important. The style affects how well the cover fits and how easy it is to use. A good cover protects your appliance from dust, spills, and scratches. It also adds a neat look to your kitchen. There are several styles to consider. Each style has its own benefits and suits different needs.
Simple Slipcovers
Simple slipcovers are easy to make and use. They slide over the appliance like a bag. These covers fit loosely and are quick to remove. Slipcovers work well for appliances with simple shapes. They need no zippers or ties. This style is great for quick protection and easy cleaning.
Drawstring Covers
Drawstring covers have a string or cord at the bottom. You pull the string tight to secure the cover. This keeps the cover from slipping off. Drawstring covers fit snugly around the appliance. They are good for appliances with uneven shapes. The drawstring lets you adjust the tightness as needed.
Zippered Designs
Zippered covers offer a secure and tight fit. You open and close the cover with a zipper. This style protects against dust and spills very well. Zippered covers are perfect for appliances you want fully enclosed. They take a bit more time to make but offer great protection. These covers often look neater and more tailored.

Credit: www.amazon.com
Gathering Essential Tools
Gathering the right tools is the first step to making covers for kitchen appliances. Having the right equipment makes the process easier and the results better. Tools help you measure, cut, and sew fabric with precision.
Sewing Machines And Needles
A good sewing machine speeds up your work. Choose one that handles thick fabrics well. Use needles designed for the fabric type. Strong needles prevent breaks and skipped stitches.
Measuring Tape And Scissors
Measure your appliances carefully with a flexible tape measure. Accurate measurements ensure a perfect fit. Use sharp scissors for clean fabric cuts. Dull scissors can fray edges and ruin material.
Pins, Thread, And Fasteners
Pins hold fabric pieces together while sewing. Use enough pins to keep layers aligned. Select strong thread that matches your fabric’s color. Fasteners like Velcro or snaps make covers easy to remove.
Cutting And Preparing Fabric
Cutting and preparing fabric is the first step to making covers for kitchen appliances. This process helps you shape the fabric to fit perfectly. Careful preparation saves time and avoids mistakes later. It also gives your cover a neat and professional look.
Marking Patterns On Fabric
Start by placing your pattern on the fabric. Use a fabric pencil or chalk to trace around the pattern. Mark all important points, like seams and darts. Double-check measurements before cutting. Clear markings make sewing easier and more accurate.
Cutting With Precision
Use sharp fabric scissors for clean cuts. Cut slowly and follow the marked lines exactly. Avoid lifting the fabric while cutting to keep edges straight. Cut on a flat surface for better control. Precision cutting helps the pieces fit perfectly together.
Pre-washing And Ironing Fabric
Wash the fabric before cutting to prevent shrinking later. Use a gentle cycle and mild detergent. Let the fabric dry completely before ironing. Iron the fabric flat to remove wrinkles. Smooth fabric ensures accurate cutting and sewing.
Sewing The Cover Pieces
Sewing the cover pieces is an important step in making a kitchen appliance cover. This process joins the fabric parts to fit the appliance well. Careful sewing helps the cover look neat and last long. Use the right tools and take your time for best results.
Basic Stitching Techniques
Start with a straight stitch for strong seams. Use a sewing machine for faster work. Keep stitches even and close for durability. Backstitch at the start and end to secure the thread. Practice on scrap fabric to control stitch length and speed.
Assembling The Cover
Place fabric pieces right sides together before sewing. Match edges and pin pieces to hold them in place. Sew along the pinned edges slowly and carefully. Press seams open with an iron for a flat finish. Check the fit by placing the cover on the appliance.
Adding Fasteners Or Elastic
Add fasteners like Velcro or snaps for easy removal. Sew them firmly to avoid loosening over time. Elastic bands can help the cover fit snugly. Measure the elastic to fit around the appliance base. Sew the elastic into the hem or edges securely.
Adding Decorative Touches
Adding decorative touches to your kitchen appliance covers makes them both useful and beautiful. These details bring personality and charm to plain fabric. Simple additions can change a basic cover into a stylish piece that fits your kitchen’s look.
Pockets And Embellishments
Pockets add space for small items like measuring spoons or recipe cards. Sew them on the front or side of the cover. Choose fabrics that match or contrast for a fun effect. Embellishments like buttons, patches, or appliques add interest. Use shapes or designs that match your kitchen theme.
Trim And Edging Options
Trim gives covers a neat, finished look. Try lace, ribbon, or bias tape along the edges. Pick colors that highlight or complement your fabric. Edging protects the fabric from fraying. It also adds a subtle style detail that stands out.
Personalizing With Labels
Labels make your covers unique and easy to identify. Use fabric tags or embroidered names. Place them on the front or side for visibility. Personal labels can show your name or the appliance type. This small touch adds a custom feel and helps organize your kitchen.
Maintaining And Cleaning Covers
Keeping kitchen appliance covers clean and well-maintained helps them last longer. Clean covers protect your appliances from dust, spills, and stains. Regular care also keeps them looking fresh and new. Simple steps can make a big difference in maintaining these covers.
Washing Instructions
Check the fabric label for washing directions. Most covers need gentle washing with mild detergent. Use cold or warm water to avoid shrinking. Hand washing is best for delicate materials. If machine washing, use a gentle cycle. Avoid bleach and strong chemicals. Air dry the covers flat to keep their shape. Do not use high heat in the dryer.
Repairing Minor Damages
Small tears or holes can be fixed quickly. Use a needle and thread to sew up rips. Choose thread color close to the cover fabric. For small holes, fabric glue also works well. Fix damages as soon as you find them. This prevents bigger problems and extends cover life. Avoid heavy repairs that may weaken the fabric.
Storing When Not In Use
Store covers in a clean, dry place. Fold them neatly to avoid wrinkles. Use a breathable bag or container for storage. Keep covers away from moisture to stop mold growth. Avoid storing in direct sunlight to prevent fading. Check covers periodically and refold to keep them fresh.

Credit: www.walmart.com
Frequently Asked Questions
What Materials Are Best For Kitchen Appliance Covers?
The best materials are cotton, vinyl, or waterproof fabric. These offer durability, easy cleaning, and protection from dust and spills. Choose based on your appliance size and kitchen style to ensure a perfect fit and long-lasting use.
How Do I Measure Appliances For Custom Covers?
Measure width, height, and depth of your appliance. Add extra inches for seam allowance and ease of covering. Accurate measurements ensure a snug, protective fit, preventing dust accumulation and damage while enhancing kitchen decor.
Can I Wash Homemade Kitchen Appliance Covers?
Yes, most homemade covers made from washable fabrics can be machine or hand washed. Always check fabric care instructions. Washing keeps covers clean, fresh, and extends their lifespan, maintaining appliance protection and kitchen hygiene.
How Do Covers Protect Kitchen Appliances?
Covers shield appliances from dust, spills, and scratches. They prevent moisture damage and reduce wear from everyday use. Covers also keep appliances clean, saving time on maintenance and preserving their appearance and functionality.
Conclusion
Making covers for kitchen appliances protects them from dust and damage. It also keeps your kitchen looking neat and tidy. You can choose simple fabrics or patterns that match your style. Sewing your own covers saves money and lets you customize sizes easily.
With a little effort, your appliances stay clean and last longer. Try making covers for each appliance to keep your kitchen organized. Simple steps, useful results.