
If your Dyna Glo heater isn’t staying lit, the problem might be a faulty thermocouple. Replacing this small but vital part can save you time and money, and get your heater working like new again.
In this guide, you’ll learn exactly how to replace your Dyna Glo thermocouple step-by-step, even if you’re not a handyman. By the end, you’ll feel confident fixing it yourself and keeping your space warm and safe. Keep reading to discover the simple tricks that make this repair easier than you think.
Tools And Materials Needed
Replacing the thermocouple on a Dyna Glo heater requires a few basic tools and materials. Having everything ready makes the job faster and safer. Each item plays an important role in the process. Here is a clear list of what you need before starting your repair.
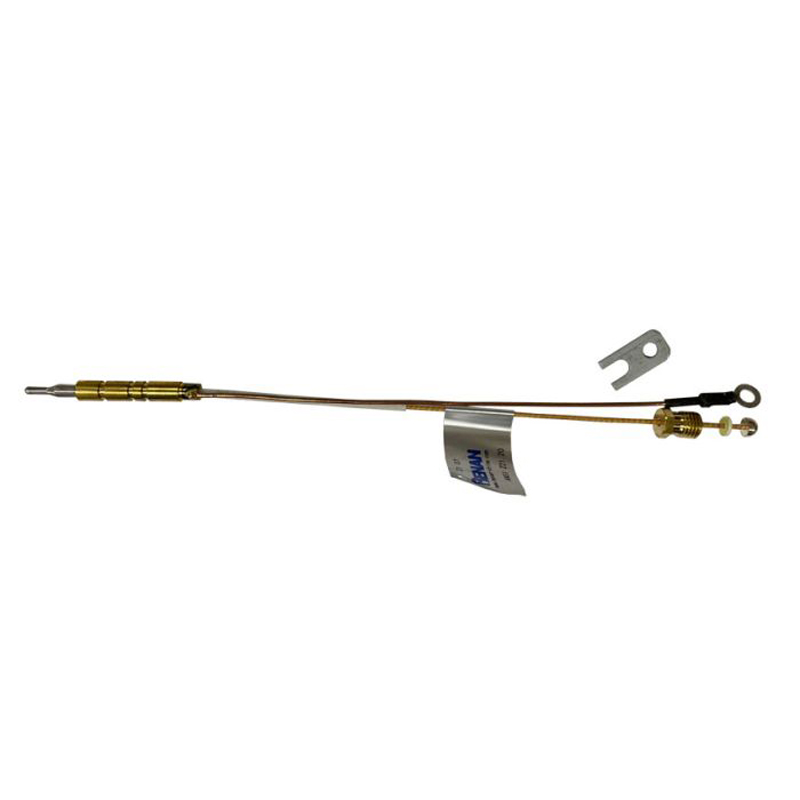
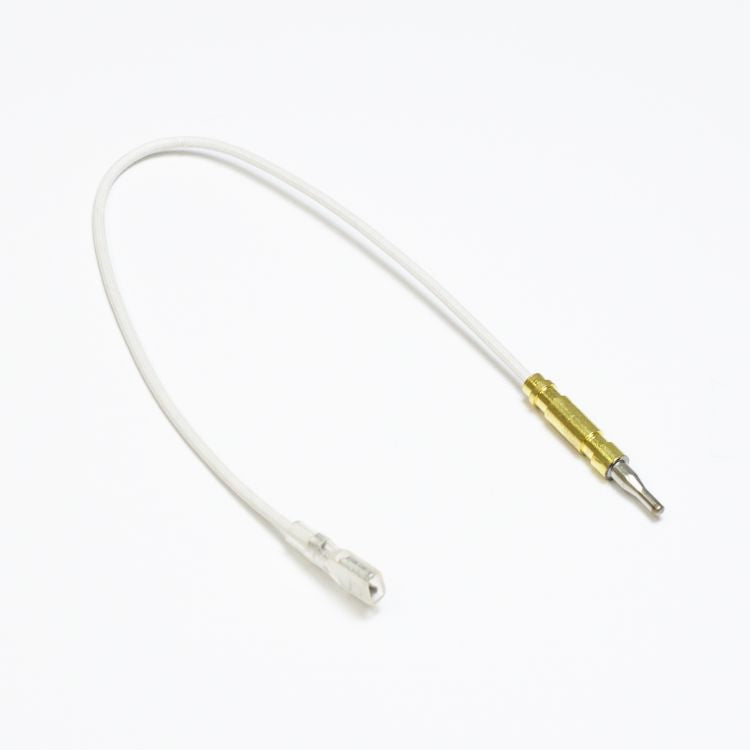
Thermocouple Replacement Part
Get a new thermocouple made for Dyna Glo heaters. Using the correct part ensures proper fit and function. Avoid generic or incompatible models to prevent future issues.
Screwdrivers
Use both flathead and Phillips screwdrivers. These help remove screws from the heater’s cover and mounting points. Choose sizes that match your heater’s screws.
Adjustable Wrench
An adjustable wrench is needed to loosen and tighten the thermocouple fitting. It fits various bolt sizes for a secure grip. This tool protects the heater parts from damage.
Work Gloves
Wear work gloves to protect your hands. The heater parts can be sharp or hot. Gloves also improve grip on small pieces.
Cleaning Brush
A small brush helps clean the area around the thermocouple. Removing dust and debris improves the new part’s connection. Use a soft brush to avoid damage.
Flashlight
A flashlight provides better visibility inside the heater. It helps spot screws and parts clearly. Good lighting reduces mistakes during replacement.

Credit: www.amazon.com
Safety Precautions
Replacing a Dyna Glo thermocouple requires careful attention to safety. Handling gas appliances involves risks. Taking the right precautions protects you and your home. Follow these important safety steps before starting the replacement process.
Turn Off The Gas Supply
Always shut off the gas valve completely. This stops gas flow and prevents leaks. Confirm no gas smell is present before proceeding. Safety first.
Disconnect The Power Source
Unplug the heater or switch off the circuit breaker. Avoid electric shock during the replacement. Double-check power is off before touching any parts.
Ventilate The Area
Open windows and doors to allow fresh air in. This helps remove any trapped gas. Good airflow lowers the risk of accidents.
Use Proper Tools And Equipment
Gather the correct tools for the job. Avoid using damaged or improper tools. Proper equipment ensures a safe and smooth process.
Wear Protective Gear
Use gloves and safety glasses to protect your hands and eyes. Small metal parts can cause cuts or injuries. Safety gear reduces these risks.
Locating The Thermocouple
Finding the thermocouple is the first step to replace it in your Dyna Glo heater. The thermocouple is a small metal rod that senses the pilot flame. It tells the heater to stay on or shut off. Locating this part saves time and helps avoid mistakes.
The thermocouple sits near the pilot light assembly. It looks like a thin copper tube with a wire attached. You will find it close to the burner area. Usually, it is connected to the gas valve. This makes it easy to spot once you open the heater’s access panel.
Open The Access Panel
Start by turning off the heater and unplugging it. Find the screws holding the front panel. Use a screwdriver to remove them carefully. Take off the panel to see inside. You will see the burner, pilot light, and gas valve inside.
Identify The Pilot Light Assembly
Look near the burner for a small flame. This is the pilot light. The thermocouple is right next to this flame. It is a thin metal rod that touches the pilot flame. This rod detects if the flame is lit or not.
Trace The Thermocouple Wire
Follow the thin copper tube from the pilot light. It runs to the gas control valve. The wire has a nut that screws into the valve. This nut holds the thermocouple in place. Removing this nut allows you to take out the thermocouple.
Removing The Old Thermocouple
Start by turning off the gas and power to the heater. Carefully unscrew and remove the old thermocouple from its position. Make sure to keep all parts for easy replacement.
Turn Off The Gas Supply
Start by turning off the gas supply to your Dyna Glo heater. This step is crucial for safety. Make sure no gas is flowing before you touch the thermocouple.
Access The Thermocouple
Open the heater’s access panel. You may need a screwdriver to remove screws. Locate the thermocouple near the burner assembly. It looks like a thin metal rod with wires attached.
Disconnect The Thermocouple
Use a wrench or pliers to loosen the fitting connecting the thermocouple to the gas valve. Turn it counterclockwise to unscrew. Gently pull the thermocouple free from its position near the burner.
Installing The New Thermocouple
Installing the new thermocouple is a key step in fixing your Dyna Glo heater. This part controls the gas flow and keeps the flame burning safely. Proper installation ensures your heater works well and stays safe.
Follow each step carefully. Take your time to avoid mistakes. Use the right tools and parts for the best results.
Turn Off Gas And Power Supply
Before starting, switch off the gas supply. Also, unplug the heater from the power source. This prevents accidents during installation. Safety first.
Remove The Old Thermocouple
Locate the old thermocouple near the burner. Use a wrench to loosen the connection. Gently pull out the thermocouple without bending it. Keep the area clean for the new part.
Attach The New Thermocouple
Place the new thermocouple in the same position as the old one. Tighten the connection with a wrench, but do not over-tighten. The tip should sit close to the burner flame.
Check The Connection And Flame
Turn the gas back on carefully. Plug in the heater and light the burner. Watch the flame; it should stay steady. Check if the new thermocouple holds the flame without shutting off.
Credit: dynagloreplacementparts.com
Testing The Replacement
Testing the replacement thermocouple is a crucial step after installation. It confirms that the new part works properly and keeps your Dyna Glo heater safe. This process helps avoid future problems and ensures your heater runs smoothly.
Checking Gas Flow And Flame
Turn on the gas supply slowly. Light the pilot flame according to your heater’s instructions. Watch the flame closely. It should be steady and blue with a small yellow tip. A weak or flickering flame means the thermocouple might not work right.
Measuring Voltage Output
Use a multimeter set to millivolts. Connect the probes to the thermocouple wires. The flame heats the thermocouple, generating voltage. A good thermocouple usually produces 25 to 30 millivolts. Low voltage indicates a bad connection or a faulty thermocouple.
Ensuring Safety Shut-off
Turn off the pilot light. The gas valve should close immediately. If gas keeps flowing, the thermocouple is not sensing heat properly. This can cause dangerous gas leaks. Replace the thermocouple again or check the installation.
Troubleshooting Common Issues
Troubleshooting common issues with your Dyna Glo thermocouple saves time and money. Problems often arise from simple causes. Identifying these early helps avoid bigger repairs. This section guides you through typical issues and how to fix them. Clear steps make troubleshooting easy and safe.
Checking For Loose Connections
Loose connections cause the thermocouple to fail. Inspect the wires carefully. Make sure all screws are tight. Look for any frayed or damaged wires. Reconnect or replace wires if needed. A secure connection ensures the thermocouple works properly.
Testing The Thermocouple Voltage
Use a multimeter to test the thermocouple voltage. Set the meter to millivolts. Heat the thermocouple tip with a lighter. The voltage should rise to about 25-30 millivolts. If voltage stays low, the thermocouple may be faulty. Replace it to restore function.
Inspecting For Dirt Or Soot Buildup
Dirt or soot can block the thermocouple’s heat sensing. Check the thermocouple tip for black deposits. Clean gently with fine sandpaper or steel wool. Avoid damaging the metal tip. Regular cleaning improves heat detection and safety.
Verifying Proper Thermocouple Placement
The thermocouple must sit correctly in the pilot flame. If it is too far or too close, it won’t work. Adjust the position until the flame covers the tip fully. Proper placement ensures accurate temperature reading and ignition.
Credit: ghpgroupinc.com
Frequently Asked Questions
What Is A Dyna Glo Thermocouple Used For?
A thermocouple detects the pilot light’s heat in your heater. It helps keep the gas valve open safely. Without it, the heater won’t stay on.
How Do I Know If My Thermocouple Is Bad?
Look for a weak or no flame on your pilot light. The heater may shut off unexpectedly. These are common signs of a faulty thermocouple.
What Tools Do I Need To Replace The Thermocouple?
You will need a wrench, screwdriver, and a new thermocouple. Make sure to turn off the gas before starting. These basic tools will make replacement easy.
How Long Does It Take To Replace A Thermocouple?
Replacing a thermocouple usually takes about 15 to 30 minutes. It depends on your comfort with basic tools. Take your time to ensure safety.
Can I Replace The Thermocouple Myself Safely?
Yes, you can replace it yourself with care and the right tools. Always turn off the gas and follow safety steps. If unsure, ask a professional for help.
Conclusion
Replacing a Dyna Glo thermocouple is simple with the right steps. Take your time and follow each part carefully. A working thermocouple keeps your heater safe and efficient. Keep tools ready and work in a safe space. Check your connections before turning the heater back on.
Small efforts now can save you trouble later. Trust yourself to handle this task well. Stay safe and enjoy a warm, reliable heater.