
Deciding to install a vapor barrier for garage floor surfaces is a smart move for homeowners looking to prevent moisture migration, mold growth, and premature coating failure. Whether you’re planning to epoxy your floor or just want to keep the space dry, understanding the underlying mechanics of concrete moisture is essential. On average, a professional vapor barrier installation costs between $1.50 and $4.50 per square foot, while a high-quality DIY kit typically ranges from $0.50 to $1.50 per square foot depending on the material thickness and chemical complexity.
Key Takeaways
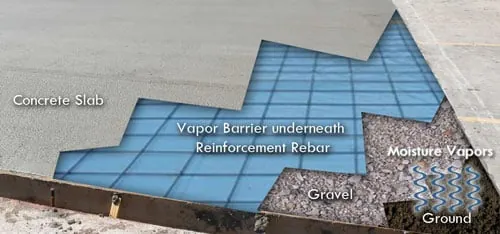
- Concrete is naturally porous, meaning it acts like a sponge for groundwater moisture.
- A vapor barrier must be installed correctly to prevent hydrostatic pressure from lifting your coatings.
- Testing your slab for moisture levels before application is a non-negotiable step.
- Choose between liquid-applied moisture vapor transmission reducers or physical plastic sheeting under new concrete.
- Proper surface preparation, specifically mechanical grinding, is the most important factor for long-term success.
Why Does Concrete Need Protection?
Concrete is a composite material made of cement, water, and aggregates. Even when it appears solid, it contains a network of microscopic capillaries. Through a process called capillary action, moisture from the soil beneath your garage slab can travel upward. When this moisture reaches the surface, it carries dissolved salts, which can lead to efflorescence, a white powdery residue. If you apply a paint or epoxy over this, the moisture will eventually push against the coating, causing delamination or bubbling.
Beyond aesthetics, excess moisture creates a breeding ground for mold and mildew. This is particularly problematic if you store cardboard boxes, wood tools, or paper products in your garage. By installing a barrier, you essentially decouple the concrete from the earth, creating a dry environment. This is critical in regions with high water tables or poor drainage.
Is Your Garage Floor Too Wet?
Before you commit to a product, you must determine if you have a moisture issue. A simple way to check is the plastic sheet test. Tape a 2-foot by 2-foot piece of clear plastic sheeting to the concrete, sealing all four edges with duct tape. Leave it for 48 hours. If the underside of the plastic is damp or the concrete has darkened, you have significant moisture transmission.
For professional-grade accuracy, you should look toward the standards set by the ASTM International F1869 standard test method for measuring moisture vapor emission rates. This involves using a calcium chloride test kit to quantify exactly how much water is moving through the slab. If the reading is high, you must use a high-performance moisture vapor barrier, not just a standard concrete sealer.
Choosing the Right Vapor Barrier for Your Garage Floor
There are two distinct categories of barriers: those used during new construction and those used for existing slabs. If you’re pouring a new garage floor, you’ll place a physical sheet of plastic beneath the concrete. For existing garages, you’re restricted to liquid-applied systems.
| Barrier Type | Best For | Application Method | Durability |
|---|---|---|---|
| Polyethylene Sheeting | New Construction | Under-slab placement | High |
| Epoxy Moisture Mitigator | Existing Slabs | Roller/Squeegee | Very High |
| Penetrating Silicate Sealers | Low Moisture | Spray/Brush | Moderate |
| Acrylic Coatings | Light Protection | Roller | Low |
Physical Polyethylene Sheeting
For new slabs, a heavy-duty vapor retarder, typically 10 to 15 mil thick, is the gold standard. It must be laid over a compacted base before the concrete is poured. Ensure all seams are overlapped and sealed with specialized tape to create a monolithic barrier.
Liquid-Applied Moisture Mitigators
These are two-part epoxy or resin systems designed to penetrate the pores of the concrete. Once cured, they create a dense, impermeable layer that stops water vapor from reaching the surface. These are the essential foundation layers for any professional epoxy installation.
How to Prepare the Surface
Preparation is the most labor-intensive part of the process. If the concrete is contaminated with oil, grease, or previous coatings, the barrier won’t bond. You must start by cleaning the floor with a degreaser. Next, you must profile the concrete. The industry standard is to achieve a surface profile of CSP 2 or 3.
Pro Tip: Don’t rely on chemical etching alone to prepare the concrete; it’s often insufficient for heavy-duty moisture barriers. Rent a walk-behind diamond grinder to open the pores of the concrete effectively, ensuring the barrier penetrates deeply and adheres properly.
Step-by-Step Installation Process
- Clear the Space: Remove all items and sweep the floor thoroughly.
- Degrease: Use a concrete cleaner to remove oil spots, as moisture barriers will fail over oil-stained areas.
- Grind the Surface: Use a diamond grinder to remove the “cream” from the top of the concrete.
- Vacuum: Use an industrial shop vacuum to remove all dust. Residual dust will act as a bond breaker.
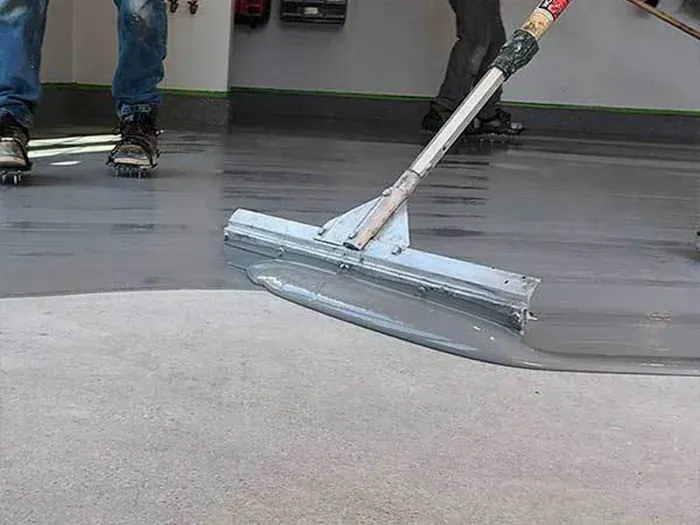
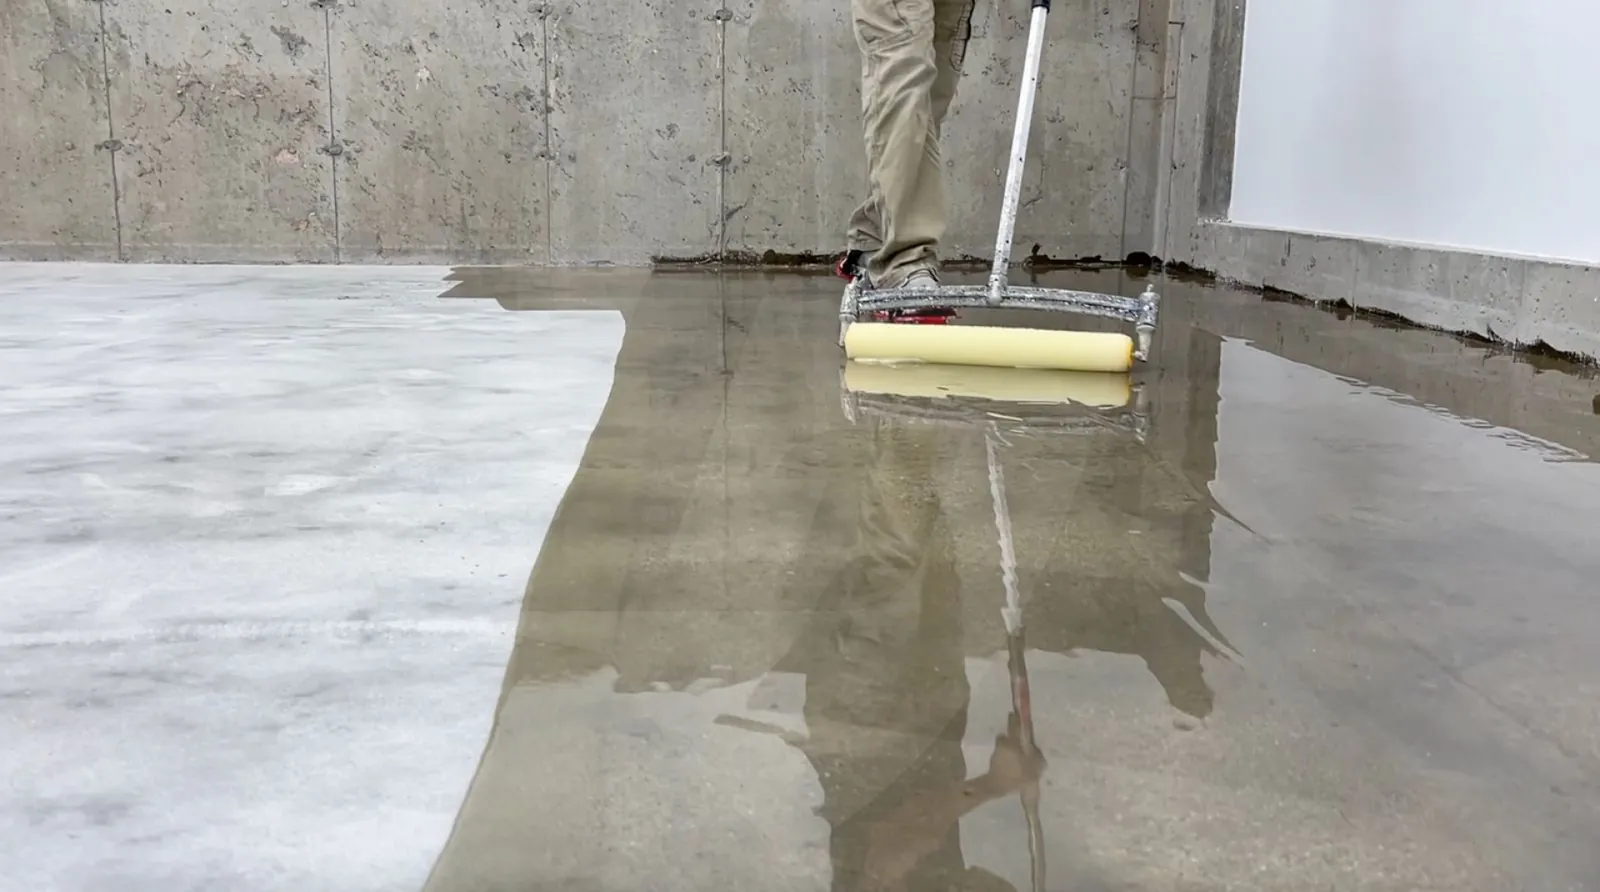
- Apply the Barrier: Mix the two-part epoxy according to the manufacturer’s instructions and apply with a squeegee followed by a back-roll.
- Cure: Allow the recommended drying time, usually 12 to 24 hours, before walking on it or applying a topcoat.
Comparison of Common Barrier Brands
When shopping for products, you’ll encounter various brands that cater to both the professional and DIY markets. Stick to reputable manufacturers that provide detailed technical data sheets.
| Brand | Product Line | Ideal Application |
|---|---|---|
| Rust-Oleum | RockSolid Moisture Barrier | DIY Epoxy Projects |
| Sherwin-Williams | Loxon Concrete & Masonry | Exterior/Interior Slabs |
| Sika | SikaProof Systems | New Construction |
| Koster | VAP I 2000 | Professional High Moisture |
Troubleshooting Common Installation Errors
Even with the best products, mistakes happen. The most common error is failing to mix the two-part components thoroughly. If the resin and hardener aren’t blended at the precise ratio, the barrier will remain tacky or soft, leading to failure when you apply your final floor coating.
Another frequent issue is applying the barrier when the concrete temperature is too low. Most epoxies require a substrate temperature of at least 55°F to cure properly. If the floor is too cold, the chemical reaction will stall, leading to a brittle or weak layer. Always check the ambient temperature requirements provided by the manufacturer before starting your project.
Warning: Never apply a moisture barrier over wet concrete that has standing water. While these products are designed to handle vapor, they aren’t designed to withstand liquid water pressure or active leaks from a high water table.
Maintenance After Installation
Once the barrier is applied, it acts as a permanent shield. However, the topcoat is what takes the daily abuse. To keep your garage floor looking new, avoid using harsh chemicals or industrial solvents for cleaning. A simple mixture of warm water and a neutral pH cleaner is sufficient.
If you notice scratches or chips in your topcoat, address them immediately. If the barrier itself is exposed, moisture could theoretically enter the concrete through that opening. Regularly sweep the floor to remove grit, which acts like sandpaper under your tires and can eventually degrade the finish.
Related guides
Frequently Asked Questions
Can I install a vapor barrier over existing epoxy?
No. A vapor barrier must be applied directly to the porous concrete surface to be effective. If you have an existing coating, you must remove it entirely through mechanical grinding before you can apply a moisture mitigator. Applying it over old epoxy will result in poor adhesion and eventual peeling, as the new layer won’t be able to penetrate the substrate.
How do I know if my concrete is too damp to coat?
You should use a moisture meter or the plastic sheet test mentioned earlier. If the concrete is visibly dark or feels damp to the touch, it’s too wet. Most epoxy manufacturers specify that the concrete moisture content should be below a certain percentage, often around 4% to 5%, before application. When in doubt, wait for a drier season or use a dehumidifier.
What happens if I skip the vapor barrier?
If you skip the barrier in a high-moisture environment, the vapor pressure will build up beneath your paint or epoxy coating. This pressure will eventually cause the coating to blister, bubble, or peel away from the concrete. This process, known as osmotic blistering, is the most common reason for garage floor coating failure and requires expensive grinding to fix.
Are there eco-friendly vapor barrier options?
Many modern moisture barriers are low-VOC, which reduces the harsh chemical smells associated with traditional epoxies. Look for water-based epoxy systems that offer the same penetration and sealing capabilities as solvent-based ones. While they may take slightly longer to cure, they’re safer for enclosed garage environments where ventilation might be limited during the installation process.
Can I use a regular concrete sealer instead?
A standard concrete sealer, such as a water-repellent silane or siloxane, isn’t a true vapor barrier. While it prevents liquid water from soaking into the concrete, it still allows water vapor to pass through. If you’re planning to apply an epoxy or urethane topcoat, you must use a dedicated moisture vapor transmission reducer, not a simple penetrating sealer.
Conclusion
Taking the time to address the moisture levels in your garage floor is the most important investment you can make in your home improvement project. By properly sealing the slab, you protect your future investment in floor coatings, ensure a healthier environment for your tools and belongings, and prevent the headache of recurring maintenance. Start by testing your slab today to determine the specific moisture mitigation needs of your unique garage environment.
