
The best choice depends entirely on how your water pipes exit the wall or floor, as a straight stop valve is used when the supply pipe comes directly out of the wall in line with the fixture, while an angle stop valve is the standard for pipes exiting the wall at a 90-degree turn toward the fixture. If your supply line runs parallel to the wall, you must use a straight model; if it emerges from behind the fixture, an angle valve is almost always required.
Comparing water supply valve types
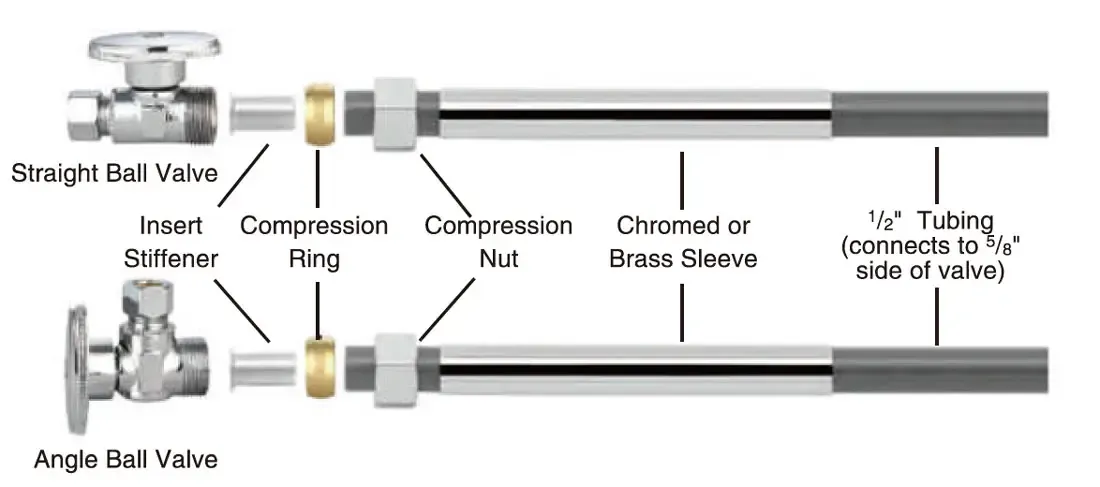
Choosing the right valve is about matching your existing plumbing layout to the fixture connection. While both types serve the same purpose of isolating water for maintenance, their physical orientation determines if your installation will be clean or cluttered.
| Method | How long | Effort | Cost | Best for |
|---|---|---|---|---|
| Angle stop valve | 15 minutes | Low | Low | Wall-mounted pipes |
| Straight stop valve | 15 minutes | Low | Low | Floor-mounted pipes |
| Multi-turn valve | 20 minutes | Medium | Low | Older systems |
| Quarter-turn valve | 10 minutes | Low | Medium | Modern reliability |
Use an angle stop when the supply line exits the wall directly behind the fixture. If you force a straight valve here, the supply line will kink or require an unsightly loop. Use a straight valve only when the pipe emerges vertically from the floor.
Most homeowners mistakenly choose multi-turn valves to save money, but these rely on rubber washers that degrade over time. A quarter-turn ball valve costs slightly more but eliminates this failure point entirely.
The time estimates assume you have the correct fitting already in hand and the water supply to the home is fully shut off. If you’re replacing an old, corroded valve, allow an extra 30 minutes for potential pipe cleaning or debris removal. Always check your pipe diameter before heading to the store; 1/2-inch copper is standard, but older homes often hide 3/8-inch or 5/8-inch supply lines.
Using an angle stop valve
An angle stop valve is the most common choice for bathroom sinks and toilets because it directs water from a wall-mounted pipe upward to the fixture. This saves space and keeps your supply lines hidden behind the pedestal or vanity cabinet.
- Shut off the main water supply to the building.
- Disconnect the existing supply line and remove the old valve using two wrenches to prevent pipe twisting. Always hold the pipe steady with one wrench while turning the valve nut with the other; failing to do this often snaps the copper pipe inside the wall, turning a simple swap into a major plumbing repair.
- Clean the pipe threads with a wire brush and apply plumber’s tape to the male threads if you’re using a threaded connection.
- Slide the compression nut and sleeve onto the pipe, then tighten the valve onto the pipe until firm. If you feel the nut resist before it’s snug, back it off and check for cross-threading. Forcing it will ruin the brass seal.
- Attach the flexible supply line to the top outlet of the valve and tighten it by hand, plus an additional quarter-turn with a wrench.
This valve is excellent for tight spaces where you need a clean, low-profile connection. Use a straight stop valve if the pipe comes directly out of the floor or wall toward the fixture. If you see the pipe protruding at a right angle, you must use an angle stop to avoid kinking the supply line.
Using a straight stop valve
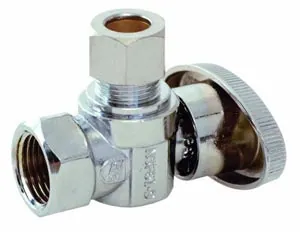
A straight stop valve is designed for situations where the supply pipe runs vertically from the floor or horizontally in a straight path to the fixture. It ensures the flow of water remains linear, preventing unnecessary stress on the pipe or the connection fittings.
Turn off the water and drain the residual pressure by opening a nearby faucet. Cut the supply pipe to the correct length, ensuring the edge is smooth and free of burrs. Slide the compression nut and the ferrule onto the pipe. Insert the pipe into the valve body, ensuring it seats fully against the internal stop. Tighten the compression nut with a wrench while holding the valve body steady to prevent the pipe from rotating.
These valves are highly effective for floor-mounted plumbing, such as pedestal sinks where the pipes come up through the floor tiles. If your pipe is copper, tighten the nut until it feels snug, then add exactly one-half turn more with your wrench. Overtightening often crushes the soft copper wall, creating a permanent leak path that requires cutting the pipe and starting over.
If you’re working with PEX tubing, you must insert a stainless steel stiffener inside the pipe end before sliding on the ferrule. Without this support, the compression nut will collapse the plastic wall, causing a catastrophic failure under pressure. Because these valves offer no vertical adjustment, measure your pipe length twice before cutting. If the pipe is even an eighth of an inch too short, the ferrule won’t seat, and the connection will weep water indefinitely.
Modern quarter-turn technology
The quarter-turn valve is the modern standard for both straight and angle configurations, replacing the older multi-turn gate valves that often leak over time. These valves use a ball mechanism that provides a positive seal with just a 90-degree rotation of the handle.
Verify the pipe size matches the valve inlet, typically 1/2 inch for residential copper or PEX. Prepare the pipe end by removing any debris or old sealant. Install the valve using a compression or push-fit connection, depending on your pipe material. Test the seal by slowly turning the water back on and checking for drips.
Most failures occur because installers fail to deburr the pipe end. A jagged edge will shred the internal O-ring during insertion, leading to a slow, persistent weep that rots your cabinetry. Always use a deburring tool to smooth the exterior circumference before sliding the valve into place.
If you’re working with older, brittle piping, you may need a professional plumber to ensure the connection doesn’t cause a leak. If the pipe is pitted or deeply scratched, a compression fitting will never seal properly. In that case, switch to a sweat-solder valve to bridge the surface imperfections.
These valves are much more reliable because they don’t rely on rubber washers that wear out. The trade-off is that they’re slightly more expensive than traditional multi-turn valves. Expect to pay roughly three times the cost of a gate valve for the increased durability and ease of operation.
Choosing the right valve for your home
If you’re in a hurry, choose a quarter-turn angle stop valve. These units rely on a simple ball-and-seat mechanism that shuts off water flow completely with a single 90-degree twist. They’re the easiest to install and least likely to leak over time.
If you’re doing this for the first time, stick to compression-style valves. They require no soldering and use a soft brass ferrule that creates a watertight seal as you tighten the nut. They’re extremely forgiving for home DIY projects because you can back them off and reseat them if the initial alignment is slightly off.
When you want the best possible result, prioritize high-quality brass valves over plastic alternatives.
The decision always comes down to the orientation of your pipes. If the pipe emerges from the wall, you need an angle valve; if the pipe rises from the floor, you need a straight valve. A common mistake is forcing a straight valve onto a wall pipe. This creates a sharp, dangerous kink in the supply line that restricts flow and eventually causes the hose to burst.
Essential rules for valve installation
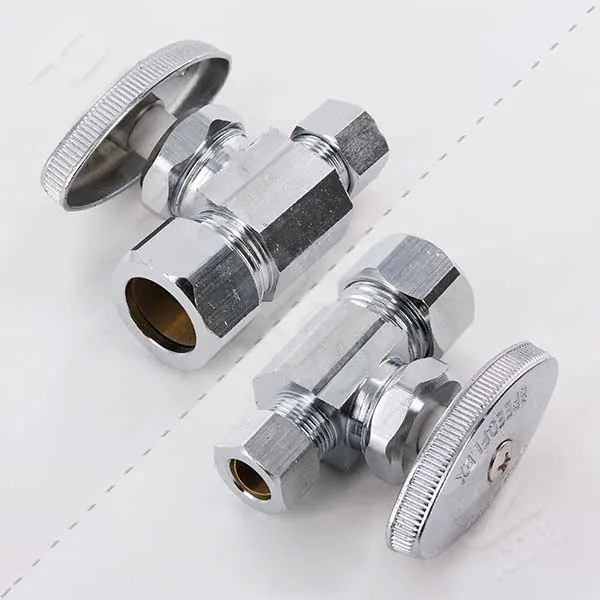
Regardless of the valve type, you must always ensure the water supply is completely off before starting. Check your local building codes, as some areas require specific certifications for plumbing materials to ensure they’re lead-free and pressure-rated.
Always prepare your pipe surface by cleaning it thoroughly with a soft cloth or fine sandpaper. If you notice any pitting or deep scratches on the pipe, the valve may fail to create a watertight seal.
Always check for leaks after installation by leaving a dry paper towel under the joint for 10 minutes; if the paper stays dry, you have a successful seal. If you’re uncomfortable working with pressurized water lines, contact a licensed plumber to avoid property damage from potential flooding.
Frequently Asked Questions
Can I use a straight valve instead of an angle valve?
No, you can’t use a straight valve where an angle valve is needed because it will cause the supply line to kink or bend at an unnatural angle. This puts unnecessary stress on the flexible hose and can lead to a burst pipe. Always match the valve to the direction your pipe is already pointing to ensure a secure, long-lasting connection.
How long do stop valves last?
Most modern quarter-turn valves have a limited lifespan, though this varies based on your local water hardness and mineral content. If your water is high in calcium or magnesium, mineral buildup can cause the ball inside the valve to seize over time. You can check the health of your valve by turning it off and on once or twice a year to prevent calcification.
Is it safe to install these valves myself?
Yes, it’s safe for most homeowners to install these valves if they have basic tools and understand the process for shutting off the water. However, if your pipes are old, galvanized steel, or lead, you should call a professional to avoid breaking the plumbing behind your walls. Always ensure you have a backup shut-off plan before beginning any work.
What happens if I overtighten the compression nut?
Overtightening the compression nut will deform the ferrule, which can crack the pipe or prevent a proper seal from forming. This is a common mistake that leads to slow, persistent leaks that are difficult to fix without cutting the pipe. Tighten the nut until it feels firm, then add only another half-turn to ensure the ferrule is properly compressed against the pipe.
How do I know which size valve I need?
You can determine the size by measuring the outer diameter of your supply pipe, which is usually 1/2 inch or 3/8 inch in most residential settings. You should measure this with a caliper or a tape measure before going to the store to buy your parts. If you’re unsure, take a small section of the old pipe or the old valve with you to match the size exactly.
Conclusion
Before you head to the hardware store, take a quick photo of your current setup to ensure you buy the right fit. It’ll save you a frustrating extra trip if you’re unsure about the connection type. Once you’ve got the correct part, you’re ready to finish your project with confidence.