
When a plumbing emergency strikes, finding the best pipe repair kits can save you thousands of dollars in water damage restoration and professional service fees. Depending on the severity of the leak and the materials involved, a high-quality kit typically costs between $15 and $85. While these solutions are often temporary, they provide the critical time needed to shut off the main water supply and arrange for a permanent replacement. Understanding which repair method suits your specific pipe material—whether it’s copper, PVC, or galvanized steel—is the first step toward regaining control of your home’s plumbing system.
Key Takeaways
- Always turn off the main water supply before attempting any patch, as internal pressure will prevent adhesives from curing.
- Pipe repair kits are best suited for pinhole leaks and hairline cracks; they aren’t intended for structural integrity repairs on heavily corroded lines.
- Clean the pipe surface thoroughly with abrasive pads to ensure the putty or epoxy creates a watertight mechanical bond.
- Check the pressure rating of any repair product to ensure it can handle the specific PSI of your household plumbing system.
- Consider a permanent compression coupling for leaking joints rather than relying solely on chemical-based epoxy wraps.
Identifying Your Pipe Material
Before selecting a repair solution, you must determine what your plumbing is made of. Most modern homes utilize a mix of materials, and using the wrong repair agent can lead to further degradation or bond failure.
- PVC and CPVC: Common in drain lines and modern supply lines. These plastics respond well to solvent-based cements and specialized epoxy putties.
- Copper: Found in older supply lines. These require metallic-compatible epoxies or mechanical clamps to prevent galvanic corrosion.
- Galvanized Steel: Often found in homes built before the 1960s. These pipes are prone to internal rust, making external patches temporary at best.
- PEX: Flexible plastic tubing that’s increasingly standard. PEX typically requires specific crimp-ring fittings rather than external wrap-around kits.
Surface preparation is the most important factor in a successful repair. If you don’t sand the pipe until it’s dull and clean, even the most expensive kit will fail to adhere properly to the pipe wall.
Types of Pipe Repair Kits
Choosing the right technology for your repair depends on the location of the leak and the pipe diameter.
| Repair Kit Type | Best For | Durability | Ease of Use |
|---|---|---|---|
| Epoxy Putty | Pinhole leaks | Moderate | High |
| Fiberglass Wrap | Structural reinforcement | High | Moderate |
| Rubber/Clamp | High-pressure lines | High | Low |
| Compression Fitting | Joint leaks | Permanent | Low |
Epoxy Putty Solutions
Epoxy putty acts as a moldable clay that hardens into a steel-like consistency. It’s excellent for irregular shapes and tight spaces where a wrap can’t be applied. You simply knead the two-part compound until it reaches a uniform color and press it firmly into the leak site.
Fiberglass Resin Wraps
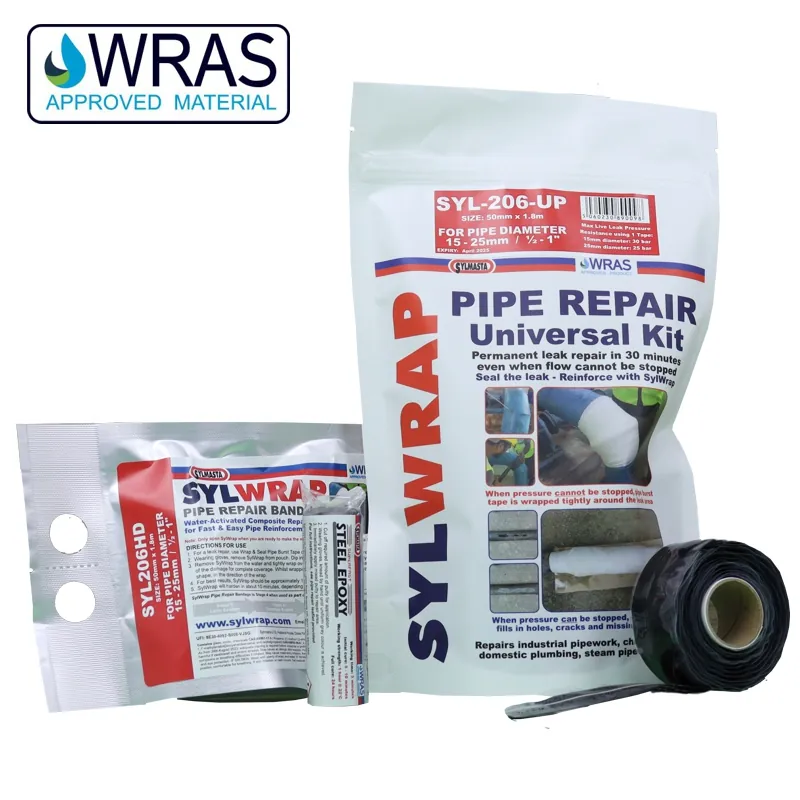
These are the gold standard for long-term emergency repairs. They consist of a water-activated resin tape that hardens into a rock-hard composite shell. Once cured, these wraps can withstand significant internal pressure and are resistant to most household chemicals.
Rubber Gasket Clamps
For high-pressure supply lines, a mechanical clamp is often superior to chemical seals. These kits feature a heavy-duty rubber gasket that’s compressed against the leak by a stainless steel housing. This provides a mechanical seal that’s less reliant on adhesive curing times.
How to use a repair kit?
The application process is largely consistent across most brands, though you must always follow the specific instructions on the packaging.
- Shut down: Close the main water valve and open the lowest faucet in the house to drain excess water from the lines.
- Clean the area: Use an abrasive pad or sandpaper to remove corrosion, paint, or grease from the pipe.
- Mix the agent: If using putty, knead it until warm. If using a wrap, soak the tape in water according to the manufacturer’s time requirements.
- Apply the patch: Wrap the material tightly around the pipe, ensuring you overlap the leak site by at least two inches in both directions.
- Cure: Allow the recommended time for the material to harden before restoring water pressure.
Warning: Never attempt to apply an adhesive repair kit while water is actively spraying or leaking, as the moisture will prevent the chemical bond from forming, leading to a secondary failure shortly after installation.
When are repairs not enough?
While the best pipe repair kits are impressive, they aren’t a substitute for professional plumbing. If your pipe shows signs of “weeping” or significant external rust, the pipe wall itself has likely lost its structural integrity. In these cases, the pipe is compromised across a larger area than the kit can cover.
Structural failure is often indicated by bubbling paint on walls or damp patches that persist even after a patch is applied. If you see these signs, you need a professional to perform a full section replacement.
Comparing Leading Repair Brands
When shopping at hardware stores like Home Depot, Lowe’s, or Ace Hardware, you’ll likely encounter these reliable manufacturers.
- Fernco: Known for their rubber couplings and mechanical repair clamps, which are ideal for drain and vent lines.
- Oatey: A household name providing a wide range of epoxy putties and solvent cements for plastic and metal pipes.
- J-B Weld: Their WaterWeld product is a staple for those needing an underwater-capable epoxy putty that cures in wet conditions.
- Hercules: Focuses on professional-grade sealants and tapes that are often used by trade contractors.
Pro Tip: If you’re dealing with a leak on a threaded joint, a repair kit will rarely suffice; instead, use high-quality pipe thread sealant or PTFE tape to reseal the connection after disassembling the joint.
Safety Measures for Pipe Repairs
Working with plumbing involves hidden risks, including potential contact with lead pipes in older homes or electrical grounding issues.
- Electrical Grounding: In many older homes, the metal plumbing system is used as an electrical ground. If you cut into the pipe, you could break this circuit and create a shock hazard.
- Pipe Stress: When applying a clamp, don’t over-tighten, as you may crush older, brittle metal pipes and turn a small leak into a burst.
- Ventilation: Many epoxy-based kits release strong fumes during the curing process; ensure the area is well-ventilated while you work.
Personal protective equipment is essential. Always wear gloves to protect your skin from the resins and safety glasses to prevent debris from falling into your eyes while working under sinks or in crawlspaces.
Troubleshooting Common Kit Failures
Even with the correct kit, things can go wrong. If you find your repair is still leaking, consider these common pitfalls.
Improper Surface Prep
If the pipe wasn’t sanded, the adhesive will slide off the surface. You must create a “tooth” or rough texture on the pipe surface so the material can grip.
Insufficient Curing Time
Many users turn the water back on too quickly. While some products claim “fast-setting,” they often require several hours to reach full pressure resistance. If you can, wait 24 hours before restoring full pressure.
Temperature Sensitivity
Most epoxy and resin products perform poorly in near-freezing temperatures. If your pipe is in an unheated garage or basement, use a heat lamp to warm the area before application.
Related guides
- 4 Best Adhesives for Pool Coping: Reliable Repair Picks in 2026
- Top 10 Best Toolkits for Home Appliance Repair in 2026
Frequently Asked Questions
Can I use a repair kit on a hot water pipe?
Most standard epoxy putties are rated for temperatures up to 200°F, but you must check the specific package ratings. Hot water lines cause materials to expand and contract, which can weaken the bond over time. For hot water supply lines, mechanical clamps or professional soldered repairs are generally safer and more durable than chemical adhesives.
How do I stop a leak in a PEX pipe?
PEX pipes shouldn’t be repaired with external tapes or putties. Because PEX is a flexible polymer, the most effective repair is to cut out the damaged section and install a new PEX fitting using a crimp tool. Using adhesive patches on PEX will almost always fail because the material is slightly oily and doesn’t bond well with standard epoxies.
Are these repairs permanent?
No. Most pipe repair kits are classified as “emergency” or “temporary” solutions. While a high-quality fiberglass wrap can last for several years, it’s designed to get you through until a plumber can replace the damaged section of pipe. Relying on a patch for too long increases the risk of a catastrophic failure when you aren’t home to stop the water.
What if my pipe is lead?
If you discover your pipe is made of lead, don’t attempt to sand or disturb it. Lead is a health hazard, and mechanical clamps may cause the soft metal to deform or crack further. You should contact a professional plumber immediately to discuss a full pipe replacement to ensure your household water supply remains safe and compliant with modern plumbing codes.
Can I repair a leak at a joint?
Repairing a joint is difficult because the pipe diameter and shape change. You can use a specialized wrap if the leak is minor, but mechanical compression couplings are the standard for joints. If the leak is at a soldered copper joint, the best solution is to clean the joint and re-solder it, or replace the fitting entirely if the solder has failed due to age.
Conclusion
Taking the time to assess your leak properly is the difference between a successful patch and a messy failure. Always prioritize safety, ensure your surfaces are cleaned to a dull finish, and verify that the product you choose is rated for your specific pipe material. By following these steps and keeping a reliable kit in your emergency supply closet, you can mitigate damage and manage your home’s plumbing with confidence.