
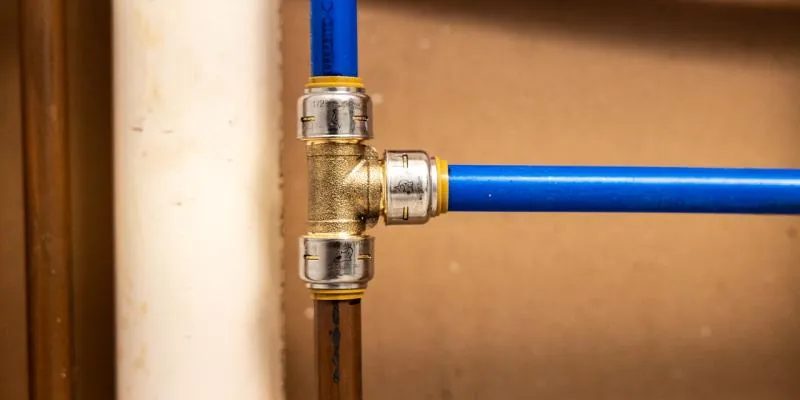
Sharkbite brass push-to-connect fittings are a standard choice for residential repairs, providing a reliable, solder-free seal for copper, PEX, and CPVC piping. These fittings use an internal grab ring and O-ring to create a watertight barrier without specialized tools. This guide covers installation, ideal conditions, and safety precautions for a leak-free system.
How push to connect fittings work
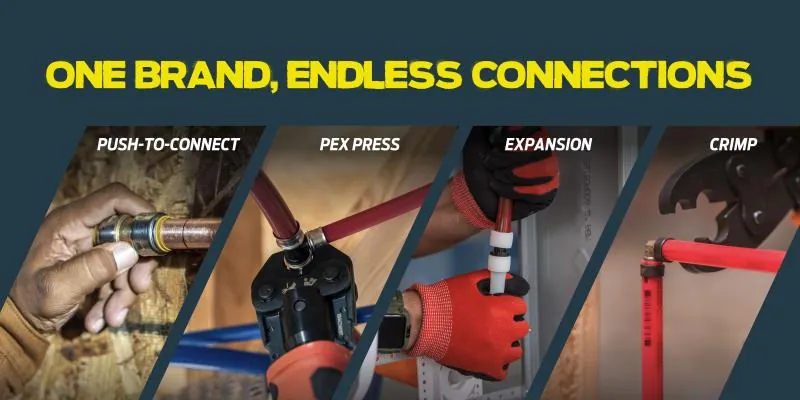
Push-to-connect technology relies on a mechanical design that allows a pipe to slide in but prevents it from sliding back out. Inside the fitting, a stainless steel teeth ring grips the outside of the pipe to create a secure hold. A high-quality EPDM O-ring then compresses against the pipe wall to block water flow. This design is intended for permanent or semi-permanent installations where speed and ease of use are prioritized over the lower cost of traditional soldered joints.
These fittings are designed for anyone who needs to repair a leaking pipe or add a new line without hiring a plumber. They’re particularly useful if you’re working in a cramped area under a sink or inside a wall cavity where a blowtorch would be a fire hazard. However, many people mistakenly believe these fittings can be used on any material or in any location.
You must only use them on pipe materials that are clean, round, and free of deep scratches or pitting. If the pipe surface is damaged, the O-ring can’t form a proper seal, and the connection will eventually drip.
It’s vital to check the compatibility of your specific piping. While most brands are universal, some are only rated for specific types of PEX or copper. Always verify the manufacturer’s technical data sheet to ensure the fitting is certified for the temperature and pressure range of your home’s water supply.
If you’re working in a commercial setting or with high-pressure gas lines, standard residential push-to-connect fittings aren’t suitable. Always consult the NSF International plumbing product standards to ensure your chosen hardware meets the necessary safety and performance requirements for your specific plumbing environment.
Installing your new plumbing connectors
- Shut off the water supply to the area and drain the remaining water from the lines to prevent spraying.
- Cut the pipe squarely using a clean, sharp pipe cutter; a jagged or angled cut will prevent the fitting from seating properly.
- Use a deburring tool to remove any sharp edges or burrs from the end of the pipe, as these can slice the internal O-ring.
- Mark the insertion depth on the pipe with a permanent marker, typically 1 inch for standard half-inch pipes, to ensure the pipe is fully seated.
- Push the pipe firmly into the fitting until you feel it hit the internal stop and the mark aligns with the edge of the fitting.
- Pull back gently on the pipe to confirm the teeth have locked onto the material and the fitting is secure.
- Turn the water back on slowly and inspect the joint for any signs of moisture or weeping.
If the fitting doesn’t sit flush or you feel significant resistance, don’t force it. Remove the pipe and check for debris or damage to the O-ring.
If you’re working on a main line that requires a permit or inspection, check your local building codes first, as some jurisdictions have specific rules regarding the use of concealed push-fit connections behind walls. If you aren’t comfortable handling pressurized water lines, contact a licensed plumber to perform the work to avoid potential water damage to your property.
Key performance data at a glance
| Situation | What to use | How long | What to watch for |
|---|---|---|---|
| Copper pipe repair | Brass fitting | 30 seconds | Surface scratches |
| PEX pipe extension | PEX-rated fitting | 30 seconds | Pipe stiffeners |
| CPVC transition | Compatible fitting | 45 seconds | Pipe roundness |
| Tight wall space | Slim-profile fitting | 60 seconds | Clearance room |
| Emergency leak | Standard brass | 30 seconds | Full insertion |
If your copper pipe shows deep longitudinal scratches, the fitting will fail. Sand the surface with 120-grit emery cloth until the marks vanish before you push the pipe into the fitting. A smooth surface is the only way to ensure the internal O-ring maintains a watertight seal.
For PEX extensions, never skip the stiffener. Without this rigid insert, the soft plastic wall will collapse under the pressure of the fitting’s teeth. You’ll know the stiffener is seated correctly when you feel a distinct mechanical resistance at the final quarter-inch of travel.
When working with CPVC, check the pipe roundness with a caliper. If the pipe is ovalized by more than 0.05 inches, the fitting will leak immediately. In these cases, you must cut back to a section of pipe that retains its original factory shape.
Most installers fail by failing to mark the insertion depth with a permanent marker. If you can’t see your line flush against the fitting edge, you haven’t achieved a full seal. Always pull back on the pipe firmly to verify the locking mechanism is engaged.
How to achieve a professional result
The most important step in achieving a long-term seal is the preparation of the pipe end. Even a microscopic scratch on the surface of a copper pipe acts as a channel for water to bypass the O-ring.
Experienced installers always use a fine-grit sandpaper or a dedicated deburring tool to polish the pipe end until it’s smooth and shiny. If you skip this step, you risk a slow leak that may not appear for several days, leading to potential mold growth or structural damage inside your walls.
Another factor is the use of a stiffener when working with PEX tubing. PEX is softer than copper and can deform slightly under pressure. If you don’t insert a plastic or metal tube stiffener into the end of the PEX pipe before pushing it into the fitting, the pipe may collapse over time, causing the seal to fail. Always ensure the stiffener is fully seated inside the PEX to maintain the round shape necessary for the O-ring to grip correctly.
Finally, avoid twisting the pipe once it’s inside the fitting. While these connectors are designed to rotate, constant movement or vibration during the initial installation can dislodge the O-ring or cause the teeth to scrape the pipe surface. Once the pipe is inserted to the marked depth, leave it undisturbed. If you need to reorient the fitting, do so carefully and check the connection again for leaks after you have finished all adjustments.
Troubleshooting common connection issues
| What you notice | What it usually means | What to do first |
|---|---|---|
| Persistent dripping | Damaged O-ring | Remove and inspect pipe |
| Fitting spins freely | Not fully inserted | Push in until it stops |
| Water spraying | Pipe is cut at angle | Re-cut pipe squarely |
| Pipe pulls out | Teeth didn’t engage | Deburr pipe end |
If you encounter a persistent drip, inspect the O-ring for nicks or debris. A single grain of sand trapped during installation can compromise the seal. If the ring appears flattened or cracked, replace the fitting entirely. Over-tightening often causes the plastic housing to stress-crack.
When a fitting spins freely, the internal grab ring has failed to lock onto the pipe surface. You must pull the pipe out completely to verify the depth mark. If you lack a depth gauge, use a permanent marker to draw a line at the manufacturer’s specified insertion depth. If the mark remains visible after pushing the pipe in, the connection is incomplete.
Water spraying under pressure usually indicates a pipe end that isn’t cut at a perfect 90-degree angle. Even a slight bevel prevents the pipe from seating against the internal stop. Use a dedicated pipe cutter rather than a hacksaw to ensure a clean, square edge. If you use a hacksaw, you must sand the end smooth, as jagged plastic teeth will shred the internal O-ring upon insertion.
Requirements for safe plumbing work
Local building codes often dictate whether push-to-connect fittings are allowed for permanent, concealed installations. Many municipalities follow the International Residential Code, which generally permits these fittings if they’re accessible for future maintenance. However, if you’re burying a connection inside a concrete slab or behind a finished tile wall, you must verify your local requirements with the building department. Failure to follow these rules can void your homeowner’s insurance policy in the event of a flood.
Before you start, check if your local jurisdiction requires an inspection for minor pipe repairs. Most cities allow minor faucet replacements without a permit, but any work involving the relocation of supply lines triggers a mandatory inspection. If you skip this step, you may face significant fines or be forced to expose your work for verification later.
Don’t use standard push-to-connect fittings for high-temperature boilers or hydronic heating systems; use professional-grade soldered or crimped connections. Standard EPDM seals may degrade when exposed to constant temperatures above 200 degrees Fahrenheit. Always check the manufacturer’s label on the packaging to confirm the maximum temperature and pressure ratings.
If you find your system exceeds these limits, you must use alternative methods like soldering or crimping to ensure the safety of your home’s infrastructure. When in doubt, prioritize copper or PEX-A expansion fittings, as these materials offer superior longevity in high-stress environments.
Long-term maintenance and care
Once installed, these connections are generally maintenance-free. However, it’s good practice to inspect them periodically, as the frequency depends on your specific usage and environmental conditions. Consult your owner’s manual for the manufacturer’s official guidance on maintenance and inspection protocols.
If your pipe is located near a water softener, inspect it more frequently, as high salt concentrations can affect the rubber seals. The exact frequency depends on your usage and environmental conditions. Consult your owner’s manual for the manufacturer’s official guidance on maintenance and inspection protocols.
If you ever need to remove a fitting, use the proper disconnection tool designed for that specific brand. Trying to pry the teeth back with a screwdriver will damage the fitting and potentially scratch the pipe, making it impossible to reuse the pipe section. Simply slide the tool over the pipe, press it against the release collar, and pull the pipe out.
You can reuse the fitting if the O-ring and teeth aren’t damaged, but it’s safer to use a new one for critical repairs. If you see deep gouges on the pipe surface after removal, trim that section off. A damaged pipe surface will prevent a new fitting from forming a watertight seal.
When to choose a different method

Push-to-connect fittings aren’t the right choice for every situation. If you’re dealing with a high-vibration environment, such as a pipe connected directly to a water pump or a washing machine, the constant movement can wear down the internal seal over time. In these cases, a threaded connection with a flexible supply line is a much more reliable option. These provide the necessary movement without risking the integrity of the pipe joint.
Check your installation site for thermal expansion. If a pipe run exceeds 20 feet in a space with significant temperature swings, the pipe will expand and contract enough to pull against the fitting’s grip ring. This movement creates a slow, steady leak that’s difficult to diagnose. For these long runs, use copper press fittings or traditional sweat joints to ensure the connection remains rigid despite the thermal stress.
Additionally, avoid using these fittings in areas where they will be exposed to harsh chemicals or direct sunlight. Ultraviolet light can degrade the plastic release collars, making them brittle and difficult to operate during future repairs. If you’re installing piping in an exposed outdoor area, use UV-resistant materials or wrap the connections in protective tape.
If the environment involves corrosive chemicals, use stainless steel fittings instead of standard brass to prevent long-term material failure. Always verify that your local code permits these fittings behind finished walls, as many jurisdictions require accessible joints for easy maintenance.
Frequently asked questions
Can I use push-to-connect fittings behind a wall?
Yes, you can use them if permitted by your local building code. Most residential codes allow them in accessible walls, provided they aren’t inside concrete or structural elements. Always consult your local plumbing inspector to ensure compliance, especially if the wall is finished with tile or stone.
How long do push-to-connect fittings last?
These fittings are designed to last for the lifespan of the piping system, typically 25 years or more. Their longevity depends on the quality of the pipe surface and your home’s water chemistry. If you have hard water, mineral deposits may occasionally interfere with the O-ring seal.
Is it safe to use these on hot water lines?
Yes, these fittings are safe for hot water lines within the manufacturer’s specified temperature limits. Most standard brass fittings are rated for temperatures up to 200 degrees Fahrenheit. Always verify your specific fitting’s rating against your water heater’s settings before installation.
What happens if I insert the pipe at an angle?
If you insert the pipe at an angle, the O-ring won’t compress evenly, causing a leak. You must cut the pipe perfectly square and insert it straight to allow the teeth to grip evenly. If the pipe is crooked, remove it, re-cut the end, and try again.
How do I know if the pipe is pushed in far enough?
You know the pipe is seated when it hits the internal stop and your insertion mark aligns with the fitting edge. Most fittings provide a firm stop or “click” indicating the pipe has cleared the O-ring. If the pipe doesn’t move when pulled, it’s likely seated correctly.
Can I reuse a push-to-connect fitting?
Yes, you can reuse the fitting if the internal teeth and O-ring remain undamaged. However, for critical or inaccessible repairs, installing a new fitting is best practice. If you see wear, deep scratches, or a distorted O-ring, discard the old fitting to ensure system integrity.
Conclusion
Proper installation ensures that your plumbing remains dry and functional for years. By focusing on square cuts, deburred ends, and correct insertion depth, you avoid the most common causes of leaks. Always keep these basic rules in mind to maintain a secure, worry-free system in your home.