
You can fix low calcium levels in your pool by adding a calcium hardness increaser, usually calcium chloride, to reach 200–400 ppm. This stops water from eating away at plaster and keeps it from turning cloudy or scaling on your heater. The exact amount you need depends on your pool’s size and current test reading. You’ll find the right dosage on the product label or by calculating based on your pool’s volume.
What calcium hardness means for your pools water quality
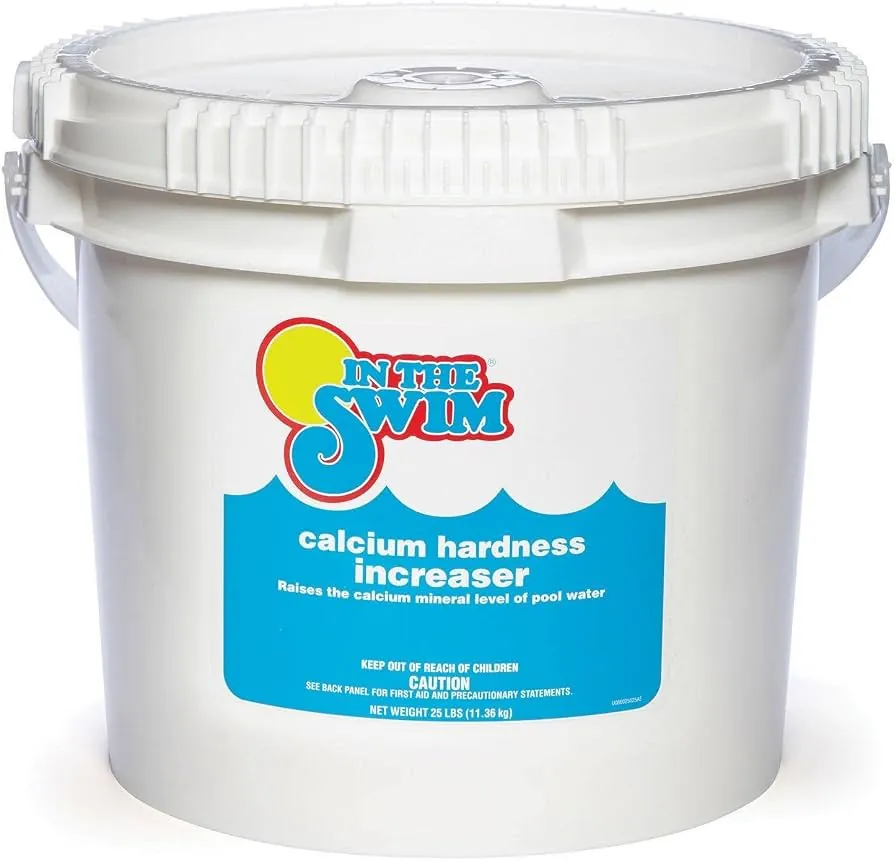
Calcium hardness measures how much dissolved calcium is floating in your water. It tells you if your water is too soft or too hard for your pool surfaces and equipment.
Most people think this number only matters for plaster pools, but vinyl and fiberglass pools need it too to prevent corrosion of metal parts. If the level drops too low, the water becomes “aggressive” and tries to steal calcium from your pool walls to balance itself out. This process slowly dissolves plaster and pitting concrete, leading to expensive repairs.
On the other hand, if the level gets too high, calcium falls out of the water and forms white scale on your tiles and heater tubes. The ideal range sits between 200 and 400 parts per million (ppm) for most residential pools. This balance protects your investment without causing new problems.
You should check this number every week during heavy swim seasons. The Association of Pool & Spa Professionals sets these standard ranges for safe swimming water.
Pool owners often confuse total hardness with calcium hardness when reading their test kits. Total hardness includes magnesium, which doesn’t cause the same scaling issues inside your plumbing. A kit measuring total hardness might show 350 ppm while your actual calcium sits at only 150 ppm. That false comfort leaves your plaster vulnerable while you assume everything is fine. Always use a titration test that specifically targets calcium ions rather than relying on a general dip strip.
When your water tests below 200 ppm, add calcium chloride directly to the skimmer while the pump runs. Never dump it into the deep end because concentrated powder sinks and burns permanent white rings into plaster. Spread it across the surface in small batches over several hours to avoid spiking the level past 400 ppm.
If your tap water already tests above 300 ppm, filling a drained pool will push you toward scaling territory fast. In that case, partially fill with softened water or plan to run a reverse osmosis treatment before adding chemicals.
How to raise calcium levels safely
Start by testing your water with a reliable kit or strips to get your current calcium hardness reading. Write down the number so you can calculate the dose correctly. Next, measure the total gallons of water in your pool; if you’re unsure, use a volume calculator based on your pool’s shape and dimensions. Put on safety goggles and gloves before handling the chemical, as calcium chloride can irritate skin and eyes.
Fill a bucket with fresh pool water and dissolve the calcium hardness increaser granules completely before pouring them back into the pool. Pour the solution slowly near a return jet where the water flows strongly to help it mix. Run your pump continuously for at least 24 hours after adding the chemical to ensure even distribution.
Wait 24 hours before retesting the water to see if you reached your target range. If the number is still too low, repeat the process with a smaller dose. Never pour dry chemicals directly into the skimmer or shallow end, as they can damage the surface or cause uneven heating. This task requires basic math skills and access to a pool test kit, which any local store sells.
| Situation | What to use | How long | What to watch for |
|---|---|---|---|
| Plaster pool below 200 ppm | Calcium chloride granules | 24 hours | Cloudy water that clears after mixing |
| Vinyl liner pool below 150 ppm | Calcium chloride granules | 24 hours | Soft spots in the liner |
| Heater scale buildup risk | None (don’t add) | N/A | White crust on heater tubes |
| High alkalinity present | Calcium chloride + acid | 48 hours | pH dropping too fast |
| New fill water | Calcium chloride | 24 hours | Initial cloudiness |
| Saltwater generator active | Calcium chloride | 24 hours | Scale on cell plates |
Details pros get right first time
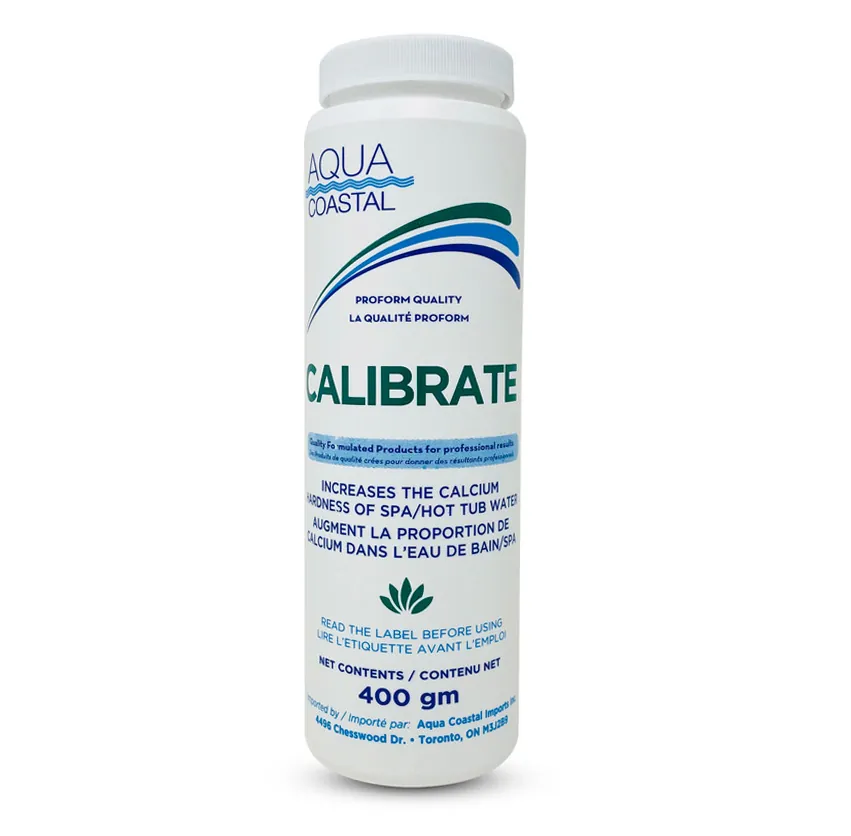
Experienced pool owners know that temperature changes how fast calcium dissolves. They always warm the bucket water slightly if the air is cold. This helps the granules break down faster without leaving clumps at the bottom. Use water around 80 degrees Fahrenheit for the fastest dissolve rate.
Another key habit is checking the pH and total alkalinity before adding calcium. If your pH is too high, the calcium won’t stay in the water. It will turn into scale immediately. Pros adjust the pH to 7.4–7.6 first, then add the hardness increaser.
They also avoid adding calcium when the pool is very hot. High heat speeds up evaporation and concentrates the minerals too quickly. Add it in the evening so the pump circulates it overnight while temperatures drop.
A common mistake beginners make is guessing the amount needed. They often dump in a whole bag because they want results fast. This costs them money and creates a mess that takes days to clear.
The trade-off here is patience versus speed; rushing the process leads to cloudy water and wasted product. You must wait for the full 24-hour cycle before deciding if more is needed. Never add more than ten pounds per ten thousand gallons in a single day.
If you need to raise hardness by more than 100 parts per million, split the work over two or three days. Adding it all at once pushes the saturation index past safe limits. That causes calcium to fall out of solution onto your tile line.
Always broadcast dissolved calcium across the deep end while the pump runs on high speed. Pouring it near the skimmer lets concentrated slugs hit the filter media directly. That coats the sand or cartridges with a crust that backwashing can’t remove.
| What you notice | What it usually means | What to do first |
|---|---|---|
| Water turns milky white | Undissolved chemical | Run pump longer and brush floor |
| White powder on steps | Too much calcium added | Lower pH and filter daily |
| Green tint appears | Algae growth | Shock the pool immediately |
| Stinging eyes | Low pH or high chlorine | Test pH and adjust separately |
| Metal stains on wall | Corrosion from soft water | Add chelating agent |
| Heater shuts off | Scale blocking flow | Clean heater elements |
Rules for safe chemical use
The Environmental Protection Agency doesn’t regulate pool chemicals directly, but OSHA sets rules for handling them safely. Always wear protective gear like gloves and goggles when working with calcium chloride. Don’t mix this chemical with any other pool products in the same bucket. Mixing acids and calcium can create dangerous gases or heat reactions. Keep all containers tightly closed and stored in a cool, dry place away from children.
If you spill dry granules on the deck, sweep them up immediately before rain washes them into the soil. Local health departments often require specific record-keeping for public pools regarding chemical additions. For home pools, follow the manufacturer’s instructions printed on the bottle exactly. If you have a saltwater system, check the manual for compatibility notes. Some generators recommend keeping calcium lower to protect the cell. Always read the Safety Data Sheet (SDS) provided by the brand you buy.
Never pour water into a container of dry calcium chloride; always add the chemical to the water instead. Reversing this order causes an immediate, violent exothermic reaction that can boil the liquid and splatter hot sludge onto your skin or eyes. This mistake happens most often when people try to dissolve large amounts quickly in a small bucket.
The heat generated can crack plastic buckets and burn through thin rubber gloves. If you must pre-dissolve the chemical, use a dedicated five-gallon bucket filled three-quarters full with water first. Stir slowly until fully dissolved before adding it to the main pool circulation line.
Storage conditions matter more than many owners realize. Calcium chloride is hygroscopic, meaning it actively pulls moisture from the air. A bag left open for just thirty minutes can turn into a solid brick of useless sludge.
Once hardened, the chemical loses its ability to dissolve evenly, leading to cloudy water and potential staining on pool surfaces. Store unopened bags in a sealed plastic bin with a tight lid to block humidity. If a bag has already absorbed moisture, break off only what you need and reseal the rest immediately.
Check the pH level before adding calcium if your reading is below 7.2. Adding calcium to highly acidic water can cause rapid precipitation, creating white spots on your plaster or vinyl liner. Raise the pH to at least 7.4 using soda ash before introducing the calcium supplement. This simple step ensures the mineral stays dissolved in the water column rather than settling out as scale. If you skip this adjustment, you may end up scrubbing stubborn deposits for weeks.
Keeping levels steady over time
Once you hit the right range, you don’t need to add calcium every week. Evaporation removes water but leaves minerals behind, so your levels naturally rise over time. Rain adds fresh water with almost no calcium, which dilutes your pool and lowers the number. Check your calcium hardness once a month during the swimming season.
If you live in an area with very hard tap water, your levels might climb on their own. In that case, you may need to drain and refill part of the pool to bring it back down. Don’t guess how much to drain; calculate the volume needed based on the difference between your current reading and your target.
If your water is 400 ppm and you want 300 ppm, draining one-third of the pool and refilling with soft water will get you close. Draining too little wastes time, while draining too much risks dropping below the safe floor for plaster protection.
Store your unused chemical in its original container with the lid tight. Moisture ruins the granules and makes them useless. A common mistake is transferring powder to a generic bucket without sealing it immediately. This clumps the product into a solid brick within days, forcing you to buy more. Mark your calendar to test again in 30 days. Consistency matters more than perfection here.
If you notice white scale forming on the water line, your level is likely too high. Scale indicates saturation has been exceeded for some time. If the scale is loose and powdery, scrubbing it off is usually enough. If it feels like rough concrete, you must lower the water chemistry before brushing can work. Adjusting your water chemistry regularly prevents big swings that hurt your equipment. Sudden spikes cause heaters to fail faster than steady, slightly elevated levels ever would.
When not to add calcium
Don’t add calcium hardness increaser if your test already shows levels above 400 ppm. Adding more will just cause scaling on your heater and tiles. If you have a saltwater chlorine generator, some manufacturers recommend staying below 350 ppm to protect the cell. In this case, you might need to drain some water instead of adding chemicals.
Also skip this step if your water is already cloudy from algae or dirt. Fix the clarity issue first, or the calcium will bind to the particles and make a mess. A common mistake is treating cloudiness as low calcium when it’s actually suspended debris; adding powder here creates a sludge that clogs filters and requires a full drain. Check your filtration system before reaching for the bag.
If you recently resurfaced your pool with plaster, the new surface releases calcium for months. Adding more now could lead to immediate scaling. Wait until the initial cure period ends, usually 30 days, before testing and adjusting. During this window, the plaster acts like a sponge, leaching minerals directly into the water column. Testing daily during the first week often shows spikes over 600 ppm that drop naturally without intervention.
Sometimes the best action is doing nothing and waiting for natural changes. Rain dilutes hardness while evaporation concentrates it, creating a self-correcting cycle in many climates. If your source water has high mineral content, filling the pool halfway with fresh water can raise levels faster than any chemical additive.
Conversely, if you live in an area with soft rainwater, you may never need to add calcium at all. Only intervene if the reading drops below 200 ppm and you see etching on the plaster, which feels rough like sandpaper under your hand.
Related guides
- 8 Best Cleaners for Pool Tile to Remove Grime and Calcium in 2026
- 5 Best Pool Pump Speeds for Heating Your Water Efficiently in 2026
Frequently asked questions
Can I add calcium hardness increaser to a vinyl pool?
Yes, you can and should add it to vinyl pools to keep the liner flexible and prevent metal parts from corroding. Vinyl liners don’t absorb calcium, so the water stays balanced without damaging the surface. Aim for the same 200–400 ppm range used for plaster pools. Just be careful not to let the level get too high, as scale can still form on your ladder and lights.
How long does it take for calcium to dissolve?
It usually takes about 15 to 30 minutes for granules to fully dissolve in a bucket of warm water. Once poured into the pool, it takes 24 hours for the chemical to mix evenly throughout the entire volume. Running your pump constantly speeds up this process significantly. Don’t test the water sooner than 24 hours or you’ll get a false reading.
Is it safe to swim right after adding calcium?
No, you should wait at least 6 hours after adding calcium hardness increaser before swimming. While the chemical isn’t highly toxic, it can irritate skin and eyes while it’s still settling. The water might also look cloudy during this time. Always follow the specific wait time listed on your product label for the safest experience.
What happens if my calcium is too high?
If calcium gets too high, it will fall out of the water and form hard white scale on your tiles, heater, and pump. This scale blocks water flow and reduces heating efficiency, costing you more energy. It also makes your pool look dirty and rough to the touch. The only fix is to drain some water and replace it with fresh water that has lower mineral content.
Why is my pool water cloudy after adding calcium?
Cloudiness usually means the chemical didn’t dissolve completely or the water wasn’t circulating well. It can also happen if you added too much at once. Run your pump for another 24 hours and brush the pool floor to help mix it. If it stays cloudy after two days, you may need to shock the pool or add a clarifier.
How much calcium hardness increaser do I need for 10,000 gallons?
For a 10,000-gallon pool, you typically need about 1 pound of calcium chloride to raise the level by 10 ppm. To raise it from 150 ppm to 250 ppm, you would need roughly 10 pounds. Always check your specific product label, as concentrations vary by brand. Measure carefully to avoid overshooting your target range.
Can rain change my calcium hardness level?
Yes, rain adds fresh water with very little calcium, which dilutes your pool and lowers the hardness level. After a heavy storm, you should test your water to see if the numbers have dropped. You may need to add more calcium to get back to the 200–400 ppm range. This is why regular testing is important after big weather events.
Conclusion
Keeping your calcium levels right protects your pool from costly damage and keeps the water clear. By following these simple steps and checking your numbers often, you avoid the headache of scaling or corrosion. Allow enough time for the chemicals to circulate fully before judging the result.