
The La Crosse Technology wireless sensor system is the best digital outdoor thermometer for most homeowners because it balances reliable data transmission with a long-range wireless signal. This device provides accurate external readings through a weather-resistant remote sensor that communicates with an indoor display unit.
Your specific choice depends on whether you need simple local monitoring, smart home integration, or long-range connectivity. These factors, alongside your local climate and building materials, define whether a basic unit or a professional-grade station is the right fit for your home.
What is the best digital outdoor thermometer for you?
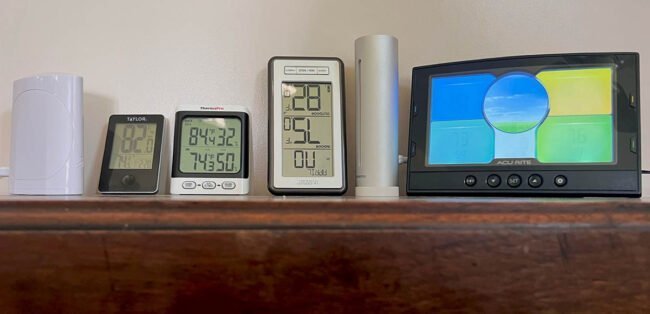
Homeowners who need a reliable reading usually have two main needs: seeing the temperature from a comfortable spot inside and keeping the sensor safe from the elements. If you only want to know the temperature at a glance, a basic digital display with a wireless transmitter is your best choice. If you want to track weather trends over time, you need a system that logs data and connects to a base station with a larger screen.
This article assumes you want a standalone system that works without a complex internet setup. If you’re looking for smart home integration, you might need a system that works with Wi-Fi or Bluetooth protocols. Users who live in areas with extreme temperature swings should look for sensors with a wide operational range, typically from negative forty degrees to one hundred and forty degrees Fahrenheit. If your home has thick stone or concrete walls, the wireless signal may drop; in this case, choose a unit with a higher frequency transmission range or a wired probe that sits outside while the main unit stays inside. Avoid buying sensors that lack an IPX rating, as these will fail quickly when exposed to direct rain or snow.
Factors affecting your readings
The most important factor in getting an accurate reading is the placement of your sensor. You should place the sensor in a shaded area, at least five feet above the ground, to avoid heat radiating from the soil or concrete. Direct sunlight will cause the sensor to report a much higher temperature than the actual air temperature, leading to errors of ten degrees or more.
Building materials also change how well your device works. A signal that works through wood walls might fail when it has to pass through brick or metal siding. If you notice the display shows dashes instead of a number, the signal is blocked. You can often fix this by moving the indoor display closer to the outdoor sensor.
Another factor is the battery chemistry. Standard alkaline batteries often fail when temperatures drop below freezing. If you live in a cold climate, use lithium batteries in your outdoor sensor, as they maintain a consistent voltage in sub-zero conditions.
The final factor is the refresh rate. Some cheaper models update only every five minutes, which makes them slow to react to fast-moving weather fronts. High-quality sensors update every thirty to sixty seconds, giving you a more real-time picture of the changing environment. Most users make the mistake of mounting the sensor near a vent or window; this allows indoor heat to leak out, which ruins the accuracy of your outdoor measurement.
Installation steps
- Install fresh lithium batteries into the outdoor sensor according to the manufacturer’s polarity markings.
- Place the indoor display and the outdoor sensor on the same table for ten minutes to ensure they sync.
- Check the display to confirm it shows the same temperature for both units before you move them.
- Mount the outdoor sensor on the north side of your home to keep it out of direct sunlight.
- Secure the sensor using the provided bracket or a screw, keeping it at least five feet above the ground.
- Verify the connection by checking the signal strength icon on your indoor display screen.
- Test the range by walking the display to your preferred indoor location while watching for signal loss.
The key judgment call is ensuring the sensor is protected from precipitation but still exposed to natural airflow. If you place the sensor inside a box to protect it, you must ensure the box has vents on all sides. Proper airflow is essential for the National Weather Service to consider the reading representative of the actual ambient air temperature. If the sensor sits in stagnant air, your readings will be inaccurate.
Comparison of thermometer types
Choosing the right model depends on your specific environment and how much data you need to see at once.
| Situation | Recommended Type | Effort Required | Watch For |
|---|---|---|---|
| Basic monitoring | Simple digital display | Low | Signal range |
| Large property | Long-range wireless | Medium | Obstructions |
| Cold climates | Lithium-compatible unit | Medium | Battery type |
| Data tracking | Weather station | High | Sync stability |
| Smart homes | Wi-Fi connected sensor | High | Network lag |
If you’re monitoring a space larger than 100 feet, avoid standard Bluetooth sensors. They often fail to penetrate interior walls, leading to frequent data drops. Instead, choose a model using LoRa or 900MHz frequency bands, which can reach up to 1,000 feet through dense obstacles.
Battery chemistry is the most common oversight in cold climates. Standard alkaline batteries suffer from high internal resistance in temperatures below 32°F, causing them to report “dead” even when half-charged. If your sensor sits outdoors in winter, ensure the unit is explicitly rated for lithium batteries, which maintain voltage in sub-zero conditions.
For data tracking, differentiate between “logging” and “streaming.” If you need a historical record, verify the device has onboard storage. Without it, a brief Wi-Fi outage will create permanent gaps in your data set.
Use this decision rule: If you need real-time alerts for an emergency, choose Wi-Fi for its instant push notifications. If you need long-term climate analysis, choose a dedicated weather station that prioritizes offline data logging over constant connectivity. This prevents the frustration of losing months of trends due to a simple router reboot.
Accuracy and performance
Placement and calibration
Accuracy starts with how you mount the hardware. Beginners often mount sensors on a south-facing wall, which causes high temperature spikes due to solar gain. Experienced users always choose the north side of the house or a shaded post.
Managing connectivity
Wireless interference is a common problem in modern homes. Devices like cordless phones, baby monitors, and Wi-Fi routers can disrupt the signal between your sensor and the display. If your signal keeps dropping, try changing the channel setting on both the sensor and the display. This simple switch moves the data to a different frequency, which often clears up the interference and stabilizes your connection.
Troubleshooting common issues
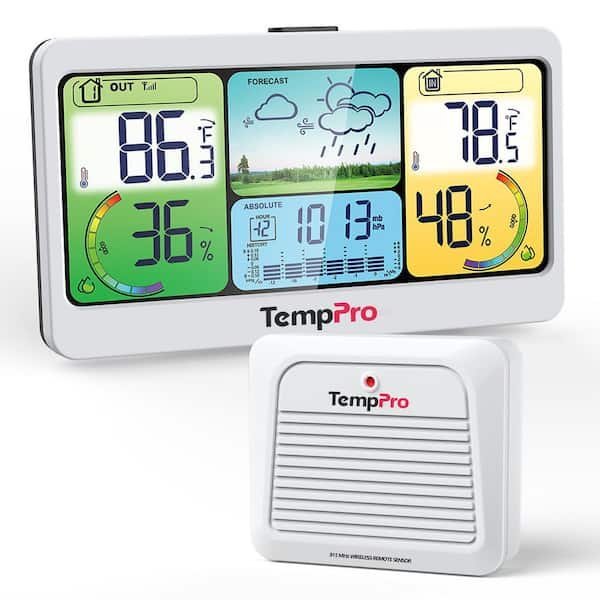
| What you notice | What it usually means | What to do first | How to stop it |
|---|---|---|---|
| Blank screen | Dead batteries | Replace batteries | Use lithium cells |
| Dashes on screen | Signal lost | Move units closer | Check for metal |
| High readings | Direct sun exposure | Move to shade | Add a shield |
| Inconsistent data | Low battery voltage | Change batteries | Monitor yearly |
| Wrong temperature | Calibration error | Reset the unit | Use offset setting |
Most users assume a blank screen indicates a faulty sensor. In reality, alkaline batteries often leak acid if left in the unit for more than six months. If you see corrosion on the terminals, clean them with white vinegar before inserting new lithium cells. Lithium batteries perform reliably down to -40 degrees, whereas standard alkaline cells fail the moment the temperature drops below freezing.
When you see dashes, the 433MHz signal is likely being blocked by structural interference. Thick masonry or steel-reinforced walls are the primary culprits. If your units are more than 30 feet apart, you must relocate the receiver to a line-of-sight position. Don’t place the base station near a microwave or a Wi-Fi router, as these devices create electromagnetic noise that disrupts the data handshake.
High readings are rarely a sign of a broken sensor. If your unit is in direct sunlight, the plastic housing absorbs heat, creating a localized greenhouse effect. A simple plastic shield or a piece of reflective foil can lower the internal temperature by up to 10 degrees. If the reading remains inaccurate after moving the unit to a shaded area, perform a hard reset by removing the batteries for several minutes.
Compliance and standards
Outdoor thermometers must meet certain standards for safety and accuracy to be sold in the United States. Most consumer-grade electronics are rated for indoor or outdoor use based on their enclosure protection, often referred to as an IP rating. You should check the product packaging or the manufacturer’s website for the specific IP rating, which indicates how well the device keeps out dust and moisture.
If your device is part of a larger weather station, check if it complies with the Federal Communications Commission rules regarding radio frequency transmissions. This ensures the device doesn’t interfere with other household electronics. For professional-grade accuracy, some users turn to equipment that meets the standards set by the World Meteorological Organization, though these units are usually too expensive for residential use. Always follow the manufacturer’s guidelines for battery disposal, as many local jurisdictions have laws regarding the safe recycling of lithium and alkaline cells.
Investment of resources
The cost of a digital outdoor thermometer varies based on features, but you should expect to pay a moderate amount for a reliable model. The most significant cost isn’t the purchase price, but the time you spend finding the right location. If you mount the sensor in a poor spot, you’ll spend weeks fighting inaccurate data.
Time is also a factor during setup. While simple units take ten minutes to start, a full weather station might require an hour for mounting and software syncing. If you need to replace batteries in a hard-to-reach spot, you’ll spend more effort on maintenance. Always compare the cost of replacement batteries against the lifespan of the unit. A unit that eats batteries regularly is more expensive over time than a slightly pricier model that lasts longer on a single set of cells.
Maintenance and care
After you install your thermometer, keeping it right requires minimal work. You should check the sensor regularly for signs of spider webs or debris, which can block the vents and affect accuracy. If you live in an area with heavy snow, clear the sensor after a storm to ensure the temperature reading stays current.
When the display starts to fade or the signal becomes intermittent, it’s time to replace the batteries. Don’t wait for the unit to die completely, as a dying battery can leak and destroy the internal circuits. Use high-quality lithium batteries if your sensor is mounted in a location that drops below freezing. Alkaline batteries often fail or leak when temperatures fall below 32 degrees Fahrenheit.
If you decide to move your sensor to a new location, you’ll need to re-sync the system by removing the batteries from both units for one minute before starting the setup process again.
If the signal fails to reconnect after a power cycle, check for interference from nearby electronic devices. Large metal objects or thick concrete walls can block the radio signal; if this occurs, you must relocate the sensor to a position with a clearer line of sight to the display. If the display remains blank after a battery change, use a paperclip to press the small reset button located inside the battery compartment to clear the unit’s memory.
Situations for other methods
If you need to measure the temperature of soil or water, an outdoor air thermometer is the wrong choice. Use a probe-style digital thermometer designed for immersion or direct ground contact instead. These units are built to withstand moisture and have faster response times for liquid or solid surfaces.
The critical distinction lies in the sensor housing. Air thermometers use exposed, fragile thermistors meant for airflow. If you submerge them, the moisture will short the internal circuitry or corrode the contacts within minutes. Always check the IP rating on the packaging; for soil or water, look for a minimum rating of IP67.
If you’re a professional meteorologist or need to report data to a government agency, consumer-grade digital sensors won’t meet the required accuracy standards. In these cases, you must use calibrated equipment that undergoes annual certification. Attempting to use a household device for scientific or legal reporting is a mistake that will result in unusable data.
The decision rule is simple: if the data influences a legal contract, an insurance claim, or a scientific publication, you must use a device with a traceable NIST calibration certificate. If the device lacks this document, assume the data is inadmissible. Using uncertified hardware for these high-stakes tasks often leads to the total rejection of your findings by regulatory bodies.
Frequently asked questions
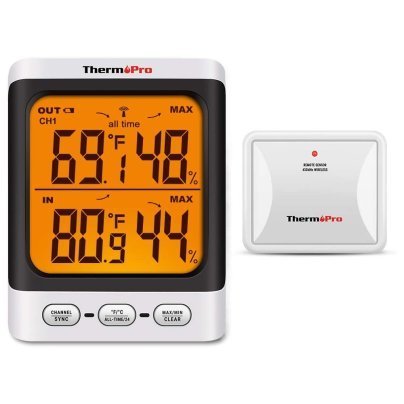
How long do outdoor batteries last?
Most sensors last about twelve months with standard alkaline batteries, but you should use lithium batteries for a longer life in cold climates. Always check your model’s manual, as some high-frequency transmitters consume power faster than others.
Is it safe to leave the display outside?
No, the indoor display unit isn’t weather-resistant and will fail if exposed to rain or high humidity. You must keep the display inside your home, while only the remote sensor remains outdoors.
How far can the sensor be from the display?
Most models work reliably up to three hundred feet in an open area, but walls and trees will reduce this distance significantly. If you have a large property, test the signal at your desired location before you permanently mount the sensor.
Why is my thermometer reading too high?
Your sensor is likely in direct sunlight, which causes the plastic housing to heat up and report an incorrect temperature. Move the sensor to a permanent shade location to ensure the reading reflects the actual air temperature.
Does the temperature need calibration?
Most digital thermometers arrive calibrated from the factory, but you can adjust the offset on higher-end models if you find a consistent difference compared to a local weather station. Check your user manual for the specific steps to enter the calibration menu.
How often should I replace the sensor?
A well-maintained digital sensor should last until the internal components begin to degrade as it ages. If you notice the readings becoming erratic despite fresh batteries, it’s usually a sign that the sensor’s internal circuitry has reached the end of its life.
Digital outdoor, in short
Start by placing your sensor in a shaded, well-ventilated area that’s protected from direct rain. Once you see a consistent temperature reading on your indoor display, you have successfully set up your system. If the display shows inconsistent data or frequent signal drops, consult the manufacturer’s manual to perform a hard reset or move the display closer to the outdoor unit.
Related guides