
Are your kitchen cabinets looking dull or worn out? Sealing them can bring back their shine and protect them from damage.
But how do you seal kitchen cabinets the right way? Whether you want to refresh old cabinets or protect new ones, this simple step can make a big difference. In this guide, you’ll learn easy tips and tricks to seal your cabinets like a pro.
Keep reading to discover how you can transform your kitchen with just a few simple steps.
Choosing The Right Sealant
Choosing the right sealant is key to protecting kitchen cabinets. The right sealant keeps moisture, stains, and heat away. It also helps cabinets look fresh for years. Picking the right type depends on your cabinet material and kitchen use. Understanding different sealants helps you make a smart choice.
Types Of Sealants For Kitchen Cabinets
Polyurethane is a popular sealant. It creates a strong, clear coat. It protects well against water and heat. Water-based polyurethane dries fast and has low odor. Oil-based polyurethane lasts longer but smells more.
Lacquer is another option. It dries very quickly and gives a shiny finish. It works best on wood cabinets but needs good ventilation.
Shellac comes from natural sources. It adds a warm tone and seals well. It works best on cabinets not exposed to much water.
Varnish is tough and protects against scratches and heat. It is a good choice for busy kitchens.
Factors To Consider When Selecting Sealant
Think about the cabinet material first. Wood needs different sealants than laminate or metal. Choose a sealant that sticks well to your cabinet surface.
Consider how much heat and moisture your kitchen faces. Sealants with high water resistance suit kitchens with lots of steam.
Look for sealants that are easy to apply. Some need brushes, others spray. Choose what fits your skill level.
Check drying time. Fast drying sealants let you finish the job quickly. Long drying times may need more patience.
Smell matters. Low-odor sealants are better for indoor use. They keep air fresh while drying.

Credit: diy.stackexchange.com
Preparing Cabinet Surfaces
Preparing cabinet surfaces is the first step to sealing kitchen cabinets. Clean, smooth surfaces help the sealant stick better. This makes the finish last longer and look nicer. You need to remove dirt, grease, and old finishes. Then, smooth out any rough spots. These steps create the perfect base for sealing.
Cleaning And Removing Old Finish
Start by wiping the cabinets with a damp cloth. Use mild soap to remove grease and dirt. Avoid soaking the wood with water. For old finishes, use a chemical stripper or sandpaper. Apply stripper carefully and follow the instructions. Remove all traces of the old finish. This helps the new sealant bond well with the wood.
Sanding Techniques For Smooth Surfaces
Sand the cabinets to create a smooth surface. Use medium-grit sandpaper to remove rough patches. Then switch to fine-grit sandpaper for a smooth finish. Always sand in the direction of the wood grain. This prevents scratches and uneven surfaces. After sanding, wipe the dust off with a clean cloth. Smooth surfaces make sealing easier and more effective.
Applying The Sealant
Applying the sealant to kitchen cabinets protects the wood and keeps moisture out. It also helps the cabinets look fresh and clean for a long time. This step requires care and the right tools to get a smooth, even finish. Follow each step carefully for the best results.
Tools And Materials Needed
- Sealant (polyurethane or water-based)
- Paintbrush or foam brush
- Sandpaper (220 grit)
- Clean cloth or tack cloth
- Painter’s tape
- Protective gloves
- Drop cloth or old newspapers
- Small container for sealant
Step-by-step Application Process
- Start by sanding the cabinet surface lightly. This removes old finish and smooths the wood.
- Wipe away dust with a clean cloth or tack cloth. The surface must be dust-free.
- Protect areas you do not want sealed with painter’s tape.
- Pour a small amount of sealant into the container to avoid contamination.
- Dip the brush lightly into the sealant. Avoid overloading it to prevent drips.
- Apply the sealant in long, even strokes, following the wood grain.
- Cover all visible surfaces, including edges and corners.
- Let the first coat dry as per the sealant instructions, usually 2 to 4 hours.
- Lightly sand the dried coat with fine sandpaper to remove bumps.
- Clean off sanding dust before applying the next coat.
- Apply at least two coats for good protection, repeating the sanding and cleaning.
- Allow the final coat to dry completely before using the cabinets.

Credit: www.loveandrenovations.com
Drying And Curing Tips
Drying and curing are key steps in sealing kitchen cabinets. Proper drying ensures the finish sticks well and looks smooth. Curing makes the seal strong and durable. These steps need patience and the right conditions. Rushing can cause sticky or uneven surfaces. Follow these tips for the best results.
Ideal Drying Conditions
Keep the room temperature between 65 and 75 degrees Fahrenheit. Avoid extreme heat or cold. Good air circulation helps the seal dry evenly. Open windows or use fans for airflow. Avoid direct sunlight on the cabinets. High humidity slows drying. Use a dehumidifier if needed. Dry air speeds up the process without damage.
How Long To Wait Between Coats
Wait at least 2 to 4 hours before applying the next coat. Check the product label for exact times. The surface should feel dry but not hard. Lightly sanding between coats improves adhesion. Patience prevents peeling and bubbling. Multiple thin coats work better than one thick coat. Follow drying times closely for a smooth finish.
Maintaining Sealed Cabinets
Keeping your kitchen cabinets sealed helps protect them from water damage, stains, and wear. Proper maintenance extends the life of the sealant and keeps your cabinets looking fresh. Simple care steps can make a big difference in preserving the seal.
Regular checks and light cleaning help maintain the seal’s strength. Avoiding harsh chemicals ensures the sealant does not break down quickly. Small efforts prevent costly repairs or resealing too often.
Cleaning Tips To Preserve Sealant
Use a soft cloth and mild soap to clean cabinet surfaces. Avoid abrasive scrubbers that can scratch or remove the seal. Wipe spills immediately to prevent moisture from seeping in.
Dry cabinets well after cleaning. Water left on the surface may weaken the seal over time. Gentle cleaning keeps the finish smooth and protected.
When To Reapply Sealant
Check your cabinets every six months for signs of wear. Look for dull spots, peeling, or water stains. These signs mean the sealant needs reapplying.
Reapply sealant if you notice damage or after heavy use. Choose a sealant suited for kitchen cabinets for best results. Timely resealing keeps cabinets safe and looking new.
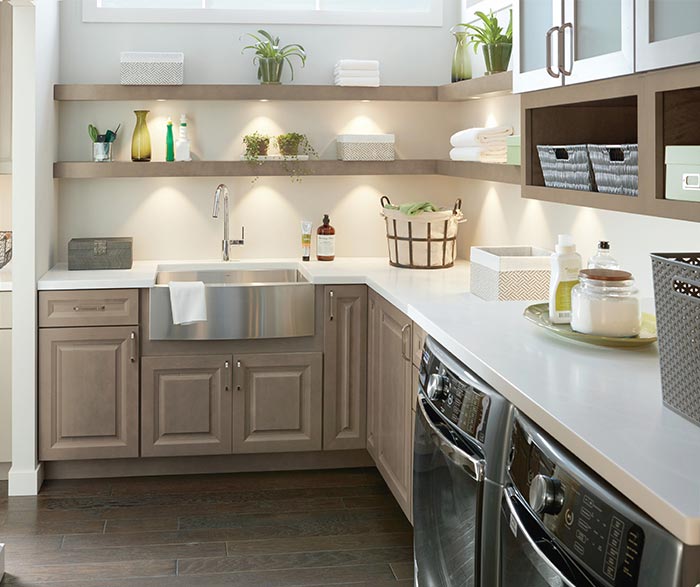
Credit: www.kempercabinets.com
Common Mistakes To Avoid
Sealing kitchen cabinets is a simple task but easy to mess up. Avoiding common mistakes helps protect your cabinets and keeps them looking great. Small errors can cause the seal to fail or look uneven. Pay close attention to these key points for a smooth finish.
Overapplying Sealant
Applying too much sealant causes drips and sticky surfaces. Thick layers take longer to dry and may crack. Use a thin, even coat instead. Multiple thin coats work better than one heavy one. Spread the sealant gently with a brush or cloth.
Ignoring Surface Preparation
Sealing over dirty or rough surfaces reduces adhesion. Clean cabinets thoroughly before sealing. Remove grease, dust, and old finish. Lightly sanding the surface helps the sealant stick well. Proper preparation ensures a smooth, long-lasting seal.
Frequently Asked Questions
How Do I Prepare Cabinets Before Sealing?
Clean the cabinets thoroughly to remove grease and dirt. Sand the surface lightly for better sealant adhesion. Wipe off dust with a damp cloth before sealing.
What Type Of Sealant Is Best For Kitchen Cabinets?
Use a clear polyurethane or acrylic sealant. These protect against moisture, stains, and wear while enhancing the cabinet’s finish. Choose water-based for easy cleanup and low odor.
How Long Does It Take For Cabinet Sealant To Dry?
Sealants usually dry within 2 to 4 hours. Full curing can take up to 24 hours. Avoid heavy use until the sealant is completely dry.
Can I Seal Painted Kitchen Cabinets?
Yes, you can seal painted cabinets. Ensure the paint is fully dry and cured. Use a compatible sealant to avoid peeling or discoloration.
Conclusion
Sealing kitchen cabinets protects them from water and stains. It helps cabinets last longer and look better. Use the right sealant and apply it carefully. Let it dry well before using the cabinets again. Regular sealing keeps your kitchen fresh and clean.
Small effort, big difference. Now, your cabinets stay strong and shiny for years.