
Are you looking to give your kitchen cabinets a fresh, stylish upgrade without spending a fortune? Adding ribbon to your kitchen cabinets is a simple and creative way to transform their look instantly.
Imagine turning plain cabinet doors into charming, eye-catching features that reflect your personal style. In this guide, you’ll discover easy, step-by-step tips to put ribbon on your kitchen cabinets like a pro. Whether you want a subtle touch or a bold statement, this method is perfect for you.
Ready to make your kitchen shine? Let’s dive in!

Credit: www.amazon.com
Choosing The Right Ribbon
Choosing the right ribbon for your kitchen cabinets can change the whole look. The ribbon should match the style and feel of your kitchen. Picking the right ribbon means thinking about material, color, and size. Each choice affects how your cabinets look and feel.
Materials And Textures
Ribbons come in many materials like satin, grosgrain, or velvet. Satin is smooth and shiny, good for a sleek look. Grosgrain has ridges and feels sturdy, great for casual kitchens. Velvet feels soft and rich, perfect for a cozy space. Choose a texture that fits your kitchen’s mood.
Color Coordination
Pick a ribbon color that matches or contrasts your cabinets. Light ribbons work well with dark cabinets. Dark ribbons stand out on light cabinets. You can also use colors from your kitchen decor. Keep the color simple to avoid a busy look.
Width And Length
The width of the ribbon changes its impact. Thin ribbons are subtle and delicate. Wide ribbons make a bold statement. Measure your cabinet edges to get the right length. Always buy extra to cover mistakes or adjustments.
Credit: teacherbakermaker.com
Preparing Your Cabinets
Preparing your kitchen cabinets is an important first step before adding ribbon. Proper preparation helps the ribbon stick better and last longer. It also makes your cabinets look neat and smooth. Take your time with these steps to get the best results.
Cleaning And Drying Surfaces
Start by cleaning the cabinet doors and frames. Use a mild soap and water mixture to remove grease and dirt. Wipe thoroughly with a clean cloth. Let the surfaces dry completely before moving on. Dry surfaces help the ribbon glue hold strong.
Removing Hardware
Take off all knobs, handles, and hinges from the cabinet doors. Removing hardware makes it easier to work on the surfaces. Use a screwdriver to carefully unscrew each piece. Store the hardware safely for reattaching later.
Sanding And Smoothing
Lightly sand the cabinet surfaces using fine-grit sandpaper. This step smooths out bumps and rough spots. Sanding also helps the ribbon adhesive stick better. After sanding, wipe away dust with a dry cloth. Your cabinets are now ready for ribbon application.
Measuring And Cutting Ribbon
Measuring and cutting ribbon for kitchen cabinets is a key step. It ensures the ribbon fits perfectly and looks neat. Taking time for this part avoids mistakes. It helps save ribbon and makes your work easier. Follow simple steps to measure and cut the ribbon correctly.
Accurate Measurements
Use a tape measure for precise results. Measure each cabinet edge where the ribbon will go. Write down the length for every section. Add a small extra length for overlap and adjustments. Double-check your numbers before cutting. Accuracy prevents ribbon waste and poor fit.
Cutting Techniques
Use sharp scissors or a craft knife for clean cuts. Cut on a flat surface to keep the ribbon steady. Cut slowly to avoid jagged edges. Keep the ribbon taut but not stretched while cutting. Straight cuts make the ribbon easier to attach and look better.
Avoiding Fraying
Ribbon edges can fray after cutting. Seal the edges by lightly burning with a match or lighter. Move the flame quickly and do not burn the ribbon. Use clear nail polish or fabric glue on the edges as an alternative. Preventing fray keeps the ribbon neat and durable.
Attaching Ribbon To Cabinets
Attaching ribbon to kitchen cabinets adds charm and personality to your space. This simple step can brighten the room and make cabinets stand out. The key is to attach the ribbon securely and neatly. There are different ways to do this depending on your tools and materials.
Using Adhesive Options
Glue or double-sided tape works well for smooth cabinet surfaces. Choose a strong adhesive to keep the ribbon in place. Clean the cabinet surface before applying adhesive. Press the ribbon firmly for a few seconds. This method avoids holes and keeps the ribbon flat.
Stapling And Tacking
Staples or small tacks hold ribbon firmly on wood cabinets. Use a staple gun or hammer with care. Place staples or tacks at ribbon ends and along the edges. Make sure they are hidden or blend with the ribbon color. This method is durable and works well for thicker ribbons.
Ensuring Secure Placement
Measure and mark cabinet spots before attaching ribbon. Keep ribbon straight and wrinkle-free while securing. Check edges to prevent peeling or lifting over time. Use clips or pins temporarily to hold ribbon during placement. A steady hand helps achieve a neat finish.
Adding Decorative Touches
Adding decorative touches to kitchen cabinets with ribbon brings charm and personality. It transforms plain cabinets into a stylish feature. Simple ribbons can brighten the kitchen’s look. These small details make a big difference in design.
Tying Bows And Knots
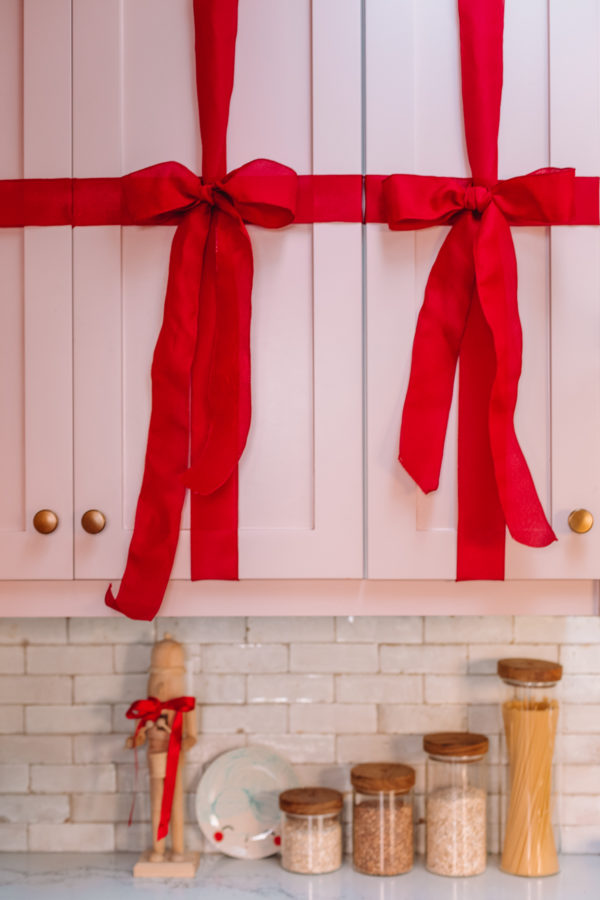
Start by tying bows or knots on cabinet handles. Bows add softness and a welcoming feel. Knots create a neat and simple look. Choose a ribbon width that fits the handles well. Secure the ribbon tightly so it stays in place. This technique works best with satin or grosgrain ribbons. They hold shape and look smooth on cabinets.
Incorporating Accents
Use small accents with ribbons for extra style. Add tiny flowers, beads, or buttons to the ribbon. Glue or sew these accents on for a secure hold. Accents make ribbons more unique and eye-catching. Choose colors that match the kitchen’s theme. This step adds a creative and personal touch easily.
Mixing Ribbon Styles
Mix different ribbon styles to create visual interest. Combine solid colors with patterns like stripes or polka dots. Use various textures such as velvet and lace for depth. Layer ribbons for a fuller, richer look. Keep the color palette balanced to avoid clashing. Mixing styles adds fun and flair to cabinets.
Credit: studiodiy.com
Maintaining Ribbon On Cabinets
Maintaining ribbon on kitchen cabinets helps keep them looking fresh and neat. Proper care prevents damage and extends the life of the ribbon. Simple steps can preserve the beauty of your cabinet ribbons for a long time.
Cleaning Tips
Use a soft cloth to clean the ribbon gently. Avoid harsh chemicals that can damage the material. A damp cloth with mild soap works well for regular cleaning. Dry the ribbon carefully to prevent moisture damage. Clean ribbons often to stop dust and grime from building up.
Repairing Loose Ribbon
Check ribbons regularly for loose edges or corners. Use clear craft glue to fix any parts lifting from the cabinet. Press the ribbon firmly until the glue dries. Avoid using too much glue to prevent mess. Repair ribbons quickly to stop further damage.
Seasonal Updates
Change ribbons with the seasons to refresh your kitchen look. Lighter colors for spring and summer bring brightness. Darker or warmer tones suit fall and winter better. Store ribbons safely when not in use. Rotating ribbons keeps your kitchen style up to date.
Creative Ribbon Ideas
Ribbons offer a fun, easy way to refresh kitchen cabinets. They bring color, texture, and style to plain surfaces. Choose ribbons that fit your kitchen’s mood or the season. Small touches can make a big difference in your kitchen’s look.
Festive Themes
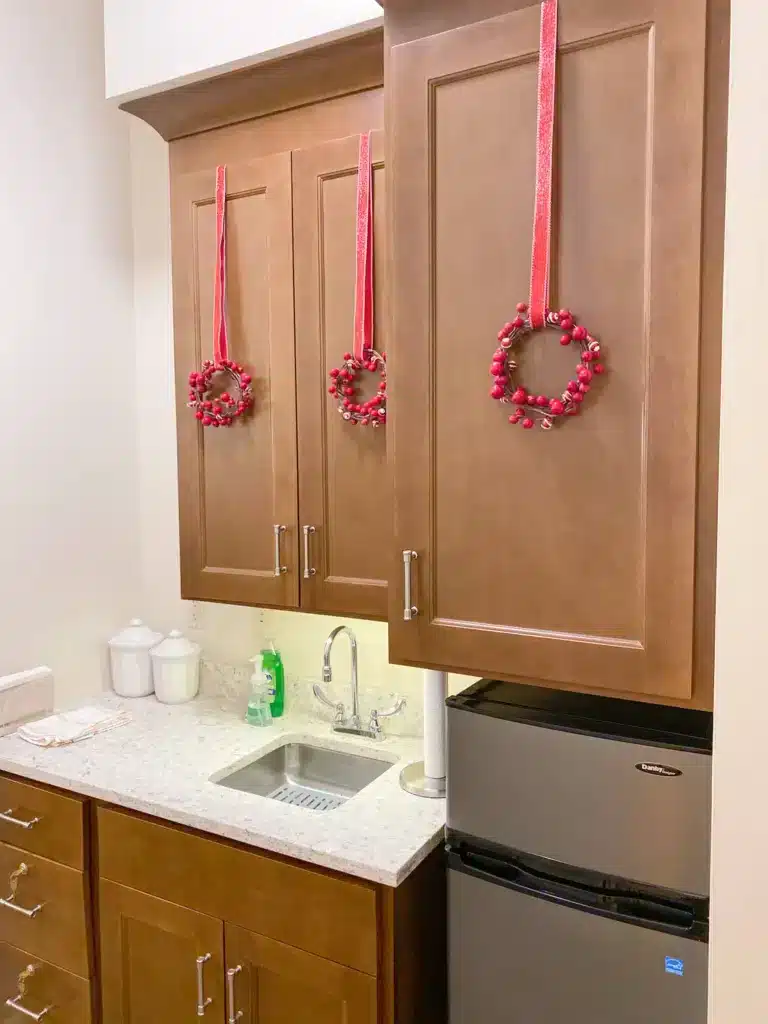
Bright ribbons brighten kitchens during holidays. Red, green, or gold ribbons add Christmas cheer. Orange and brown ribbons suit fall or Thanksgiving. Pastel ribbons work well for spring or Easter. Tie ribbons into bows for a joyful touch. Mix patterns like stripes or polka dots for fun.
Modern Minimalist Looks
Simple ribbons fit clean, modern kitchens. Solid colors like black, white, or grey keep it sleek. Satin or grosgrain ribbons add subtle texture. Use thin ribbons for a delicate effect. Wrap ribbons tightly for a neat, tidy look. Choose matte finishes to avoid shine.
Vintage And Rustic Styles
Natural ribbons match rustic or vintage kitchens. Burlap or lace ribbons add charm. Earth tones like brown, cream, and olive work best. Combine ribbons with twine for a rough, cozy feel. Wrap loosely for a relaxed, casual style. Use frayed edges to enhance the vintage vibe.
Frequently Asked Questions
How Do I Attach Ribbon To Kitchen Cabinets?
Clean the cabinet surface first. Use double-sided tape or wood glue to secure the ribbon. Press firmly for a smooth finish. Allow glue to dry fully before use.
What Type Of Ribbon Works Best On Cabinets?
Choose fabric or satin ribbons for durability. Avoid thin or flimsy ribbons, as they may tear easily. Consider moisture-resistant ribbons for kitchen use.
Can I Paint Over The Ribbon On Cabinets?
It’s not recommended to paint over ribbons. Paint may cause the ribbon to stiffen or peel. Instead, select a ribbon color that complements your cabinet paint.
How Do I Remove Ribbon From Kitchen Cabinets?
Gently peel the ribbon off. Use a mild adhesive remover to clear any residue. Avoid harsh chemicals to prevent cabinet damage.
Conclusion
Adding ribbon to kitchen cabinets can change the room’s look. It’s a simple way to add style and charm. Choose the right ribbon that matches your kitchen’s colors. Take your time to measure and attach carefully. Small steps make a big difference in the end.
Enjoy the new, fresh feel of your kitchen space. Try this easy update to brighten your home today.