
Are you ready to give your kitchen a polished, professional look? Installing a cabinet toe kick might seem like a small detail, but it makes a huge difference in both appearance and comfort.
If you’ve ever wondered how to do it yourself without hiring a pro, you’re in the right place. This step-by-step guide will walk you through the process clearly and simply. By the end, you’ll know exactly how to install your kitchen cabinet toe kick so it fits perfectly and adds that finishing touch your kitchen deserves.
Keep reading—you’re about to take your kitchen to the next level!
Credit: www.myautoinsurancepro.com
Tools And Materials Needed
Installing a kitchen cabinet toe kick needs the right tools and materials. Getting these ready helps the job go smoothly. It also ensures a neat and strong finish. Knowing what to gather before starting saves time and effort.
Essential Tools
You need a few basic tools for toe kick installation. A measuring tape is crucial to get exact sizes. Use a pencil to mark cutting lines clearly. A saw works to cut the toe kick pieces. A drill or screwdriver helps fix the pieces in place. A level ensures the toe kick is straight and even. Sandpaper smooths any rough edges after cutting. Clamps keep pieces steady during assembly.
Choosing The Right Materials
Pick materials that match your kitchen style and durability needs. Many use plywood or MDF for toe kicks. These are strong and easy to paint or finish. Solid wood gives a classic look but costs more. Consider moisture resistance, especially in kitchens. Choose materials that can handle humidity and spills. Also, pick paint or stain that matches your cabinets. This helps the toe kick blend in nicely.
Preparing The Workspace
Preparing the workspace is a key step before installing your kitchen cabinet toe kick. A clean and organized area helps the job go smoothly. It also makes the installation safer and faster. Take time to set up your space correctly. Follow these simple steps to get ready.
Clearing The Area
Remove all items from around the cabinet base. Clear the floor near your workspace. This prevents accidents and gives you enough room to work. Sweep the floor to remove dust and dirt. A clean surface helps the toe kick fit better. Keep tools and materials nearby but out of the way.
Measuring The Cabinet Base
Use a tape measure to find the length of the cabinet base. Measure from one end to the other carefully. Write down the exact measurement. Check for any irregularities or bumps on the base. Mark the spots where the toe kick will attach. Accurate measurements ensure a perfect fit and easy installation.
Cutting The Toe Kick
Cutting the kitchen cabinet toe kick requires precision and care. This step shapes the base that fits perfectly under your cabinets. Proper cutting ensures a clean look and strong support. Take your time to measure and saw accurately for the best results.
Measuring For Accuracy
Start by measuring the space under your cabinets carefully. Use a tape measure to get the exact length and height needed. Double-check your numbers before cutting to avoid mistakes. Mark your measurements clearly on the toe kick board with a pencil. Accurate measurements help the toe kick fit snugly and look professional.
Using The Right Saw
Choose a saw that suits your material and skill level. A circular saw works well for straight cuts on plywood or MDF. Use a fine-toothed blade to get smooth edges without splinters. Clamp the board firmly before cutting to keep it steady. Cut slowly and follow your marked lines precisely for a clean finish.

Credit: erinzubotdesign.com
Attaching The Toe Kick
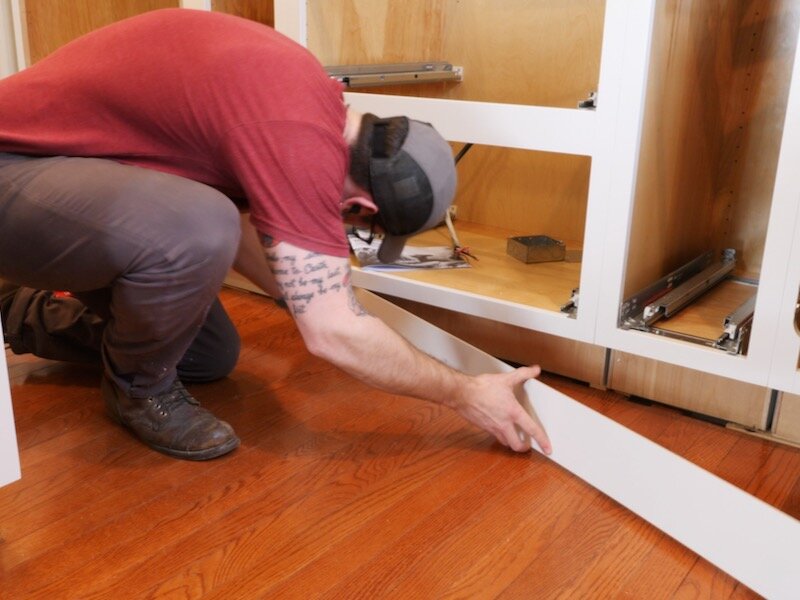
Attaching the kitchen cabinet toe kick is an important step. It completes the look and protects the base of your cabinets. Proper attachment ensures stability and a clean finish. Follow simple steps to position and secure the toe kick correctly.
Positioning The Toe Kick
Place the toe kick flush against the cabinet base. Align it so the front edge is even and straight. Check that it sits flat on the floor. Leave a small gap at the bottom for easy cleaning. Use a level to keep it perfectly horizontal. Proper positioning prevents gaps and uneven surfaces.
Securing With Nails Or Screws
Choose nails or screws to fasten the toe kick. Nails work well for thin pieces, screws for thicker wood. Pre-drill holes to avoid splitting the wood. Drive nails or screws through the toe kick into the cabinet frame. Space them evenly, about every 12 inches. Countersink screws for a smooth finish. Fill holes with wood filler for a neat look.
Finishing Touches
Finishing touches make your kitchen cabinet toe kick look complete and polished. These small steps help the installation blend smoothly with the rest of your kitchen. Proper finishing also protects the toe kick and keeps it looking good for years.
Filling Gaps And Holes
Fill any gaps or holes with wood filler or caulk. Use a putty knife to press the filler into cracks and holes. Smooth the surface so it is even with the surrounding wood. Let the filler dry completely before sanding. Sand gently to create a smooth, flat finish. This step hides imperfections and gives a clean look.
Painting Or Staining
Choose paint or stain to match your kitchen cabinets. Apply a primer first for better adhesion and color. Use a small brush or roller for even coverage. Let each coat dry before applying another. Staining shows the wood grain, while paint offers solid color. Finish with a clear sealant for protection and shine.

Credit: www.thehandymansdaughter.com
Common Mistakes To Avoid
Installing a kitchen cabinet toe kick seems simple but common mistakes can cause problems later. Avoiding these errors saves time and effort. It also ensures the toe kick fits well and looks good.
Here are two frequent mistakes to watch out for during installation.
Misaligned Toe Kick
Misalignment happens when the toe kick is not level or flush with cabinets. It creates gaps and uneven surfaces that look bad. Check the floor and cabinet edges carefully before attaching the toe kick. Use a level tool to keep it straight. Measure twice to avoid cutting errors. Align the toe kick with cabinet fronts and corners. This prevents uneven gaps and improves the overall appearance.
Improper Fastening
Using the wrong fasteners or not securing the toe kick firmly causes it to loosen over time. Nails or screws that are too short or thin won’t hold well. Choose fasteners designed for wood and strong enough to support the toe kick. Space fasteners evenly to avoid bending or warping. Drive screws in straight and countersink them slightly. Proper fastening keeps the toe kick stable and durable.
Maintenance Tips
Maintaining your kitchen cabinet toe kick keeps it looking fresh and lasting longer. Regular care prevents damage and helps maintain its appearance. Follow these simple tips to keep your toe kick in great shape.
Cleaning The Toe Kick
Use a soft cloth or sponge to wipe the toe kick regularly. Mild soap and water work well for most surfaces. Avoid harsh chemicals that can damage the finish. Dry the area with a clean cloth after cleaning. This prevents water spots and swelling.
Repairing Damage
Small dents or scratches can be fixed with wood filler or touch-up markers. Match the color to the toe kick for a seamless look. Sand lightly after the filler dries to smooth the surface. For loose or detached parts, use wood glue or small nails to secure them. Prompt repairs stop damage from getting worse.
Frequently Asked Questions
What Tools Are Needed To Install Kitchen Cabinet Toe Kicks?
You need a measuring tape, saw, drill, screws, adhesive, and a level. These tools ensure precise cuts and secure installation of toe kicks.
How Do I Measure For A Kitchen Cabinet Toe Kick?
Measure the length of the cabinet base where the toe kick will attach. Also, note the height and depth for an accurate fit.
Can I Install Toe Kicks On Existing Kitchen Cabinets?
Yes, toe kicks can be added to existing cabinets. Clean the surface and use screws or adhesive for a secure attachment.
What Material Is Best For Kitchen Cabinet Toe Kicks?
Wood is the most common material for toe kicks. It offers durability, easy customization, and matches most cabinet styles.
Conclusion
Installing a kitchen cabinet toe kick can improve your kitchen’s look. It also protects the cabinet base from damage and dirt. Follow each step carefully to avoid mistakes. Take your time and measure twice before cutting. Use the right tools for a smooth fit and finish.
With patience, you can add this simple detail yourself. It makes your kitchen cleaner and more comfortable to use. Give your cabinets a neat, polished appearance with a toe kick. Small efforts bring big improvements. Try it and enjoy the difference!