
A broken shower pipe inside your wall can quickly turn from a small annoyance into a major headache. You might notice water stains, a drop in water pressure, or even damp spots on your bathroom floor.
But before you call a plumber and face a costly repair, there’s good news: you can fix this yourself. Imagine saving money and gaining confidence by handling the problem with your own hands. You’ll discover simple, step-by-step instructions to locate and repair that broken pipe quickly and effectively.
Ready to stop the leak and restore your shower? Let’s get started.
Credit: www.youtube.com
Tools And Materials Needed
Fixing a broken shower pipe inside the wall requires the right tools and materials. Using proper equipment makes the repair easier and safer. Prepare everything before starting the job. This saves time and avoids mistakes.
Essential Plumbing Tools
Gather these tools first. A pipe cutter helps remove damaged pipe sections cleanly. Adjustable wrenches tighten or loosen pipe fittings. A pipe wrench holds pipes firmly. Use a flashlight to see inside the wall cavity. A screwdriver removes wall panels or covers. Plumber’s tape seals pipe threads tightly. A bucket catches water during repairs. Safety gloves protect your hands from sharp edges. A utility knife trims materials precisely.
Recommended Repair Materials
Choose quality materials for a lasting fix. Replacement pipes should match your existing pipe type. Use copper, PVC, or PEX pipes, depending on your system. Pipe connectors or couplings join new pipes to old ones. Apply plumber’s putty or silicone sealant around joints. Teflon tape ensures watertight threads. Pipe insulation prevents future damage from cold. Patch kits repair small holes or cracks. Wall repair materials like drywall and paint restore the surface after fixing the pipe.
Identifying The Leak Source
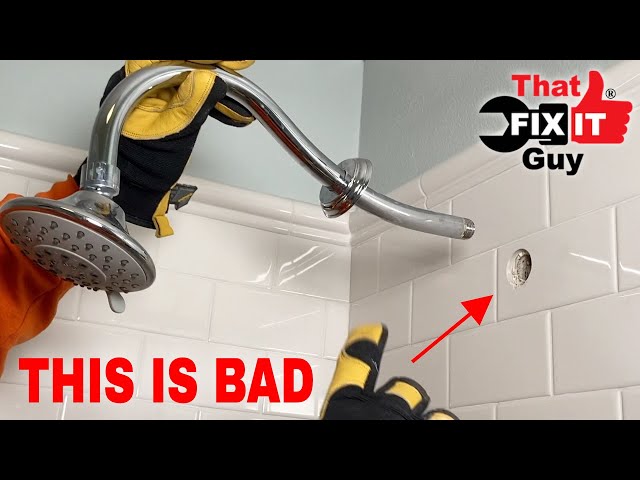
Finding the source of a shower pipe leak inside the wall is the first step to fixing it. This task needs careful observation and a clear plan. Knowing where the leak begins helps avoid bigger damage to your home. It also saves time and money during repairs. Learn to spot the signs and find the leak’s exact location behind the wall.
Signs Of A Broken Shower Pipe
Look for damp spots on the bathroom wall or ceiling below the shower. You might see peeling paint or bubbling wallpaper near the shower area. A musty smell or mold growth signals moisture problems inside the wall. Sounds of dripping water when the shower is off can also mean a leak. Water stains on the floor near the shower base are warning signs. Early detection prevents costly water damage and mold issues.
Locating The Leak Behind The Wall
Turn off the water supply before starting any inspection. Remove the shower handle or faucet plate to access the pipe area. Use a flashlight to check for wet spots inside the wall cavity. A moisture meter helps detect hidden dampness behind tiles or drywall. Listen carefully for dripping sounds with the water on. Mark the wettest area to know where to cut for repairs. Careful locating avoids unnecessary wall damage and speeds up fixing the pipe.
Shutting Off Water Supply
Fixing a broken shower pipe inside the wall starts with stopping the water flow. Shutting off the water supply prevents leaks and water damage. It also makes the repair safer and easier. Without water pressure, you can work on the pipe without worry.
Main Water Valve Location
Find the main water valve in your home. Usually, it sits near the water meter or where the main pipe enters the house. Common spots include basements, garages, or outside near the foundation. The valve looks like a round wheel or a lever.
Turn the valve clockwise to close it. This action stops water from flowing into your house. Check by opening a faucet to see if water still comes out. No water means the valve is off.
Draining The Pipes
After shutting off the main valve, drain the pipes to clear water inside. Open faucets on the lowest and highest floors of your home. Let the water run until it stops. This step reduces water pressure and prevents spills.
Flush toilets to empty their tanks. Also, open the shower valve you plan to fix. Draining the pipes makes the repair clean and safe.
Accessing The Damaged Pipe
Accessing the damaged shower pipe inside the wall is the first step to fixing the leak. You need to reach the pipe without causing extra damage to your bathroom walls. This process requires care and some basic tools. Taking your time here can save you money and effort later.
Removing Wall Panels Safely
Start by turning off the water supply to avoid flooding. Use a utility knife to cut along the edges of the wall panel. Score carefully to avoid cutting wires or pipes behind the wall. Remove screws or nails holding the panel in place. Gently pull the panel away from the wall. If it resists, check for hidden fasteners. Keep the removed panel safe for later reinstallation.
Creating Access Points
Mark the area around the damaged pipe for easy access. Use a drywall saw to cut a clean, square hole. Avoid making the hole too large. A smaller opening is easier to patch after repairs. Check for electrical wires or other pipes before cutting. Use a flashlight to inspect inside the wall cavity. Clear any insulation or debris to see the pipe clearly.
Repair Methods For Broken Pipes
Broken shower pipes inside walls can cause leaks and water damage. Fixing them quickly stops further problems. Different repair methods suit different pipe damages. Choose the right method for a lasting repair.
Small cracks need simple fixes. Larger damage may require pipe replacement. Temporary solutions help until a full repair happens.
Using Pipe Clamps For Small Cracks
Pipe clamps are easy tools to fix small cracks. They wrap tightly around the damaged area. The clamp stops water from leaking out. This method works best for tiny holes or cracks. It is a quick and affordable fix. Make sure the pipe surface is clean before placing the clamp. Tighten the clamp securely for a good seal.
Replacing Damaged Pipe Sections
Severe pipe damage needs replacing the broken section. Cut out the damaged pipe part carefully. Measure and cut a new pipe piece of the same size. Use pipe connectors to join the new piece. Ensure all connections are tight and sealed. This method provides a permanent solution. It may require turning off water supply first. Wear gloves and follow safety steps during replacement.
Applying Epoxy Putty For Temporary Fixes
Epoxy putty is a quick fix for leaks. It sticks well to wet or dry pipes. Knead the putty until soft and apply over the crack. Press firmly to cover the damaged area completely. Let it harden for the time listed in instructions. This method stops leaks temporarily. Replace the pipe section later for a long-term fix.

Credit: www.reddit.com
Reassembling And Sealing The Wall
After fixing the broken shower pipe inside the wall, the next step is to reassemble and seal the wall. This step protects the pipe and prevents water damage. Proper sealing keeps moisture out and stops mold growth. It also restores the wall’s strength and appearance.
Careful reassembly ensures the wall looks smooth and clean. Use the right materials for a long-lasting repair. This section covers installing drywall or backer board, plus waterproofing and sealing methods.
Installing Drywall Or Backer Board
Start by cutting a piece of drywall or cement backer board to fit the hole. Backer board is better for wet areas like showers. It resists water and adds durability.
Secure the board with screws into the wall studs. Make sure it sits flush with the surrounding wall. Tight screws prevent movement and cracking later.
Seal the edges with joint tape. Use fiberglass mesh tape for backer board or paper tape for drywall. This step strengthens the joints and stops cracks.
Apply joint compound over the tape. Smooth it out with a putty knife. Let it dry, then sand the surface for a clean finish.
Waterproofing And Sealing Techniques
Apply a waterproof membrane or liquid sealant over the repaired wall. This layer blocks moisture from reaching the drywall or backer board.
Use a paint-on waterproofing product made for showers. Brush or roll it on evenly, covering all seams and edges.
Let the waterproof layer dry completely before tiling or painting. This step ensures water cannot seep behind the wall.
Seal any gaps around the shower fixtures with silicone caulk. This creates a flexible, water-tight barrier.
Proper sealing protects the pipe repair and extends the life of the shower wall.
Testing The Repair
After fixing the broken shower pipe inside the wall, testing the repair is essential. This step ensures the repair holds up and prevents future water damage. Skipping this part might cause leaks or bigger problems later.
Restoring Water Supply
Turn the main water valve back on slowly. Watch the repaired pipe as water flows through it. This helps avoid sudden pressure that could harm the new connection. Listen for any unusual sounds, like hissing or dripping. These could indicate a problem.
Checking For Leaks
Look carefully around the repair area for any signs of water. Use a dry cloth or tissue to spot moisture. Check both inside the wall and around the shower valve. Leaks might appear as small drips or wet spots. If you find any, tighten fittings or redo the repair.

Credit: www.reddit.com
Preventing Future Pipe Damage
Preventing future pipe damage is key to avoiding costly repairs. Pipes hidden behind walls need care and attention. Taking simple steps helps keep your shower pipes safe and working well.
Regular Maintenance Tips
Check your pipes often for leaks or cracks. Look for damp spots on walls or floors near the shower. Tighten loose fittings to stop drips early. Clean shower drains to prevent clogs that increase pressure on pipes. Schedule a professional inspection every year to catch small problems.
Protecting Pipes From Freezing
Cold weather can cause pipes to freeze and burst. Keep your home warm during winter, especially near pipes. Insulate exposed pipes with foam sleeves or heat tape. Let faucets drip slightly on very cold nights to keep water moving. Seal gaps and cracks in walls to block cold air from reaching pipes.
Frequently Asked Questions
How Do I Locate A Broken Shower Pipe Inside The Wall?
Start by checking for water stains or damp spots on the wall. Use a moisture meter or listen for dripping sounds behind the wall.
What Tools Are Needed To Fix A Broken Shower Pipe?
You will need a pipe cutter, wrench, plumber’s tape, replacement pipe, and a pipe fitting or coupling. Safety gear like gloves and goggles help too.
Can I Fix A Shower Pipe Leak Without Removing Drywall?
Small leaks can sometimes be fixed using epoxy putty or pipe clamps without removing drywall. Larger leaks usually require cutting into the wall.
How Long Does It Take To Repair A Broken Shower Pipe?
Repair time depends on the damage size. Minor fixes can take 1-2 hours, while major repairs may take a full day.
What Type Of Pipe Is Used For Shower Plumbing?
Copper, PEX, and CPVC pipes are commonly used for shower plumbing. PEX is flexible and easy to install, while copper is durable.
How Do I Prevent Future Shower Pipe Leaks?
Check for loose fittings and corrosion regularly. Use high-quality materials and avoid overtightening pipe connections.
Should I Call A Plumber For A Broken Shower Pipe?
Calling a plumber is wise if the leak is large or hard to access. DIY repairs can cause more damage without experience.
Conclusion
Fixing a broken shower pipe inside the wall is doable with care and patience. Start by turning off the water supply to avoid leaks. Use basic tools to cut and replace the damaged pipe section. Take your time to seal connections tightly.
Check for leaks before closing the wall. A small problem now saves big repairs later. Remember, safety first and work step-by-step. You can keep your shower working well without a plumber. Simple fixes can last long with proper care.