
Are you ready to fix that dripping faucet or upgrade your kitchen sink? Installing a kitchen faucet supply line might sound tricky, but with the right steps, you can do it yourself and save time and money.
Imagine turning on your tap and enjoying a steady, leak-free flow without calling a plumber. In this guide, you’ll learn exactly how to install your kitchen faucet supply line quickly and easily. Keep reading to take control of your kitchen repairs and feel proud of the job you’ve done.

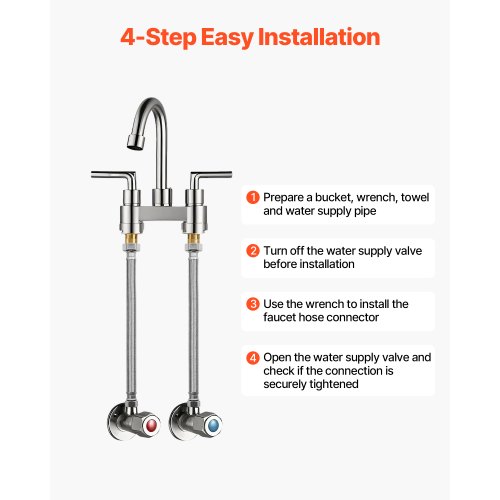
Credit: www.aquacubic.com
Tools And Materials Needed
Installing a kitchen faucet supply line requires the right tools and materials. Having everything ready makes the task easier and faster. The correct tools help you avoid damage and leaks.
Below are the essential items you need. These will help you complete the installation smoothly and safely.
Adjustable Wrench
An adjustable wrench tightens and loosens nuts on the supply line. It fits different sizes, making it versatile. Use it carefully to avoid stripping the nuts.
Teflon Tape
Teflon tape seals threaded connections and prevents leaks. Wrap it around threads before connecting parts. It creates a water-tight seal for a secure fit.
Supply Lines
Choose supply lines that match your faucet and water valves. Flexible braided lines are common for easy installation. Ensure the length fits your sink setup.
Basin Wrench
A basin wrench helps reach tight spots under the sink. It grips nuts in small spaces where other wrenches can’t reach. It makes loosening and tightening easier.
Bucket Or Towels
Use a bucket or towels to catch water spills. Turning off the water might not drain all water from pipes. Protect your cabinets and floor from water damage.
Cleaning Supplies
Clean the area around the faucet before installation. Remove old tape or debris from connections. A clean surface ensures a better seal and fit.
Turn Off Water Supply
Before installing a kitchen faucet supply line, shut off the water supply to prevent leaks. This step keeps your workspace dry and safe during the process.
Locate The Main Water Valve
Start by finding the main water valve for your home. This valve controls water flow to the entire house. It is usually near the water meter or where the main pipe enters your home. Turning off this valve stops water from flowing to all faucets, including the kitchen.
Shut Off The Valve
Turn the valve handle clockwise to close it. If it is a lever, move it perpendicular to the pipe. The water supply will stop flowing. This prevents leaks and water damage while you work on the faucet supply line.
Open A Faucet To Drain Water
Open the kitchen faucet or another faucet in the house. This lets any remaining water drain out of the pipes. The water flow will stop completely, making it safe to disconnect the supply line.
Check For Water Flow
Double-check by turning the faucet on and off. No water should come out. If water flows, the valve might not be fully closed. Tighten it more to stop the water completely.
Remove Old Supply Line
Removing the old kitchen faucet supply line is the first step in installing a new one. This process helps avoid leaks and ensures a proper connection. Take your time and follow each step carefully.
Turn Off The Water Supply
Start by shutting off the water supply valves under the sink. Turn them clockwise to close. This stops water flow and prevents spills during removal.
Place A Bucket And Towels
Put a bucket below the supply line connection. Use towels around the area to catch any leftover water. This keeps your workspace clean and dry.
Loosen The Nuts Connecting The Supply Line
Use an adjustable wrench to loosen the nuts. Turn counterclockwise until the supply line detaches from both the faucet and the shutoff valve. Hold the valve steady while loosening.
Remove The Old Supply Line
Once the nuts are loose, pull the old supply line away carefully. Check the area for any damage or debris. Clean the connections before installing the new line.
Prepare New Supply Line
Preparing the new supply line is an important step before installation. It ensures a tight fit and prevents leaks. Taking time now saves you from future problems.
Start by checking the length of the supply line. It should reach from the water valve to the faucet comfortably. Too short or too long can cause issues during installation.
Next, inspect the connectors on both ends of the supply line. Make sure they match your faucet and water valve fittings. Most supply lines have standard sizes, but double-check to avoid mistakes.
Gather Necessary Tools And Materials
Prepare tools like an adjustable wrench and plumber’s tape. Have a bucket and towel nearby to catch any water drips. Keep everything within reach to work smoothly.
Clean The Connection Points
Wipe the faucet’s inlet and water valve threads. Remove old plumber’s tape or debris. Clean surfaces help create a strong seal and prevent leaks.
Apply Plumber’s Tape
Wrap plumber’s tape around threaded fittings. This tape seals the connection and stops water leaks. Wrap it clockwise to match the thread direction.
Attach The Supply Line To Faucet And Valve
Hand-tighten the supply line connectors to the faucet and water valve. Use a wrench to secure them gently. Avoid over-tightening to prevent damage.
Attach Supply Line To Faucet
Start by connecting the supply line to the faucet’s threaded end. Tighten the connection by hand, then secure it gently with a wrench. Ensure no leaks appear by checking the fit carefully.
Prepare The Faucet Connection
Start by cleaning the faucet’s connection point. Remove any dirt or old sealant. Check the threads on the faucet for damage. A clean, smooth surface helps create a tight seal. This step prevents leaks and ensures the supply line fits well.
Attach The Supply Line Nut
Take the supply line and align the nut with the faucet threads. Hand-tighten the nut to avoid cross-threading. Turn it clockwise until it feels snug. Do not use tools yet. Hand-tightening helps keep the connection straight and secure.
Tighten The Supply Line
Use an adjustable wrench to tighten the nut further. Turn it about a quarter to half a turn past hand-tight. Avoid overtightening. Too much force can damage the threads or cause leaks. Tighten just enough to make a firm seal.
After attaching the supply line, turn on the water supply slowly. Watch the connection point closely. Look for drips or moisture. If you see leaks, tighten the nut a bit more. Repeat the check until the connection stays dry.
Connect Supply Line To Shutoff Valve
Connecting the supply line to the shutoff valve is a key step in installing a kitchen faucet. This connection lets water flow from the main line to your faucet. It also allows you to turn off water when needed. Doing this step correctly ensures no leaks or water damage.
Follow these clear steps to make a secure connection between the supply line and shutoff valve. Use simple tools and check the parts carefully before starting.
Turn Off The Main Water Supply
Locate the main water valve and turn it off. This stops water flow to avoid spills. Open the faucet to drain any water left in the pipes. This step prevents water mess during the connection.
Prepare The Shutoff Valve
Check the shutoff valve for dirt or old tape. Clean the threads with a cloth. Wrap plumber’s tape around the valve threads. This tape helps create a tight seal and stops leaks.
Attach The Supply Line To The Valve
Hand-tighten the supply line nut onto the valve threads. Use a wrench to tighten it further, but do not over-tighten. A snug fit prevents leaks and keeps the connection secure.
Turn on the main water supply slowly. Open the shutoff valve and watch the connection point. Look for water drips or moisture. Tighten the connection more if needed to stop leaks.
Check For Leaks
Checking for leaks is an important step after installing a kitchen faucet supply line. It helps prevent water damage and costly repairs. A small leak can cause big problems over time. Take your time to inspect every connection carefully.
Turn on the water supply slowly. Watch the joints and fittings closely. Look for any drops or wet spots. Even a tiny drip matters. Fix leaks right away to keep your kitchen dry and safe.
Turn On Water Supply Slowly
Open the shutoff valves gently. This prevents sudden pressure that might cause leaks. Slowly increase the water flow. Keep an eye on the supply line as water moves through it.
Inspect All Connections
Check each connection point carefully. Look under the sink and around the faucet base. Use a dry cloth to spot wet areas quickly. Tighten any loose nuts or fittings you find.
Use A Dry Cloth To Detect Leaks
Wipe around the supply line and connections. A dry cloth catches moisture easily. If it becomes wet, you found a leak. This simple trick helps spot leaks early.
Fix Leaks Immediately
Tighten loose parts with a wrench, but don’t overtighten. Replace damaged washers or seals if needed. Test again after fixing. No leaks mean a job done well.
Credit: agad.gov.pl
Tips For Maintenance And Troubleshooting
Maintaining your kitchen faucet supply line helps keep it working well for a long time. Small issues can turn into big problems. Simple checks and quick fixes save time and money.
Regular care also prevents leaks and water damage. Knowing how to troubleshoot common problems makes repairs easier. This section shares easy tips for maintenance and troubleshooting.
Checking For Leaks Regularly
Look under the sink for any water drops or wet spots. Even small leaks waste water and can cause damage. Tighten connections if you see any drips. Replace damaged washers or seals promptly.
Cleaning Supply Line Connections
Dirt and buildup can block water flow or cause leaks. Use a soft cloth to clean the connections. Avoid harsh chemicals that damage rubber parts. Clean supply lines every few months to keep them clear.
Replacing Worn Or Damaged Parts
Parts wear out over time. Look for cracks, rust, or hardening in hoses. Replace any damaged supply lines immediately. Use parts that match your faucet model for a good fit and safe use.
Using The Right Tools For Repairs
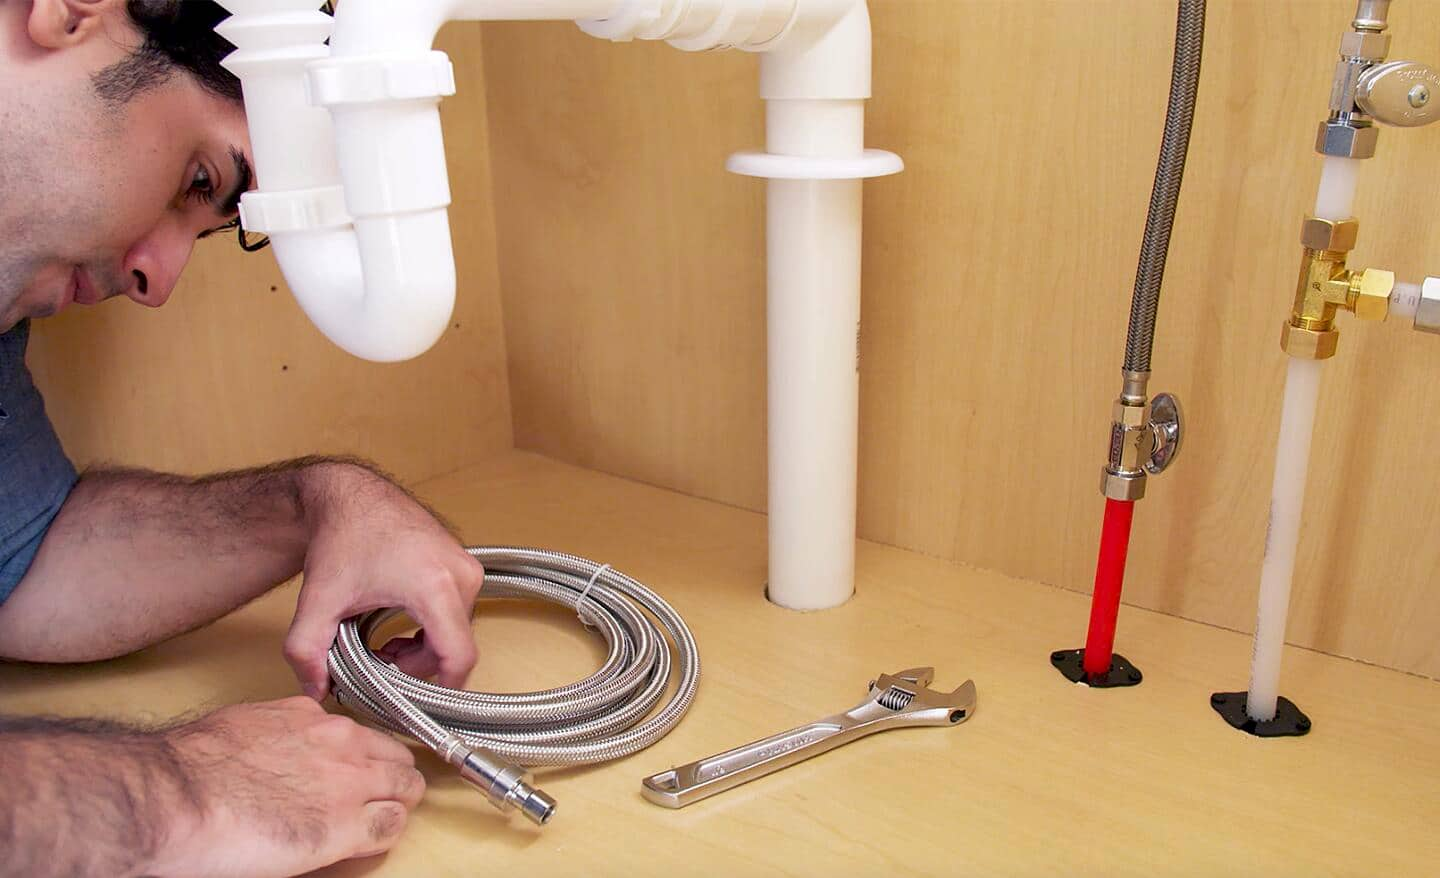
Use adjustable wrenches or pliers for tightening connections. Avoid over-tightening, which can damage fittings. Turn off the water supply before any repair work. Proper tools make jobs faster and safer.
Flushing The Supply Lines
Mineral buildup can clog lines. Remove supply lines and flush them with water. This clears debris and improves water flow. Do this once a year to keep water fresh and pipes clean.
Credit: www.homedepot.com
Frequently Asked Questions
How Do You Connect A Kitchen Faucet Supply Line?
To connect a kitchen faucet supply line, first turn off the water supply. Attach the supply line to the faucet and tighten by hand. Connect the other end to the shutoff valve and secure it with a wrench. Check for leaks before finishing.
What Tools Are Needed To Install A Supply Line?
You need an adjustable wrench, plumber’s tape, and a bucket. A flashlight helps for visibility. These tools simplify the installation and prevent leaks. Having the right tools ensures a smooth and secure kitchen faucet supply line setup.
How Long Does It Take To Install A Supply Line?
Installing a kitchen faucet supply line usually takes 15 to 30 minutes. Time varies based on experience and faucet type. Proper preparation and tools speed up the process. Always check connections for leaks before finishing installation.
Can I Reuse Old Supply Lines For My Faucet?
Reusing old supply lines is not recommended. Old lines may have wear or damage causing leaks. New supply lines ensure a secure and leak-free connection. Always replace supply lines during faucet installation for best results.
Conclusion
Installing a kitchen faucet supply line is a simple task anyone can do. Follow the steps carefully and take your time. Tighten connections to avoid leaks. Check for water flow and leaks before finishing. Use the right tools for best results.
This small project saves money and gives satisfaction. With patience, your kitchen will work smoothly again. Ready to fix or replace? Now you know how to install it right.