
You need calcium chloride to get the cheapest way to increase calcium hardness in your pool. A standard 10,000-gallon pool usually takes about 3 pounds of this solid chemical to raise levels by 10 parts per million. You can find it at big-box stores or pool supply shops for a few dollars per pound. This method works fast and costs far less than using liquid alternatives or calling a professional service.
The exact amount you need changes based on your water volume and how much the level is currently low. The type of chemical form you buy also shifts the price slightly. Your local weather and water source might affect how quickly the number drops again after you add it.
How to cheapest increase calcium hardness for pools
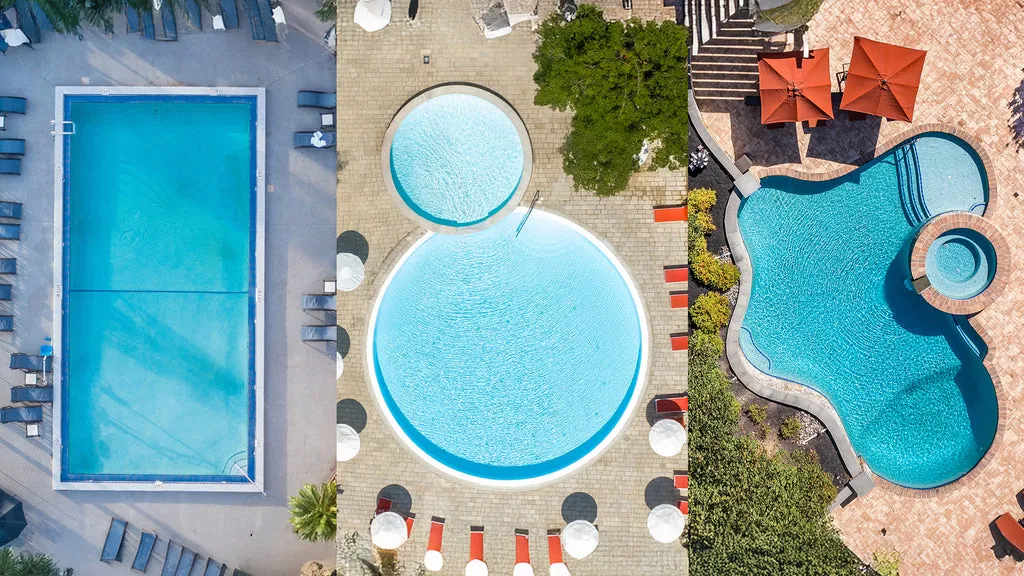
This page helps homeowners with standard residential swimming pools who want to fix low calcium levels without hiring a pro. You likely have a vinyl liner, fiberglass shell, or concrete pool that holds between 15,000 and 40,000 gallons of water. You already own basic test strips or a liquid test kit and know your current hardness reading is below 200 ppm.
Another reader here might be a new pool owner who just tested their water and saw a “low” warning on their app. They don’t yet know which chemicals to buy or how to calculate the dose. This guide gives them the exact math and product names they need to act today.
This article doesn’t serve commercial pool managers running large complexes or spas with special filtration systems. Those setups often have different safety rules and equipment needs. We assume you’re working with a typical backyard pool where you can safely walk around the edge and pour chemicals directly into the skimmer or near a return jet.
What moves the hardness number
Your pool’s total water volume is the biggest factor in how much chemical you must buy. A small plunge pool needs only a fraction of the powder required for a large family lap pool. If you guess the size wrong, you’ll either waste money or fail to fix the problem. Check your pool manual or measure the length, width, and average depth to get the real gallon count.
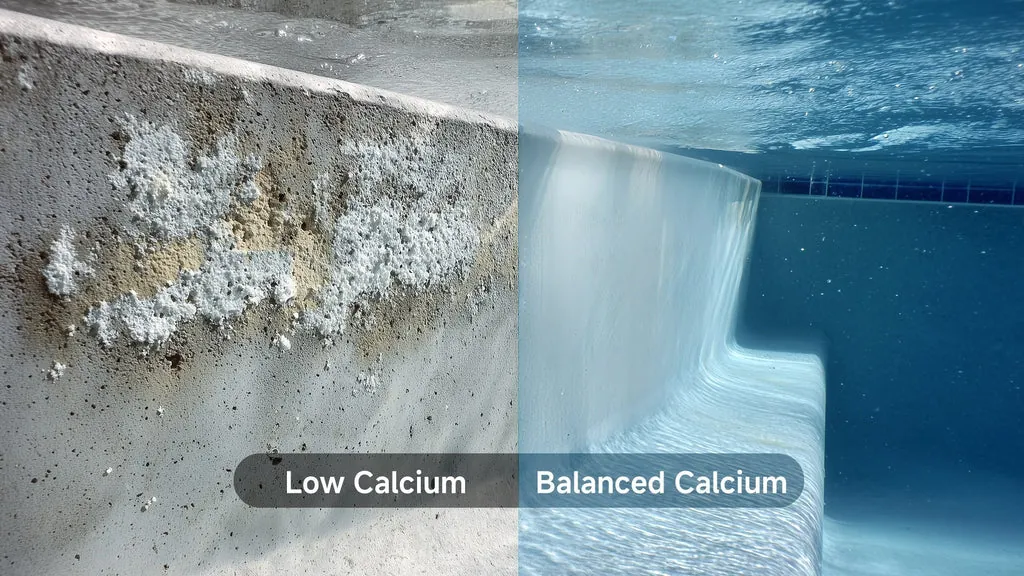
The starting hardness level decides how many pounds you need to reach the safe zone. Water that sits at 50 ppm needs three times more product than water sitting at 150 ppm to hit the same target. Most experts recommend keeping levels between 200 and 400 ppm for most pool types. If your water is below 150 ppm, you risk damaging plaster surfaces or corroding metal parts.
The form of calcium you choose affects both cost and speed. Solid calcium chloride pellets dissolve faster and are cheaper per unit of hardness than liquid versions. Some brands sell bags with fillers that make them seem larger but contain less active ingredient. Always check the label for the percentage of pure calcium chloride before you buy.
One thing people get wrong most often is adding too much at once. Pouring a huge bag into one spot can burn a hole in a vinyl liner or cloud the water for days. It’s better to split the dose and let the pump run overnight. The National Swimming Pool Foundation suggests adding no more than 100 ppm in a single day to avoid shocking the system.
How to add calcium safely
First, test your water to find the exact current hardness level in parts per million (ppm). Use a reliable liquid test kit rather than cheap strips, as strips often give wide ranges that lead to guessing errors. Write down the number so you can calculate the correct dose later.
Next, figure out your pool’s total water volume in gallons. Multiply the length by the width by the average depth, then multiply that result by 7.5 if your pool is rectangular. For irregular shapes, use an online pool volume calculator from a trusted manufacturer like Pentair to get an accurate number.
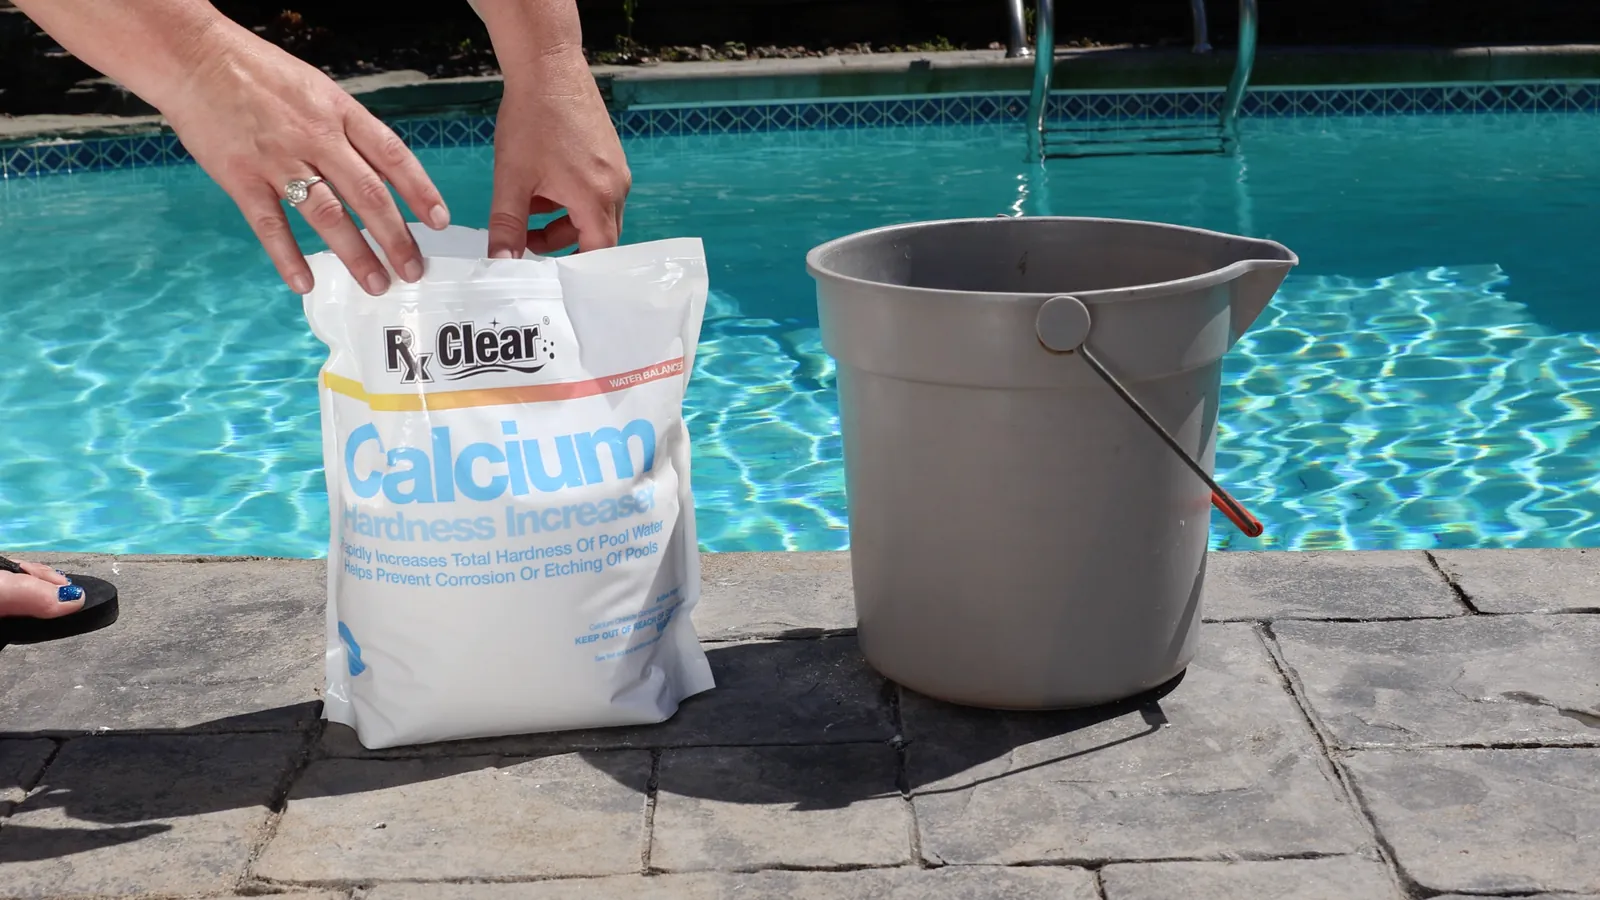
Buy food-grade or pool-grade calcium chloride in solid pellet or flake form. Avoid the liquid version unless you can’t carry heavy bags, as solids cost less per unit of hardness. Look for bags labeled specifically for swimming pools to ensure they don’t contain impurities that cloud the water.
Dissolve the chemical in a bucket of pool water before pouring it into the pool. Never throw dry pellets directly into the water, as they can sink and damage the bottom surface or liner. Stir the bucket until the granules disappear completely, which usually takes 10 to 15 minutes.
Pour the solution slowly near a return jet while the pump is running. Aim the stream toward the strong water flow so it mixes quickly throughout the entire pool. Don’t pour it near the skimmer, as the concentrated solution could settle and cause stains.
Run your circulation pump for at least 6 hours after adding the chemical. This ensures the calcium spreads evenly and prevents high spots that could damage equipment. Wait 24 hours before testing the water again to see if the level has reached your target range.
The key judgment call here is knowing when to stop adding more. If your first dose brings the level close to 200 ppm, wait a full day before considering a second dose. Adding too much too fast creates cloudy water and makes it hard to balance other chemicals like pH and alkalinity.
Quick comparison of options
| Situation | Best Action | Time & Cost | Watch For |
|---|---|---|---|
| Low budget, large pool | Buy bulk solid pellets | Cheap, 20 min prep | Dissolve fully first |
| Small pool, quick fix | Use pre-measured tablets | Moderate cost, 5 min | Over-dosing risk |
| Plaster pool surface | Solid calcium chloride | Lowest cost, 1 hour | Cloudy water initially |
| Very low hardness (<50) | Split dose over two days | Same cost, safer | Corrosion if delayed |
| Hard to reach area | Hire a pro for delivery | High cost, 0 effort | Service fees vary |
Details pros get right
Preparation and mixing
Experienced pool owners always dissolve calcium chloride in a plastic bucket before adding it to the pool. They never pour dry chemicals directly into the water because the heat generated during dissolution can crack concrete or melt vinyl liners. They also wear gloves and eye protection to avoid skin irritation from the dust.
Beginners often skip the dissolving step to save time, thinking the water will mix it on its own. This mistake leads to white spots on the pool floor or permanent damage to the surface. The proper way takes only 15 minutes but saves hundreds of dollars in repairs. Always stir until the water looks clear and no grains remain at the bottom.
Timing and circulation
Pros run their pumps continuously for several hours after adding the chemical to ensure even distribution. They check the flow rate to make sure the water is moving fast enough to carry the solution away from the entry point.
New owners often turn off the pump immediately after pouring, assuming the job is done. This causes the chemical to settle in one area, creating a hot spot that can stain or etch the surface. The pump must run long enough to circulate the entire volume of water at least once. A good rule is to run it for the time it takes to turn over the whole pool volume.
Common problems and fixes
| What you notice | What it usually means | What to do first | How to stop it happening again |
|---|---|---|---|
| White spots on floor | Undissolved pellets settled | Brush area gently | Always dissolve in bucket |
| Cloudy water after add | Too much added at once | Run filter 24 hours | Split dose over two days |
| Stained tiles or liner | Chemical touched surface | Rinse with hose | Pour near return jet only |
| No change in test | Wrong calculation used | Re-test and recalc | Measure volume accurately |
| Equipment corrosion | Levels still too low | Add more gradually | Maintain 200-400 ppm range |
Dropping dry pellets straight into the skimmer basket is a common mistake. The concentrated brine eats through plastic housings within a single season.
Always use a five-gallon bucket filled from the pool itself. Stir until every grain disappears before pouring the solution around the perimeter.
Cloudiness happens when calcium bonds with carbonate already present in your water. This occurs fastest when the temperature and pH are high.
If your pool holds more than ten thousand gallons, never add the full calculated amount on a single afternoon. Half today and half tomorrow keeps the water clear.
Stains set permanently on vinyl liners if left overnight. A quick rinse immediately after pouring prevents the chemical from burning through the material.
Pour slowly directly in front of the return jet while the pump runs. The current pulls the solution away from walls instantly.
Test strips read falsely high right after a fresh addition. Wait four hours of circulation before trusting any color change on the pad.
Rules and limits to follow
The recommended calcium hardness range for most pools is 200 to 400 ppm according to industry standards. Going below 150 ppm risks corroding metal ladders, heaters, and plaster surfaces. Exceeding 500 ppm can cause scaling on walls and reduce heater efficiency. These limits apply to all common pool types including vinyl, fiberglass, and concrete.
Local health departments may have stricter rules for public or semi-public pools. Always check your county or city health code if you operate a pool that others use. Residential pools usually follow general guidelines, but some areas require specific testing frequencies or record-keeping.
If your pool has a saltwater generator, you must keep hardness above 200 ppm to protect the cell. Salt systems work best within the standard range, and low calcium can shorten the life of expensive components. Consult your manufacturer’s manual for any model-specific requirements before adjusting levels.
Real cost breakdown
The cheapest option is buying a 50-pound bag of solid calcium chloride pellets for about $25 to $35. This covers roughly 50,000 gallons needing a 10 ppm boost, making the cost under $1 per 10,000 gallons. Prices vary by brand and location, so compare unit prices on store shelves or online catalogs.
Liquid calcium chloride costs about twice as much per unit of hardness because you pay for the water weight. A 5-gallon jug might cost $40 but deliver less actual calcium than a smaller bag of solids. Unless you have mobility issues or no storage space, solids are always the budget choice.
Labor costs rise if you hire a service technician to handle the addition. Most companies charge a minimum visit fee plus a per-pound markup on chemicals. Doing it yourself saves this extra expense entirely, provided you follow safety steps correctly.
Maintaining steady levels
Check your calcium hardness every two weeks during the swimming season. Rain, splash-out, and backwashing naturally lower the level over time, so regular testing keeps you ahead of problems. Keep a log of readings to spot trends before they become emergencies.
When levels drop below 200 ppm, add another small dose of calcium chloride. Don’t wait until the number hits zero, as that invites corrosion and equipment failure. A slow, steady approach prevents sudden spikes that cloud the water or strain your filter. If your pool is plastered, aim for 250 to 400 ppm; if it’s vinyl or fiberglass, stay between 150 and 250 ppm. Exceeding these ranges in soft-surface pools causes scaling that’s difficult to remove without damaging the surface.
Replace your test kit reagents annually to ensure accurate readings. Old chemicals give false results that lead to wrong decisions. Store your calcium chloride in a cool, dry place inside its original sealed bag to prevent clumping or moisture absorption.
Never pour undissolved granules directly into the skimmer or return jets, as this creates concentrated pockets that etch the plumbing. Instead, dissolve the chemical in a bucket of water first, then broadcast it slowly around the deep end while the pump runs. This simple step protects your heater and pipes from localized damage that costs thousands to repair.
When not to use this method
Don’t use calcium chloride if your pool already has hardness above 400 ppm. Adding more will cause scaling on surfaces and clog filters, requiring expensive cleaning or replacement. In this case, you must partially drain and refill the pool with softer water instead.
Test the fill water before you drain anything. If your hose water already measures 350 ppm, a partial refill barely moves the needle. You’ll waste hundreds of gallons for a negligible drop in hardness.
Avoid this method if you have a spa or hot tub with very small water volume. The concentration changes too fast, and the heat accelerates reactions that can damage seals or jets. Spas often need specialized balancing products designed for their unique chemistry.
A standard 400-gallon spa requires roughly one-tenth the dose meant for a pool. Pouring from the same bucket you use outdoors easily overshoots the target by double.
If your water source is extremely soft or acidic, you may need to adjust pH and alkalinity first. Adding calcium to unbalanced water can create precipitates that cloud the pool instantly. Fix the overall balance before tackling hardness alone.
Bring total alkalinity into the 80 to 120 ppm range first. Calcium added below that threshold frequently falls out of solution as white dust.
Related guides
Frequently asked questions
Can I use table salt to raise calcium?
No, table salt contains sodium chloride, not calcium chloride. Adding salt won’t increase hardness and may harm your pool equipment or liner. Only use products specifically labeled for raising calcium hardness in pools.
How long does it take to work?
Solid calcium chloride dissolves and mixes within 6 to 8 hours of pump runtime. You should see results on your next test after waiting 24 hours. Liquid versions mix faster but cost more and may not last as long.
Is it safe for vinyl liners?
Yes, if dissolved properly in a bucket first. Dry pellets touching a vinyl liner can cause melting or holes due to heat release. Always follow the dissolving step to protect your pool surface.
What happens if I add too much?
High calcium levels cause white scale buildup on walls, floors, and equipment. It reduces heater efficiency and makes water look cloudy. You may need to drain part of the pool to bring levels back down.
Does rain affect calcium hardness?
Rain dilutes pool water and lowers hardness over time. Heavy storms can drop levels significantly, especially in smaller pools. Test after major rainfall and adjust as needed.
How often should I test?
Test calcium hardness every two weeks during warm months. Rain, evaporation, and usage change levels regularly. Monthly checks aren’t enough to catch drops before damage occurs.
Does it matter what brand I buy?
Yes, some brands include fillers that reduce active ingredient content. Check the label for the percentage of pure calcium chloride. Food-grade or pool-grade products work best and cost less in the long run.
Start with these steps
Buy a bag of solid calcium chloride pellets and a liquid test kit today. Dissolve the correct amount in a bucket of pool water before pouring it near a return jet while the pump runs.