
Got a crack in your wall? Don’t worry, you’re not alone.
It’s a common problem, and the good news is, you probably don’t need to call a contractor. That’s right, you can tackle this yourself and save some money. Think about it: that unsightly crack is just sitting there, bothering you every time you look at it.
But what if you could make it disappear, and feel a real sense of accomplishment doing it? This guide will show you exactly how. We’ll break it down into simple steps, so you can feel confident and get your walls looking smooth and new again. Ready to take control and fix that crack yourself? Let’s get started.
Credit: stoneveneerrepairexperts.com
Tools And Materials
Gathering the right tools and materials makes wall crack repair easy. You need specific items for a smooth job. This ensures a professional finish. Let’s look at what you’ll need.
Essential Tools
You need a putty knife. A utility knife is also useful. A sanding block helps too. A dust mask protects your lungs. Safety glasses are a must. A clean cloth is handy. A small paintbrush is good.
Types Of Fillers
Choose the right filler for your crack. Spackle is for small holes. Joint compound works for larger cracks. Some fillers are pre-mixed. Others require mixing with water. Read the product label carefully. Match the filler to your wall type.
Finishing Supplies
Primer is important. Paint matches your wall color. A paint tray holds your paint. A roller covers large areas. A brush gets into corners. Drop cloths protect your floor. Newspaper works too.
Assessing The Crack
Before you grab a tool, take a close look. Understanding the crack is key. It guides your repair. This step saves time. It prevents bigger problems.
Identifying Crack Types
Not all cracks are the same. Some are hairline. Others are wide. Some run straight. Some zig-zag. Hairline cracks are often cosmetic. Wider cracks need more care. Diagonal cracks can signal issues. Look closely at the pattern.
Determining Severity
How deep is the crack? Can you fit a coin inside? If it’s shallow, it’s minor. If it’s deep, it’s serious. Are there many cracks? Do they form a pattern? A single, small crack is easy. Multiple, large cracks are different. Watch for crumbling plaster. This means a bigger problem.
When To Call A Pro
Some cracks are beyond DIY. Cracks that go through the wall are bad. Cracks near doors or windows are concerning. If you see sagging walls, call for help. Structural issues need experts. Water damage can cause cracks. These need professional attention. Trust your gut feeling. When in doubt, ask an expert.
Preparing The Wall
This step is very important. Good preparation makes the repair last. It ensures a smooth, professional finish. You are setting the stage for success.Cleaning The Area
First, you must clean the area. Dust and dirt hide in cracks. These particles prevent adhesion. Use a soft brush or cloth. Wipe the crack thoroughly. Remove all loose dirt. A clean surface is key.Widening Small Cracks
Small cracks need attention. They might be too narrow. They can trap air. This weakens the patch. Use a utility knife. Carefully widen the crack slightly. Make it a V-shape. This creates space for filler. It helps the filler grip.Removing Loose Debris
Now, remove loose bits. Old paint can flake off. Plaster might crumble. These pieces do not stick. They will fall out later. Use a putty knife. Scrape away all loose material. Get down to solid plaster. Ensure the crack is stable. This makes the repair strong.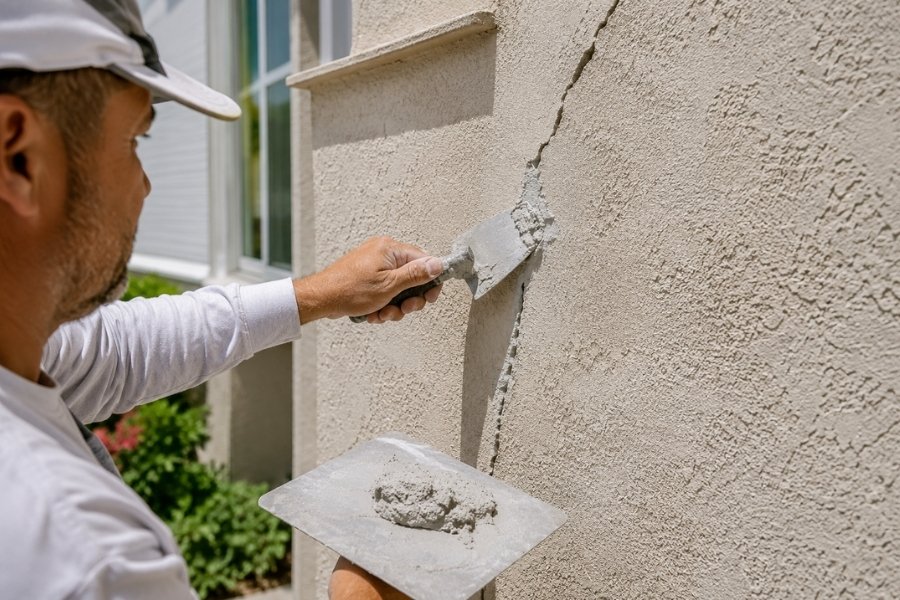
Credit: royalbuildernyc.com
Filling Small Cracks
Fixing small wall cracks yourself is easy. You’ll need spackle or joint compound. Simply apply it to the crack, smooth it, and let it dry.
Small cracks are common. They appear in many walls. Filling them is an easy DIY task. You do not need a professional. This section guides you through it.Using Spackle
Spackle is your best friend. It is a lightweight filler. It dries fast. You can buy it at any store. It comes in a tub or tube. For tiny cracks, a tube is fine. For many cracks, a tub is better.Applying With A Putty Knife
Open the spackle container. Get a small amount on your putty knife. A putty knife is a flat tool. It has a handle. Scoop a little spackle. Hold the knife at an angle. Press it into the crack. Scrape away extra spackle. Make the surface flat.Smoothing The Surface
The spackle should be level. It should match the wall. Gently scrape again. Use the edge of the knife. Feather the edges of the spackle. This blends it with the wall. The crack should disappear. Let the spackle dry completely. It will shrink a little. You may need a second coat. Apply it thinly. Smooth it again.Repairing Larger Cracks
Larger cracks need more filler. Apply it generously. Smooth it flat. Let it dry completely.
Big cracks need a different approach. Small cracks are simple. Large cracks require more effort. You can still fix them yourself. No contractor needed. This section guides you. You will learn to tackle these bigger issues.Choosing The Right Filler
Applying With A Trowel
Using Mesh Tape
Layering The Filler
Credit: backsplashrepairexperts.com
Sanding And Smoothing
Sanding and smoothing are crucial steps. They make your repair invisible. This process blends the patch with the wall. It ensures a professional look. You will not see the crack anymore.
Choosing Sandpaper Grit
Select the right sandpaper. Fine-grit sandpaper is best. Use 120-grit for initial work. Then move to 220-grit. This grit is for final smoothing. Coarser grits can damage the wall. They leave visible scratches. Always start with finer grits.
Sanding Technique
Sand gently. Use light pressure. Move the sandpaper in circles. This creates an even surface. Sand only the patched area. Extend sanding slightly beyond it. Feather the edges of the patch. This helps blend it in. Stop sanding when smooth. Feel the surface with your hand.
Achieving A Seamless Finish
Dust off all debris. A clean surface is vital. Apply a second thin coat. Let it dry completely. Then, sand again lightly. Use your 220-grit paper. The goal is a perfectly smooth wall. The patch should disappear. The repair should be undetectable. Your wall will look like new.
Priming And Painting
Priming and painting are the final steps. They make your wall repair invisible. This is where the magic happens. Your wall will look like new again. Get ready to see the finished result.
Applying Primer
Primer is very important. It seals the patched area. It helps paint stick better. It stops stains from showing through. Use a good quality primer. Apply it with a brush or roller. Cover the entire repaired spot. Let it dry completely. This may take a few hours. Check the primer can for drying times. A smooth surface is key.
Matching Paint Color
Finding the right paint color matters. You want a perfect match. Look at your existing wall paint. Take a small chip to the store. Paint stores can match your color. They use a special machine. This ensures an exact match. If you don’t have a chip, check a hidden spot. A closet wall is often a good place. Even a small difference looks bad. Get the same paint finish too. Matte, eggshell, or satin. This is crucial for a seamless look.
Painting The Repaired Area
Now, paint the patched area. Use a small brush for detail. Dab the paint on carefully. Feather the edges outward. This blends the new paint. It hides the repair line. Apply a second coat if needed. Let each coat dry fully. You might need to paint a larger section. This helps the repair disappear. Blend into the surrounding wall. A light touch works best. Your wall repair is now hidden. Enjoy your smooth, perfect wall.
Preventing Future Cracks
Stopping future wall cracks is key. Seal existing ones properly. This stops water from getting in. Then, your walls stay strong.
Fixing wall cracks is great. But stopping them from coming back is even better. Learn how to keep your walls strong. Prevent new cracks before they start.Controlling Humidity
High humidity causes problems. It makes walls expand and contract. This leads to cracks. Use a dehumidifier. It removes extra moisture. Vent bathrooms and kitchens well. Ensure your dryer vents outside. Fix any leaky pipes quickly. These steps keep walls stable.Addressing Structural Issues
Sometimes cracks signal bigger problems. Foundation settling is common. Poorly installed windows can cause stress. Check your home’s structure. Look for uneven floors. Notice doors that stick. Get professional help for these. Structural repairs stop deep cracks. They protect your home’s integrity.Regular Wall Maintenance
Small cracks need attention. Check walls often. Fill tiny cracks as they appear. Use caulk or spackle. This prevents water entry. Keep paint in good condition. A good paint coat protects walls. It acts as a barrier. Consistent care prevents major damage. Your walls will look better. They will last longer too.Frequently Asked Questions
What Tools Do I Need For Wall Crack Repair?
You’ll need a putty knife, spackle or joint compound, sandpaper, and a primer and paint. A caulk gun and caulk might also be useful.
How Do I Prepare The Wall For Repair?
Clean the crack area thoroughly. Remove any loose paint or debris. This ensures good adhesion for the repair material.
Can I Fix Large Wall Cracks Myself?
Yes, with the right approach. For larger cracks, you may need mesh tape or a reinforcing fabric. This adds strength to the repair.
How Long Does Wall Crack Repair Take?
Most small repairs take a few hours. This includes drying time between coats. Larger jobs might need a full day.
What’s The Best Filler For Wall Cracks?
Spackle is good for small hairline cracks. Joint compound works well for bigger ones. Choose based on your crack size.
How Do I Paint Over A Repaired Crack?
Once dry, sand the area smooth. Apply a coat of primer first. Then, paint with your wall’s color.
When Should I Call A Professional For Cracks?
Call a pro for very wide cracks. Or if you see structural damage. If the cracks keep coming back, get help.
Conclusion
Fixing wall cracks is manageable. You can do it yourself. Save money on repairs. Gather your tools and materials. Follow the steps carefully. Fill small cracks with spackle. Larger cracks need joint compound. Sand smooth when dry. Paint to match your wall.
Your walls will look great. You did a good job.