
Are your oak kitchen cabinets looking tired or outdated? Painting them can completely transform your kitchen without the cost of a full remodel.
But if you’ve never painted cabinets before, you might wonder where to start or how to get a smooth, lasting finish. This guide will walk you through each step, making the process simple and manageable for you. By the end, you’ll have the confidence and know-how to give your cabinets a fresh, stylish new look that brightens your entire kitchen.
Ready to see how easy it can be? Let’s dive in!
Choosing The Right Paint
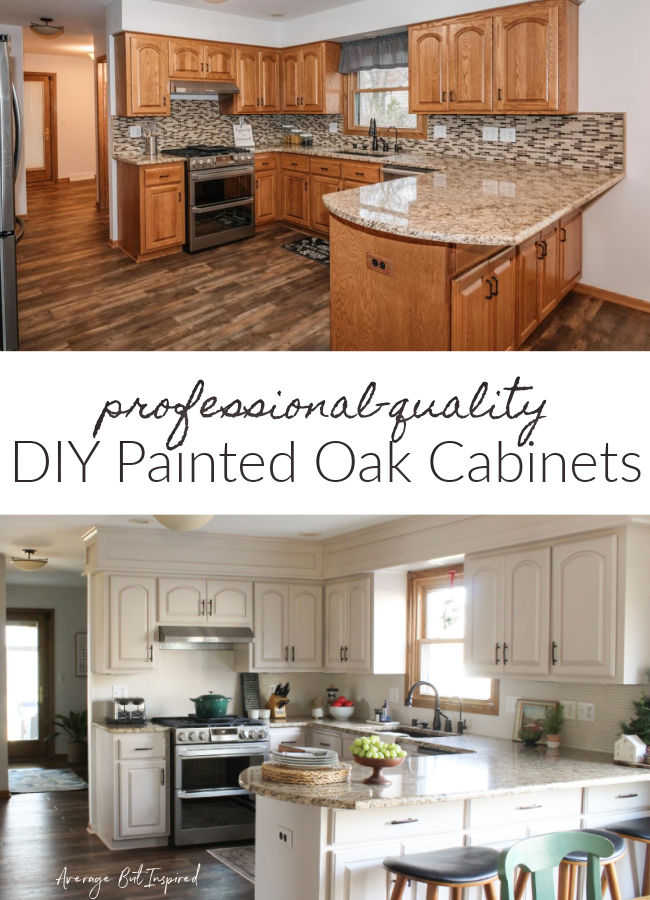
Choosing the right paint is a key step in painting oak kitchen cabinets. The right paint protects the wood and gives a smooth, lasting finish. It also highlights the beauty of oak while covering any old stains or marks. Picking the right paint type, color, and finish helps you get the best results and keeps your kitchen looking fresh for years.
Types Of Paint For Cabinets
Use paint made for cabinets or furniture for the best results. Acrylic latex paint is popular because it dries quickly and cleans easily with soap and water. Oil-based paint is strong and durable but takes longer to dry. It also gives a smoother finish on wood surfaces. Consider using a primer first to help the paint stick better and last longer.
Selecting The Perfect Color
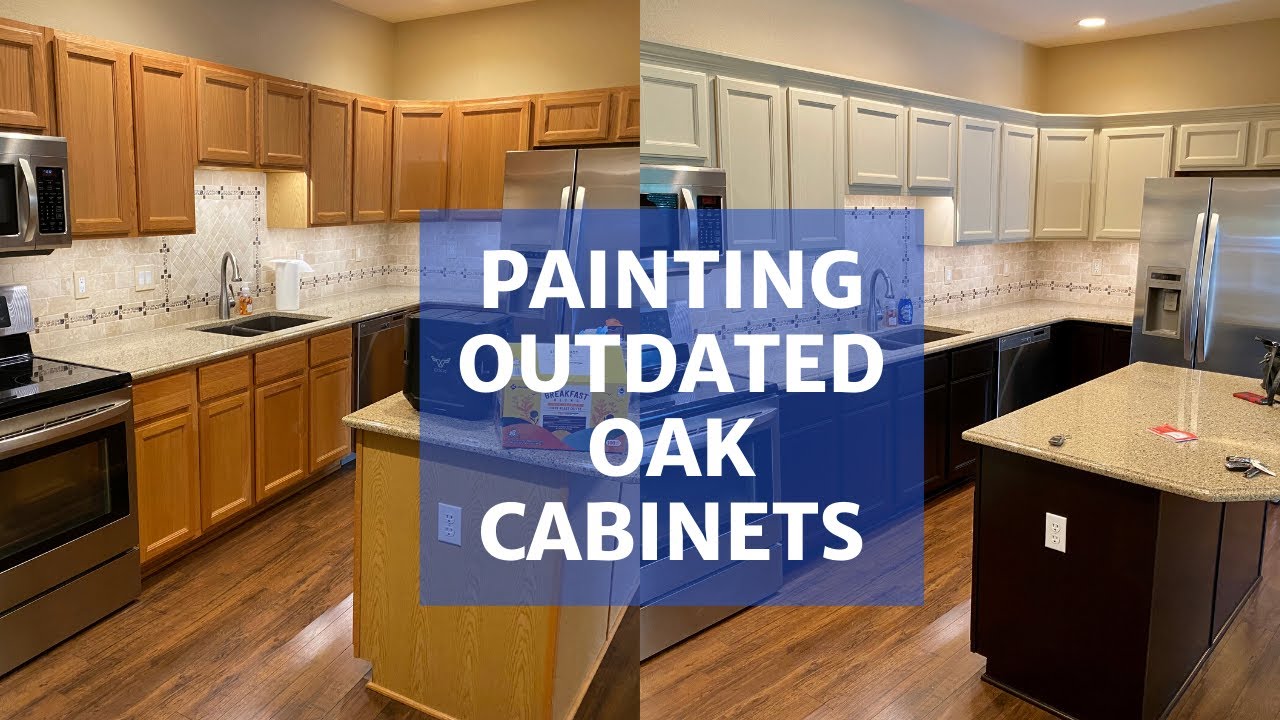
Choose a color that matches your kitchen style and lighting. Lighter colors like white or cream make small kitchens feel bigger. Dark colors add drama and work well in large spaces. Soft blues and greens bring a calm feeling. Test paint samples on a small area before painting all cabinets.
Paint Finish Options
Cabinet paint comes in different finishes. Satin finish has a soft shine and hides fingerprints well. Semi-gloss finish is shiny and easy to clean, perfect for busy kitchens. Matte finish has no shine but can show marks more easily. Pick a finish that fits your kitchen’s use and style.
Credit: averageinspired.com
Gathering Essential Tools
Before painting oak kitchen cabinets, gather the right tools. Having everything ready saves time and effort. It also helps achieve a smooth, long-lasting finish.
This section lists essential supplies and safety gear. Use these tools to get the best results and protect yourself.
Must-have Painting Supplies
Start with quality paint designed for wood surfaces. Choose a primer to prepare the oak for better paint adhesion. Sandpaper or sanding blocks help smooth the cabinet surfaces. Use painter’s tape to protect edges and hardware. A good brush or foam roller ensures even paint application. Drop cloths keep your workspace clean from spills and drips. A putty knife and wood filler fix any dents or holes before painting. Clean rags or tack cloths remove dust after sanding. A paint tray helps manage paint without mess.
Safety Equipment To Use
Wear a dust mask during sanding to avoid breathing wood particles. Safety goggles protect your eyes from dust and paint splashes. Gloves keep your hands clean and safe from chemicals. Use good ventilation or a fan to reduce paint fumes indoors. Dress in old clothes or a protective apron to avoid stains.
Preparing Oak Cabinets
Preparing oak kitchen cabinets is the first step to a fresh, beautiful finish. Proper preparation helps the paint stick and last longer. It also smooths the wood surface and removes dirt or grease. Taking time to prepare ensures a professional-looking result.
Cleaning And Degreasing
Start by cleaning the cabinets thoroughly. Use warm water with a mild detergent. Scrub gently with a soft cloth or sponge. Pay attention to corners and edges where grease builds up. Rinse with clean water and dry completely.
For stubborn grease, use a degreaser or a mixture of vinegar and water. Avoid harsh chemicals that can damage the wood. Cleaning removes oils that stop paint from adhering properly.
Removing Hardware And Doors
Remove all cabinet hardware like knobs, handles, and hinges. Use a screwdriver and keep the screws in a safe place. Take off cabinet doors and drawers to make painting easier. This step also prevents paint from getting on hardware.
Label doors and drawers to remember their places. This saves time when reassembling. Removing parts gives better access to all cabinet surfaces.
Sanding Techniques For Oak
Lightly sand the oak surfaces to roughen the finish. Use fine-grit sandpaper, around 150 to 220 grit. Sand in the direction of the wood grain to avoid scratches. Focus on glossy areas and edges for even paint coverage.
After sanding, wipe away dust with a damp cloth. Sanding helps the paint stick and smooths out imperfections. Avoid heavy sanding that can damage the wood texture.
Priming Your Cabinets
Priming your oak kitchen cabinets is a vital step before painting. It helps the paint stick better and last longer. Proper priming also hides wood grain and prevents stains from bleeding through. Taking time to prime correctly ensures a smooth and even finish on your cabinets.
Choosing The Right Primer
Select a primer made for wood surfaces. Look for a stain-blocking primer to stop tannins from oak. Oil-based or shellac primers work best for oak cabinets. They seal the wood well and provide a strong base for paint. Avoid water-based primers; they may not block stains fully.
Applying Primer Correctly
Start with clean, sanded cabinets. Use a high-quality brush or foam roller for even coverage. Apply thin, smooth coats to avoid drips and brush marks. Cover every corner and edge carefully. Let the first coat dry, then sand lightly for a smooth surface. Apply a second coat for full coverage.
Drying And Curing Time
Allow the primer to dry completely before painting. Drying usually takes 1 to 2 hours. Curing time is longer, about 24 hours, to harden fully. Avoid rushing this step. Proper curing helps paint stick well and prevents peeling later.
Painting Process
Painting oak kitchen cabinets takes patience and the right steps. The painting process transforms old wood into a fresh, modern look. It starts with cleaning and sanding the surface to remove the old finish and create a smooth base. Choosing the right painting method affects the final result. Applying the paint evenly and in layers ensures a durable finish. Avoiding common mistakes saves time and keeps the cabinets looking great.
Brush Vs. Spray Painting
Brush painting gives control and works well for detailed areas. It can leave brush marks if not done carefully. Spray painting creates a smooth, even coat quickly. It requires extra prep to protect nearby surfaces. Spraying works best for large, flat cabinet doors. Choosing between brush or spray depends on your tools and skill level.
Applying Multiple Coats
Applying several thin coats is better than one thick coat. Thin coats dry faster and avoid drips. Let each coat dry fully before the next. Sand lightly between coats for a smooth finish. Two to three coats usually give full coverage and color depth. Patience during this step improves the cabinet’s look and durability.
Avoiding Common Painting Mistakes
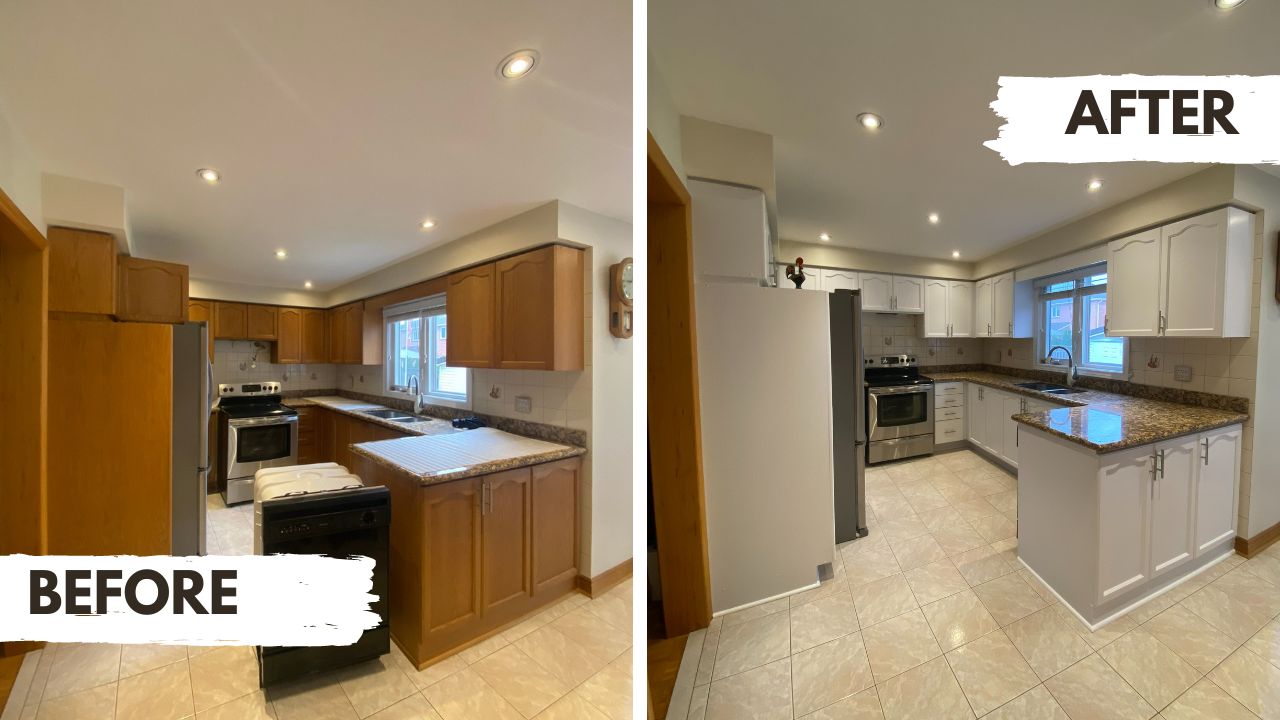
Skipping sanding leads to peeling paint. Not cleaning the surface causes poor paint adhesion. Applying paint too thick causes drips and uneven texture. Painting in a dusty area traps debris in the paint. Rushing the drying time creates sticky or cracked paint. Avoid these errors for a professional, long-lasting finish.
Credit: www.paintmycabinets.ca
Finishing Touches
Finishing touches make your painted oak kitchen cabinets look complete and professional. These final steps protect your work and restore your kitchen’s functionality. Take time with each part to ensure the best results.
Sealing And Protecting Painted Cabinets
Use a clear sealer to protect the paint from scratches and stains. Choose a water-based polyurethane for easy cleanup and low odor. Apply thin, even coats with a brush or foam applicator. Let each coat dry fully before adding the next. Two or three coats offer strong protection. Avoid heavy layers to keep the surface smooth.
Reattaching Hardware And Doors
Wait until the paint and sealer are completely dry. Reinstall cabinet doors carefully to avoid chipping paint. Tighten screws but do not overtighten to prevent damage. Clean hardware with a soft cloth before reattaching. Check that doors open and close smoothly. Adjust hinges if needed for proper alignment.
Cleaning Up After Painting
Dispose of used brushes and rags safely. Wipe down any paint drips or spills immediately. Clean your workspace thoroughly to prevent dust on fresh paint. Store leftover paint in a sealed container for touch-ups. Wash your hands and tools with warm, soapy water. Keep the room ventilated until all odors fade.
Maintenance Tips
Maintaining your painted oak kitchen cabinets keeps them looking fresh and beautiful. Regular care helps protect the paint and extends the life of your cabinets. Small actions make a big difference in preserving the finish and color.
Cleaning Painted Cabinets
Use a soft cloth or sponge for cleaning. Avoid abrasive scrubbers that can damage the paint. Mild soap mixed with warm water works well. Wipe gently to remove dirt and grease. Dry the surface with a clean cloth. Clean spills quickly to prevent stains. Regular cleaning stops buildup and keeps cabinets bright.
Repairing Minor Paint Damage
Small chips or scratches happen over time. Use a matching paint touch-up pen or small brush. Lightly sand the damaged area before painting. Apply paint in thin layers for a smooth finish. Let the paint dry completely before touching. This simple fix stops damage from spreading. Keep your cabinets looking new longer with quick repairs.
Credit: www.youtube.com
Frequently Asked Questions
How Do I Prep Oak Cabinets For Painting?
Start by cleaning the cabinets thoroughly to remove grease and dirt. Sand the surface lightly to create a smooth base. Remove dust with a tack cloth. Apply a high-quality primer to ensure better paint adhesion and durability.
What Type Of Paint Is Best For Oak Cabinets?
Use a durable, water-based acrylic or latex paint for oak cabinets. These paints provide a smooth finish and resist chipping. Semi-gloss or satin finishes are ideal for kitchens due to their easy cleaning properties.
How Many Coats Of Paint Are Needed On Oak Cabinets?
Typically, two to three coats of paint are necessary. The first coat provides coverage, while additional coats ensure an even, rich color. Allow each coat to dry completely before applying the next one to prevent streaks.
Should I Remove Cabinet Doors Before Painting?
Yes, removing cabinet doors makes painting easier and neater. It allows for better access to all surfaces and prevents paint drips on surrounding areas. Label doors and hinges to reassemble them correctly after painting.
Conclusion
Painting oak kitchen cabinets can brighten your space and update your kitchen. Follow each step carefully for smooth, lasting results. Take your time sanding and priming to avoid peeling paint. Choose the right paint for durability and easy cleaning. Remember, patience and preparation make a big difference.
Enjoy the fresh, new look of your kitchen cabinets. Your effort will pay off in a beautiful, refreshed kitchen. Ready to start your painting project?