
Are you dreaming of a kitchen island that not only looks great but also makes your daily chores easier? Imagine having a sink and dishwasher right in your island, so you can prep, cook, and clean without moving around too much.
Building a kitchen island with these features might sound tricky, but with the right steps, you can create a stylish and functional centerpiece for your kitchen. You’ll discover simple, clear instructions to help you build your own kitchen island with a sink and dishwasher.
Ready to transform your kitchen and make your life more convenient? Let’s get started!

Credit: www.laurysenkitchens.com
Planning Your Kitchen Island
Planning your kitchen island is the first step to a functional and beautiful space. It needs careful thought to fit your kitchen’s flow and your daily needs. A well-planned island adds value and convenience.
Choosing The Right Location
Place the island where it does not block traffic. It should allow easy movement around the kitchen. Keep it near plumbing lines for the sink and dishwasher. Ensure enough space for opening dishwasher and cabinet doors. The island should be central but not in the way.
Measuring Space And Dimensions
Measure your kitchen area carefully. Leave at least 36 inches around the island for walking. The island should be wide enough for the sink and dishwasher. Also, plan space for countertop work and seating. Correct measurements avoid crowding and improve usability.
Selecting Materials And Style
Choose materials that match your kitchen style and resist water damage. Solid wood, granite, or quartz are good choices. Pick a style that blends with cabinets and appliances. Durable materials keep your island looking fresh for years. A simple design often works best in busy kitchens.

Credit: www.youtube.com
Designing The Sink And Dishwasher Setup
Designing the sink and dishwasher setup is a key step in building a kitchen island. It affects how you use the space daily. A well-planned setup makes cooking and cleaning easier. It also keeps the kitchen looking neat and organized. Think about how much space you have and how often you use these appliances. This helps you choose the right size and style. Proper planning saves time and money during installation.
Picking The Sink Type And Size
Choose a sink that fits your kitchen island size. Single-bowl sinks offer more room for washing large pots. Double-bowl sinks help separate tasks like washing and rinsing. Consider the depth too. A deeper sink can hold more water and dishes. The material matters. Stainless steel is durable and easy to clean. Porcelain or composite sinks add style but need more care. Match the sink style with your kitchen design for a smooth look.
Choosing A Dishwasher Model
Pick a dishwasher that fits under or next to the island. Standard models measure about 24 inches wide. Compact models suit smaller islands but hold fewer dishes. Look for energy-efficient options to save water and power. Quiet models work well in open kitchens. Check the dishwasher’s features. Adjustable racks and quick cycles add convenience. Make sure it matches your kitchen decor and fits the space.
Arranging Plumbing And Electrical Needs
Plan plumbing carefully to connect the sink and dishwasher. Both need water supply and drainage. Place pipes close to reduce installation costs. Use quality pipes to avoid leaks. Electrical outlets must be near the dishwasher. Follow local codes for safe wiring. Consider adding a garbage disposal unit under the sink. This helps with food waste and keeps drains clear. Proper plumbing and electrical setup prevent future problems.
Gathering Tools And Materials
Gathering the right tools and materials is the first step to building a kitchen island with a sink and dishwasher. This stage is important. It saves time and prevents mistakes. Organizing everything before starting helps the project run smoothly.
Knowing what tools and materials to use makes the work easier. It also ensures the island is sturdy and functional. Safety equipment protects you from injuries during the build.
Essential Tools For The Build
Start with a measuring tape to get exact dimensions. A power drill is needed for making holes and driving screws. A circular saw helps cut wood pieces to size.
You will also need a screwdriver set for assembling parts. A level ensures the island is perfectly flat. Clamps hold pieces together while you work.
A jigsaw is useful for cutting holes for the sink and dishwasher plumbing. Sandpaper or a sander smooths rough edges. A wrench helps with plumbing connections.
Materials Checklist
Choose sturdy plywood or hardwood for the island frame. Use moisture-resistant plywood for areas near the sink. Countertop material can be granite, quartz, or butcher block.
Buy a kitchen sink that fits your island size. Select a dishwasher model that fits the space. Plumbing pipes and fittings are necessary for water and drainage.
Use screws, nails, and wood glue for assembly. Primer and paint or stain finish the island. Cabinet hardware like handles and hinges complete the look.
Safety Equipment
Wear safety goggles to protect your eyes from dust and debris. Use ear protection when operating loud power tools. Gloves protect your hands from splinters and sharp edges.
A dust mask prevents inhaling sawdust. Wear sturdy shoes to protect your feet. Keep a first aid kit nearby for minor injuries.
Work in a well-ventilated space to avoid fumes from paint or glue. Follow all tool safety instructions carefully.
Building The Island Frame
Building the island frame is the first step to creating a sturdy kitchen island with a sink and dishwasher. This frame holds everything together. It must be strong and well-built to support heavy appliances and daily use.
Focus on making the base cabinet solid and balanced. Reinforce areas that will carry extra weight. Plan storage spaces for convenience and easy access.
Constructing The Base Cabinet
Start by measuring the space for your island. Cut the plywood or wood panels to size. Assemble the base cabinet using screws and wood glue. Use a level to keep the frame even. Make sure the corners are square. Attach the frame securely to the floor or supports.
Reinforcing For Sink And Dishwasher
Sink and dishwasher add weight and vibration. Reinforce the frame with extra braces. Use thicker wood or metal brackets under the sink area. Secure the dishwasher space with strong supports on all sides. Double-check stability before moving forward.
Installing Shelves And Storage
Plan shelves based on what you will store. Cut shelf boards to fit inside the frame. Attach shelf supports evenly along the sides. Install the shelves with screws for strength. Leave space for plumbing and wiring behind shelves if needed.
Installing Plumbing And Electrical
Installing plumbing and electrical systems in your kitchen island is a key step. This makes your island functional with a sink and dishwasher. Proper setup ensures everything works safely and efficiently. It requires careful planning and attention to detail.
Running Water Supply Lines
Start by connecting the water supply lines. Use flexible pipes for easier installation. Shut off the main water supply before starting. Attach hot and cold water lines to the sink faucet. Make sure all connections are tight to prevent leaks. Test the water flow after installation.
Connecting Drainage
Next, set up the drainage system. Connect the sink drain to the main waste pipe. Use a P-trap to prevent sewer gases from entering your kitchen. Ensure the drain pipes slope downward for proper flow. Seal all joints with plumber’s putty or tape. Check for leaks by running water through the drain.
Wiring For Dishwasher And Lighting
Prepare electrical wiring for the dishwasher and lighting. Use a dedicated circuit for the dishwasher to avoid overloads. Install a GFCI outlet near the island for safety. Run wiring through conduit to protect the cables. Connect lighting fixtures under the island or above it. Test all electrical connections before finalizing.
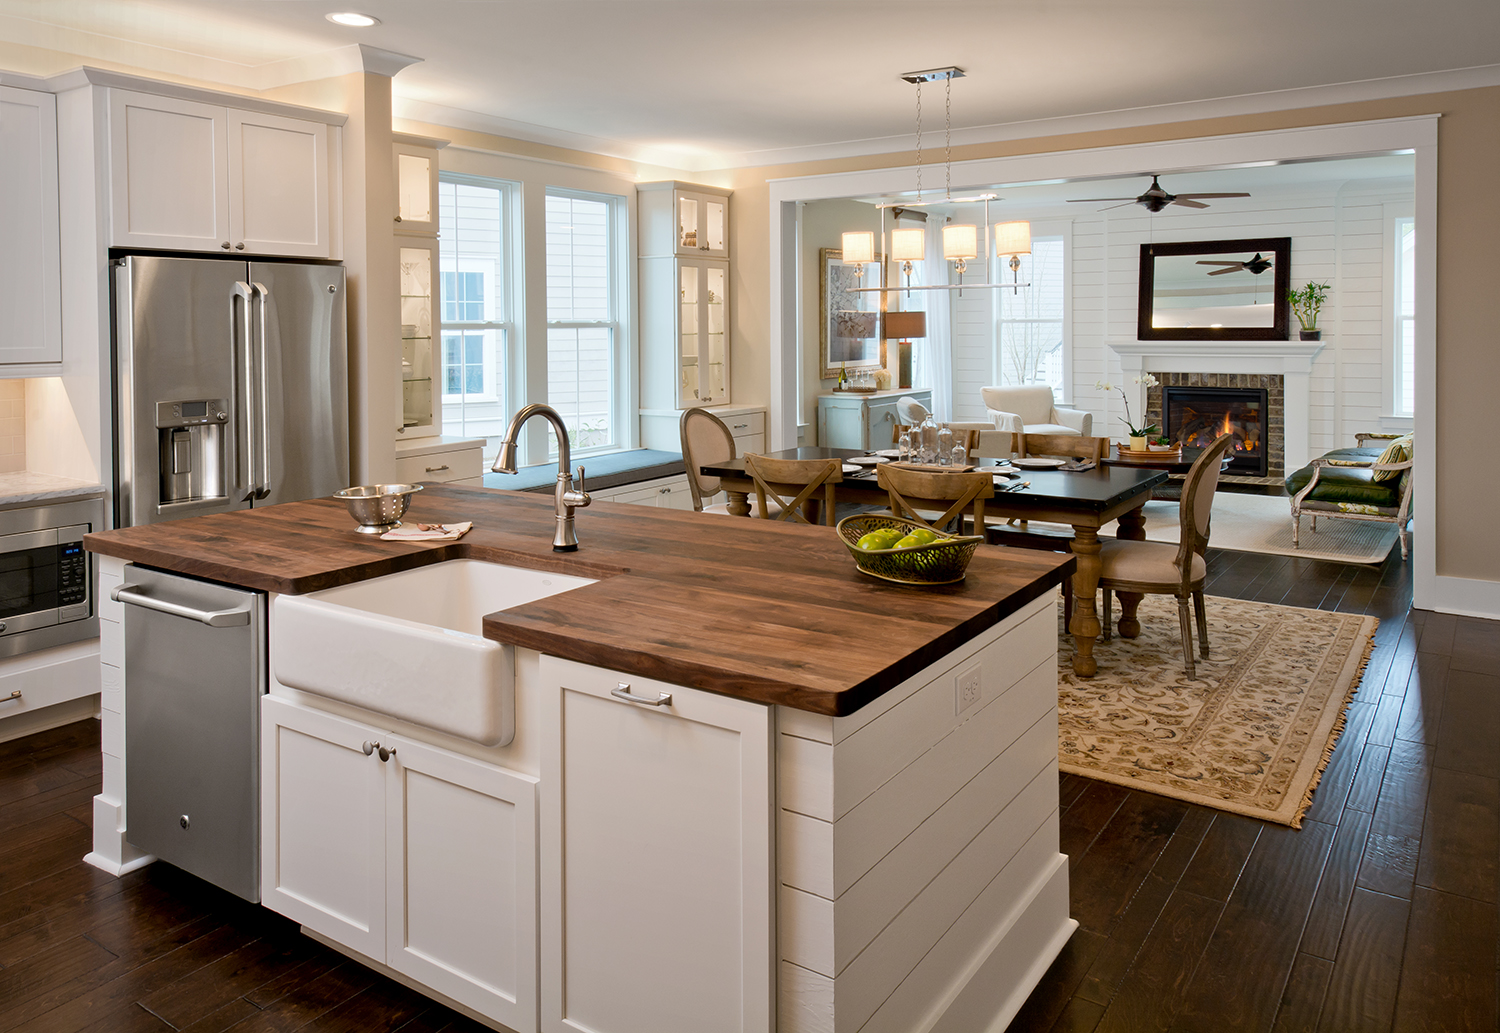
Credit: www.housingdesignmatters.com
Mounting The Sink And Dishwasher
Mounting the sink and dishwasher is a key step in building your kitchen island. It ensures both appliances work well and look neat. Proper installation prevents leaks and damage. This section explains how to set the sink, secure the dishwasher, and seal everything tightly.
Setting The Sink In Place
Start by placing the sink into the cutout on your countertop. Check that it fits snugly without gaps. Use clamps to hold the sink steady. Make sure the edges align evenly with the countertop surface. This keeps the sink level and stable.
Next, connect the water supply lines and drain pipes. Tighten all fittings by hand first. Then, use a wrench to secure them firmly but do not overtighten. Test for leaks by running water through the drain.
Securing The Dishwasher
Slide the dishwasher into its space beside the sink. Check that it is level using a carpenter’s level tool. Adjust the feet as needed to prevent rocking. Secure the dishwasher to the countertop or cabinets with mounting brackets.
Connect the dishwasher’s water supply and drain hose. Attach the power cord to a grounded outlet. Double-check all connections for a tight fit. Run a short cycle to confirm the dishwasher works properly and does not leak.
Sealing And Waterproofing
Apply a bead of silicone sealant around the sink edge. This creates a waterproof barrier between sink and countertop. Smooth the sealant with your finger or a caulking tool. Wipe away excess before it dries.
Seal gaps around plumbing fixtures and dishwasher edges. Use waterproof tape or additional sealant as needed. Proper sealing stops water damage and mold growth under the island. Let all sealants cure fully before using the sink or dishwasher.
Finishing Touches
Finishing touches bring your kitchen island to life. They complete the look and improve function. Attention to detail here makes a big difference. Each step should be done carefully. This ensures your island looks great and works well.
Installing Countertop
Choose a sturdy countertop that fits your island. Measure carefully to match your base. Use strong adhesive to fix it securely. Check that the sink hole lines up perfectly. Seal edges to stop water damage. Smooth out any rough spots for safety and style.
Adding Hardware And Fixtures
Select hardware that matches your kitchen style. Attach handles and knobs with a screwdriver. Tighten screws so they stay firm. Install the faucet and connect water lines. Test the dishwasher hookup for leaks. Make sure everything operates smoothly before moving on.
Painting And Sealing
Use paint suited for kitchen surfaces. Apply a primer first for better adhesion. Paint in thin, even layers to avoid drips. Let each coat dry fully before adding the next. Finish with a clear sealant to protect from moisture. This keeps your island looking fresh for years.
Testing And Maintenance Tips
Testing and maintenance keep your kitchen island sink and dishwasher working well. Regular checks help find small problems early. This saves money and stops big repairs later. Clean and care for your island often. This keeps it looking good and running smooth.
Checking For Leaks And Functionality
Look under the sink and dishwasher for water drops or wet spots. Run the sink and dishwasher for a few minutes. Watch for any drips or water puddles. Check the faucet, pipes, and dishwasher hose. Tighten loose parts and replace broken seals right away. Test the dishwasher by running a full cycle. Listen for unusual noises or poor water drainage. Fix issues quickly to avoid damage.
Routine Cleaning Advice
Clean the sink daily with mild soap and water. Wipe the faucet and handles to avoid water spots. Remove food scraps from the drain to prevent clogging. Use a dishwasher cleaner once a month to remove buildup. Clean the filter regularly to keep water flowing. Avoid harsh chemicals that can damage surfaces. Dry the sink and countertop after use to stop stains.
Troubleshooting Common Issues
If the faucet drips, check the cartridge or washer inside. A clogged drain may need a plunger or drain cleaner. Dishwasher won’t start? Check the power and water supply. If dishes don’t get clean, check spray arms for blockages. Strange noises can mean loose parts or worn motor. Reset the dishwasher by turning it off and on. Call a professional if problems persist.
Frequently Asked Questions
What Materials Are Best For Building A Kitchen Island?
Solid wood and plywood are ideal for kitchen islands. They provide durability and a smooth surface for installation. Choose moisture-resistant materials for areas near sinks to prevent damage. Quality materials ensure your island lasts and supports heavy appliances like dishwashers effectively.
How Do I Install Plumbing For A Sink In The Island?
Run water supply and drainage lines through the floor or cabinets. Use flexible plumbing connectors for easier installation. Ensure proper venting to avoid drainage issues. Consult local codes and consider hiring a plumber for safe and compliant installation.
Can I Add A Dishwasher To A Kitchen Island?
Yes, a dishwasher can fit in a kitchen island. Ensure enough space and proper electrical and plumbing connections. Position the dishwasher near the sink for efficient water use. Plan for ventilation and accessibility during design.
What Tools Are Needed To Build An Island With Appliances?
Basic tools include a drill, saw, measuring tape, level, and screwdriver. Plumbing tools and electrical testers are necessary for sink and dishwasher installation. Safety gear like gloves and goggles is important. Using the right tools ensures a smooth build process.
Conclusion
Building a kitchen island with a sink and dishwasher adds great value. It makes cooking and cleaning easier and more efficient. Plan carefully to fit your space and needs. Choose durable materials for long-lasting use. Follow safety rules and plumbing codes closely.
Take your time with each step to avoid mistakes. This project can improve your kitchen’s look and function. Enjoy the new space for family and friends. A well-built island makes everyday tasks more enjoyable.