
Are your unfinished kitchen cabinets making your whole kitchen look dull? You don’t have to live with that anymore.
Painting them yourself can transform your space quickly and affordably. Imagine opening your kitchen doors to fresh, vibrant cabinets that brighten up the entire room. It’s easier than you think, and you don’t need to be a pro to get great results.
In this guide, you’ll learn simple steps and insider tips to turn those plain cabinets into stunning focal points. Ready to give your kitchen the makeover it deserves? Let’s dive in and make your cabinets the highlight of your home.
Choosing The Right Paint
Choosing the right paint is key to a successful kitchen cabinet makeover. The paint affects the look, feel, and durability of your cabinets. Picking the right type, color, and finish will help your cabinets look fresh and last longer.
Types Of Paint For Cabinets
Use paint made for cabinets or trim. These paints are thicker and more durable than regular wall paint. Acrylic latex paint is popular. It cleans easily and resists yellowing. Oil-based paint offers a smooth finish but takes longer to dry. Consider water-based enamel for a tough, washable surface. Avoid flat paint. It is harder to clean and not as strong.
Selecting The Perfect Color
Choose a color that matches your kitchen style. White and off-white brighten small spaces. Gray and navy add a modern touch. Soft pastels create a calm, cozy feel. Think about your countertop and wall colors. The paint should blend well with them. Test paint samples on a small area before deciding.
Choosing The Finish
The finish changes how the paint looks and cleans. Satin and semi-gloss finishes are best for cabinets. They have a slight shine and resist stains. Glossy finishes show fingerprints but are very durable. Matte finish hides imperfections but is harder to clean. Pick a finish that fits your kitchen’s use and style.
Gathering Essential Tools
Before you start painting unfinished kitchen cabinets, gather the right tools. Having the correct supplies makes the job easier and gives better results. Prepare everything to avoid interruptions during painting.
Brushes And Rollers
Choose quality brushes and rollers for smooth paint application. Use angled brushes for corners and edges. Foam rollers work well on flat surfaces for even coverage. Avoid cheap brushes that leave streaks or bristles behind.
Sandpaper And Sanders
Sandpaper is essential to smooth rough wood surfaces. Start with medium grit to remove bumps and finish with fine grit for a smooth finish. Electric sanders speed up the process but use them gently to avoid damage.
Cleaning Supplies
Clean cabinets before painting to remove dust and grease. Use mild soap and warm water for washing. A tack cloth helps remove fine dust after sanding. Clean surfaces improve paint adhesion and final appearance.
Preparing The Cabinets
Preparing your unfinished kitchen cabinets is the first important step before painting. This stage helps the paint stick better and last longer. Taking time to prepare ensures a smooth and clean surface. Follow these simple steps to get your cabinets ready for painting.
Removing Hardware
Start by taking off all handles, knobs, and hinges. Use a screwdriver to remove them carefully. Keep all screws and hardware in a safe place. Removing hardware makes it easier to paint every corner. It also prevents paint from sticking to unwanted areas.
Cleaning Surfaces
Next, clean the cabinet surfaces with a mild detergent and water. Use a sponge or cloth to wipe away dirt and grease. Pay special attention to sticky or oily spots. Rinse with clean water and let the cabinets dry completely. Clean surfaces help paint stick better and look smooth.
Sanding For Smoothness
Use fine-grit sandpaper to sand all cabinet surfaces lightly. Sanding removes rough spots and opens the wood grain. This step creates a smooth base for the paint. Wipe away dust with a damp cloth after sanding. Smooth surfaces give a professional finish and prevent peeling paint.
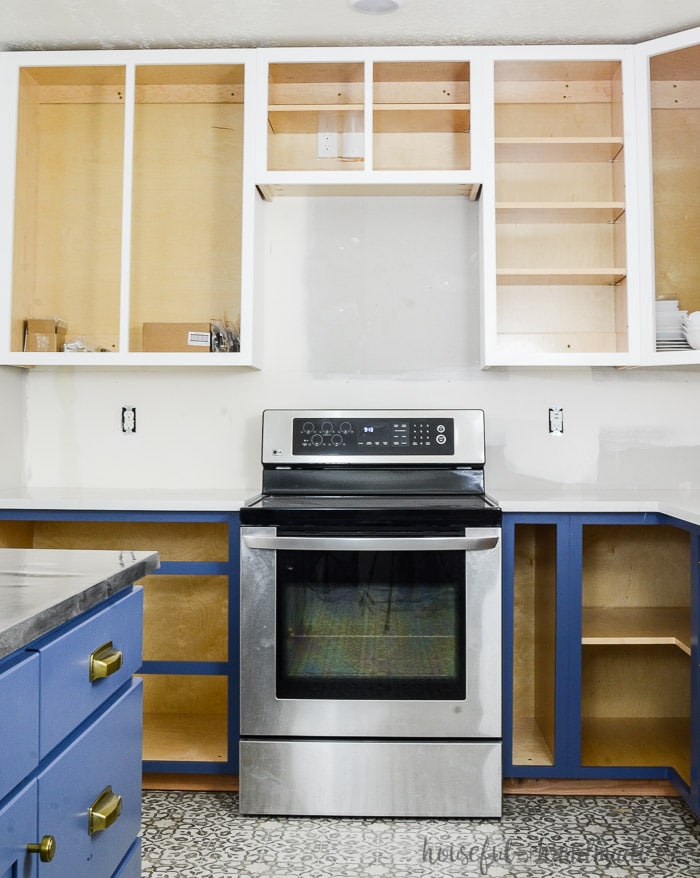
Credit: housefulofhandmade.com
Priming The Cabinets
Priming unfinished kitchen cabinets is a key step before painting. It helps paint stick better and makes the finish smooth. Primer also blocks stains and prevents wood tannins from bleeding through. Skipping this step can cause paint to peel or look uneven. Take your time to apply the right primer properly for the best results.
Choosing The Right Primer
Select a primer designed for wood surfaces. Oil-based primers are strong and seal well. They work best for raw wood. Water-based primers dry faster and clean up easily. They are good for low-odor projects. Pick a primer that matches your paint type for better adhesion.
Applying Primer Evenly
Use a high-quality brush or roller for smooth application. Apply thin, even coats to avoid drips and bubbles. Start with the cabinet edges and corners first. Cover all surfaces completely, including inside doors and drawers. Sand lightly after drying for a smooth finish before painting.
Drying Time Tips
Allow enough drying time to avoid paint problems. Check the primer label for exact drying times. Usually, primers dry in 1 to 4 hours. Avoid rushing to paint over wet primer. Wait until the surface feels dry to touch and no longer tacky. Good drying ensures a strong paint bond.
Painting Process
Painting unfinished kitchen cabinets is a step-by-step process. It takes care and patience to get smooth, even results. Proper painting protects the wood and gives your kitchen a fresh look. Follow these steps carefully for the best finish.
Applying The First Coat
Start by using a good primer designed for wood. Primer helps paint stick better and prevents stains. Use a brush for corners and a roller for flat surfaces. Apply the primer in thin, even layers. Let the primer dry completely before moving on.
Sanding Between Coats
After the primer dries, lightly sand the surface with fine-grit sandpaper. This removes bumps and smooths the wood. Clean away dust with a damp cloth before painting again. Sanding ensures the next coat sticks well and looks smooth.
Applying Additional Coats
Apply the first coat of paint using the same method as primer. Use thin layers to avoid drips and uneven spots. Let each coat dry fully. Sand lightly between coats for a soft finish. Usually, two or three coats give the best coverage.

Credit: www.neathousesweethome.com
Finishing Touches
Finishing touches make your painted kitchen cabinets look complete and polished. These final steps protect your work and keep your kitchen looking fresh. Pay attention to every detail for the best results.
Reattaching Hardware
Remove any dust or paint chips from knobs and handles before putting them back. Use a screwdriver to tighten screws firmly but not too tight. Check that all hardware fits correctly and works smoothly. Replace any broken or old pieces for a fresh look.
Cleaning Up
Wipe down cabinets with a soft, damp cloth to remove dust and paint residue. Clean paint brushes and tools with water or the recommended cleaner immediately. Dispose of any leftover paint safely following local guidelines. Keep your workspace tidy to avoid damage or stains.
Maintaining Painted Cabinets
Use mild soap and water to clean cabinets regularly. Avoid harsh chemicals and abrasive sponges that can damage paint. Dry surfaces with a soft cloth to prevent water spots. Touch up small chips or scratches quickly to keep the finish smooth. Proper care extends the life of your paint job.
Common Mistakes To Avoid
Painting unfinished kitchen cabinets can change your kitchen’s look. Avoiding common mistakes makes the job easier and the result better. Many people rush or miss steps that harm the finish.
Paying attention to details leads to smooth, long-lasting cabinets. Here are the common errors to watch out for.
Skipping Prep Work
Prep work is the base of good painting. Dirt, grease, and rough surfaces stop paint from sticking. Clean cabinets well with soap and water. Sand the wood to make it smooth. Skip this, and paint peels or looks patchy.
Using The Wrong Paint
Not all paints suit kitchen cabinets. Use paint made for wood and kitchen use. Regular wall paint can chip or wear fast. Choose a paint that cleans easily and handles heat. This helps your cabinets stay fresh longer.
Rushing Drying Times
Drying time is not just waiting. Paint needs time to set and harden. Rushing this step causes smudges and bubbles. Wait the full time between coats. This keeps the finish smooth and strong.

Credit: www.charlestoncrafted.com
Frequently Asked Questions
How Do I Prepare Unfinished Cabinets For Painting?
Start by cleaning the cabinets with a degreaser. Sand the surface with fine-grit sandpaper to smooth it. Remove dust with a tack cloth. Apply a quality primer suitable for wood to ensure paint adhesion and durability.
What Type Of Paint Works Best For Kitchen Cabinets?
Use a durable, water-based acrylic latex paint. It resists moisture, stains, and wear. Semi-gloss or satin finishes are ideal for easy cleaning and a smooth look. Avoid flat or matte paints as they are harder to maintain.
How Many Coats Of Paint Should I Apply?
Apply two to three thin coats of paint. Allow each coat to dry fully before applying the next. Thin coats prevent drips and create a more durable, even finish. Sand lightly between coats for best results.
Can I Paint Unfinished Cabinets Without Sanding?
Sanding is highly recommended for proper paint adhesion. It smooths rough surfaces and removes oils or residues. Skipping sanding can cause paint to peel or chip quickly. Use at least light sanding before priming and painting.
Conclusion
Painting unfinished kitchen cabinets can refresh your whole space. Take your time to sand and clean the surfaces well. Choose the right paint and apply it carefully for best results. Let each coat dry fully before adding the next. Small steps lead to a big change.
Enjoy your new kitchen look and the pride in doing it yourself. This simple project can boost your home’s style and value. Ready to start? Your cabinets will thank you.