
Are your laminate kitchen cabinets looking tired or outdated? You don’t have to spend a fortune on a full remodel to give your kitchen a fresh, modern look.
Updating your laminate cabinets can be easier than you think—and the results can completely transform your space. You’ll discover simple, practical ways to refresh your cabinets without the hassle or high costs. Keep reading to learn how you can make your kitchen feel brand new with just a few smart updates.

Credit: www.youtube.com
Tools And Materials Needed
Updating laminate kitchen cabinets requires the right tools and materials. Having these ready makes the job easier and cleaner. Preparation is key to achieving a fresh, polished look.
Essential Tools
- Screwdriver for removing cabinet doors and hardware
- Sandpaper or sanding block to roughen the surface
- Putty knife for filling cracks and holes
- Paintbrushes and foam rollers for smooth application
- Painter’s tape to protect edges and surfaces
- Drop cloth to keep the workspace clean
- Clean cloths or rags for wiping down surfaces
Recommended Paints And Finishes
- Primer designed for laminate surfaces to help paint stick
- Latex or acrylic paint for durability and easy cleaning
- Cabinet-specific paint for a smooth, long-lasting finish
- Clear polyurethane or water-based sealer for extra protection
Cleaning Supplies
- Degreaser or mild detergent to remove kitchen grime
- Warm water for rinsing and wiping down surfaces
- Sponges or scrub brushes for thorough cleaning
- Lint-free cloths to avoid leaving fibers behind
Preparing The Cabinets
Preparing your laminate kitchen cabinets is the first step to a fresh, updated look. Proper preparation ensures paint or finish sticks well. It also helps avoid peeling or chipping later. Follow these steps carefully for the best results.
Removing Hardware
Start by taking off all cabinet hardware. This includes handles, knobs, and hinges. Use a screwdriver to remove screws gently. Keep the hardware in a safe place. Removing hardware makes sanding and cleaning easier. It also prevents damage to the hardware during the process.
Cleaning Surfaces
Clean the cabinet surfaces thoroughly. Use warm water mixed with mild dish soap. Wipe down all areas using a soft cloth or sponge. Remove grease, dirt, and dust completely. For tough spots, use a degreaser safe for laminate. Dry the cabinets well before moving to the next step.
Sanding Tips
Lightly sand the cabinet surfaces to help paint stick. Use fine-grit sandpaper, about 220 grit. Sand gently in a circular motion. Avoid sanding too hard to prevent damage to the laminate. Wipe away dust with a damp cloth after sanding. Let the surface dry fully before painting or priming.
Repairing Damages
Damages on laminate kitchen cabinets can make your kitchen look old and worn. Small scratches, chips, and loose veneers are common problems. Fixing these damages restores the cabinet’s appearance and extends its life. Repairing the issues yourself saves money and keeps your kitchen fresh.
Filling Scratches And Chips
Start by cleaning the damaged area with a soft cloth. Use a laminate repair paste or putty that matches your cabinet color. Apply the filler carefully into the scratch or chip. Smooth it out with a putty knife or your finger. Let it dry fully before sanding lightly. Finish with a touch of matching paint or marker for a seamless look.
Fixing Loose Veneer
Loose veneer can peel away from the cabinet surface. Gently lift the loose edge without breaking it. Apply wood glue or contact cement under the veneer. Press the veneer down firmly and wipe off excess glue. Use clamps or heavy books to hold it in place while drying. This keeps the veneer flat and secure for a long time.
Replacing Damaged Parts
Severe damage may require replacing parts like doors or drawer fronts. Remove the damaged part by unscrewing hinges or slides. Buy a matching replacement from your cabinet maker or hardware store. Attach the new part carefully using the old screws or new ones if needed. Check that doors and drawers open smoothly and align properly after installation.
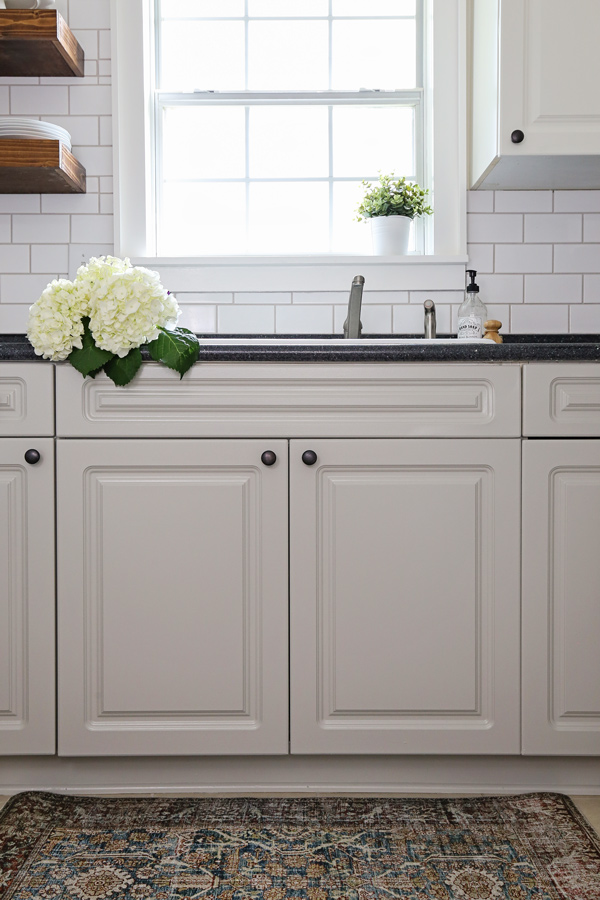
Credit: angelamariemade.com
Painting Techniques
Painting laminate kitchen cabinets can refresh your kitchen without replacing them. Proper techniques help the paint stick well and last long. This section covers key painting steps for laminate surfaces.
Choosing The Right Paint
Pick paint made for laminate or glossy surfaces. Acrylic latex paint works well for durability and smooth finish. Avoid regular wall paint; it can peel off easily. Semi-gloss or satin finishes resist stains and clean easily.
Priming Laminate Surfaces
Prime the cabinets before painting. Use a primer designed for slick surfaces. It helps paint stick and prevents peeling. Clean and sand the cabinets lightly to remove shine. Apply primer evenly and let it dry fully.
Applying Paint Evenly
Use a good quality brush or foam roller for smooth coats. Paint in thin layers to avoid drips and streaks. Let each coat dry completely before adding the next. Two or three coats give the best coverage and finish.
Alternative Refresh Options
Updating laminate kitchen cabinets does not always mean a full remodel. Small changes can make a big difference. Alternative refresh options offer easy and budget-friendly ways to improve your cabinets’ look. These methods save time and effort while giving your kitchen a fresh feel.
Using Peel-and-stick Veneer
Peel-and-stick veneer is a quick way to change cabinet surfaces. It comes in many colors and patterns. Apply it directly to clean, dry cabinets for a new look. This veneer hides scratches and dull finishes. It is easy to cut and shape for a perfect fit.
Adding Decorative Moldings
Decorative moldings add style and depth to plain cabinets. Choose simple or ornate designs based on your taste. Attach moldings with glue or small nails. Paint or stain them to match or contrast with cabinets. Moldings give cabinets a custom, high-end appearance.
Installing New Hardware
New hardware can instantly update your cabinets’ style. Swap old knobs and handles for modern or classic designs. Hardware comes in various finishes like chrome, brass, or matte black. Choose pieces that complement your kitchen’s overall look. Installing hardware is a fast, low-cost upgrade.

Credit: littleterracedhouse.com
Finishing Touches
Finishing touches give your updated laminate kitchen cabinets a polished look. These final steps protect your work and enhance durability. They also help your cabinets last longer and look fresh.
Sealing The Cabinets
Sealing your cabinets protects the surface from moisture and stains. Use a clear, water-based sealant for laminate surfaces. Apply it evenly with a brush or cloth. Let the sealant dry completely before touching the cabinets. This step prevents peeling and makes cleaning easier.
Reattaching Hardware
Put the cabinet handles and knobs back carefully. Check if the screws fit well and tighten them securely. If hardware looks old or damaged, replace it with new pieces. New knobs or handles can change the cabinet style easily. Make sure all doors and drawers open smoothly after reattaching.
Maintaining Your Updated Cabinets
Keep your cabinets clean with a soft cloth and mild soap. Avoid using harsh chemicals or abrasive scrubbers. Wipe spills immediately to prevent damage. Check the hardware regularly and tighten loose screws. This care will keep your cabinets looking new for years.
Frequently Asked Questions
How Do I Prep Laminate Cabinets For Updating?
Start by cleaning the cabinets thoroughly with a degreaser. Remove all hardware and lightly sand surfaces to improve paint adhesion. Wipe away dust with a damp cloth before proceeding to paint or apply new veneers.
What Type Of Paint Works Best On Laminate Cabinets?
Use a high-quality acrylic or latex paint designed for laminate surfaces. Apply a bonding primer first to ensure the paint sticks well. These paints offer durability and a smooth finish suited for kitchen use.
Can I Use Contact Paper To Update Laminate Cabinets?
Yes, contact paper is a budget-friendly option for updating laminate cabinets. Choose moisture-resistant, durable paper for kitchens. Clean surfaces well, measure accurately, and apply carefully to avoid bubbles and wrinkles.
How Long Does It Take To Update Laminate Cabinets?
Updating laminate cabinets typically takes 2-3 days. This includes cleaning, sanding, priming, painting, and drying times. Allow extra time if you’re adding new hardware or applying veneers.
Conclusion
Updating laminate kitchen cabinets can truly change your kitchen’s look. Small steps like cleaning, sanding, and painting make a big difference. Using new hardware adds a fresh touch without much effort. This project saves money compared to a full remodel.
It also gives you a chance to customize your space. Take your time, follow the steps, and enjoy the results. Your kitchen will feel brighter and more inviting. A simple update can bring new life to an old kitchen. Try these tips and see the change yourself.