
If you’ve ever stared at your toilet flange and wondered how to remove that stubborn Oatey toilet flange cap, you’re not alone. Whether you’re fixing a leak, replacing parts, or doing a full bathroom upgrade, knowing how to remove this cap quickly and safely can save you time and frustration.
In this guide, you’ll get simple, step-by-step instructions that anyone can follow—no special tools or skills needed. Keep reading, and you’ll have your flange cap off in no time, ready for the next step of your project.
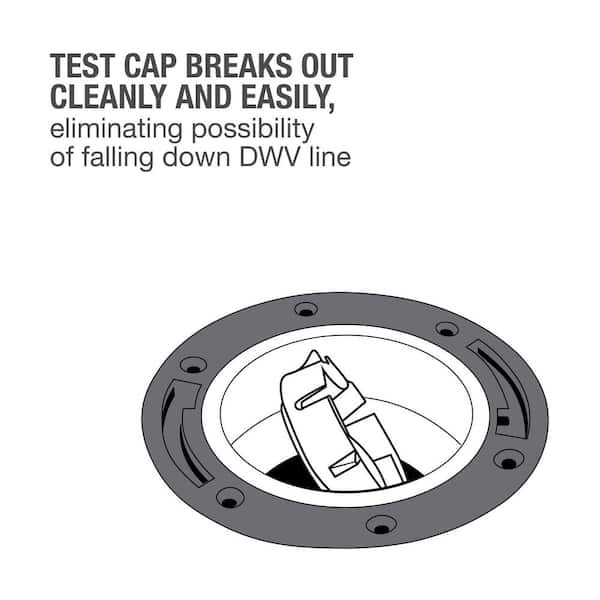
Credit: www.homedepot.com
Tools Needed
Removing an Oatey toilet flange cap requires a few basic tools. Having the right tools helps you work safely and quickly. These tools make the job easier and prevent damage to your toilet or pipes.
Flathead Screwdriver
A flathead screwdriver helps pry off the flange cap. It fits under the edge to lift it gently. Use it carefully to avoid scratching the flange or floor.
Adjustable Wrench
An adjustable wrench loosens any bolts or nuts around the flange. It adjusts to different sizes and provides a strong grip. This tool helps remove tight fasteners without slipping.
Pliers
Pliers grip small parts and help twist or pull the cap. They are handy for parts hard to reach with fingers. Choose slip-joint pliers for better control.
Utility Knife
A utility knife cuts away old sealant or caulk around the flange. It clears the area for easier removal. Use it carefully to avoid cutting into the flange or floor.
Credit: moston.com.tr
Safety Precautions
Removing an Oatey toilet flange cap requires care to avoid injury and damage. Safety comes first before starting the task. Proper precautions protect you and your bathroom fixtures. Follow these safety steps closely for a smooth and safe process.
Wear Protective Gloves
Gloves protect your hands from sharp edges and dirt. The flange cap may have rough or rusty parts. Gloves also keep your skin safe from cleaning chemicals.
Shut off the toilet water supply before removal. This prevents leaks and water damage. Draining water lowers the risk of slips and messes.
Use The Right Tools
Choose tools designed for plumbing work. Using the wrong tools can cause injury or break parts. Keep tools in good condition to work safely.
Work In A Well-lit Area
Good lighting helps you see screws and small parts clearly. It reduces mistakes and accidents. Use a flashlight if needed for dark corners.
Clear The Work Area
Remove items around the toilet to avoid tripping. A tidy space makes moving easier. It also prevents damage to belongings.
Locate The Toilet Flange Cap
Locating the toilet flange cap is the first step in removing it safely. The flange cap sits on the flange, which connects the toilet to the drain pipe. Finding this cap helps you understand how to remove or replace it without damage.
Usually, the flange cap is visible after removing the toilet bowl. It covers the opening of the flange. This cap protects the flange from debris and water damage.
Check Around The Base Of The Toilet
Look closely around the toilet base where it meets the floor. The flange cap often sits flat against the floor. It may be round and made of plastic or metal. Dirt or grime can hide it, so clean the area carefully.
Remove The Toilet To Access The Flange Cap
To see the flange cap clearly, lift the toilet off the flange. This exposes the pipe and flange area. Use gloves to keep your hands clean. Set the toilet aside on a protected surface.
Identify The Flange Cap By Its Shape And Position
The flange cap is smaller than the flange itself. It often has a smooth, circular shape. It fits snugly in the center of the flange. Its purpose is to seal the drain opening temporarily.
Turn Off Water Supply
Turning off the water supply is the first step before removing the Oatey toilet flange cap. This prevents water from spilling out during the process. Safety and cleanliness depend on stopping the water flow first.
Without turning off the water, you risk flooding your bathroom. It also makes the removal task harder and messier. Take a moment to find the water shut-off valve.
Locate The Water Shut-off Valve
Look behind or near the base of your toilet. The valve is usually a small knob or lever attached to a pipe. It may be on the wall or floor close to the toilet.
Turn The Valve Clockwise
Turn the valve slowly to the right. This closes the water supply line. Stop turning when you feel resistance. Do not force it further.
Flush The Toilet To Empty The Tank
Flush once after closing the valve. This clears most water from the tank. The tank will empty without refilling.
Check For Water Flow
Try flushing again. No water should flow into the tank. This confirms the supply is fully off. If water still flows, double-check the valve position.
Remove The Toilet
Removing the toilet is the first step to access and remove the Oatey toilet flange cap. This task requires care and some basic tools. Follow each step carefully to avoid damage or mess.
Drain Remaining Water
Start by turning off the water supply to the toilet. Flush the toilet to drain most water from the tank and bowl. Use a sponge or small cup to soak up any leftover water inside the bowl. This prevents spills during removal.
Disconnect Water Line
Locate the water supply line connected to the toilet tank. Use an adjustable wrench to loosen the nut where the line attaches to the tank. Carefully disconnect the water line and set it aside. Be ready for a small amount of water to drip out.
Unbolt Toilet
Find the bolts at the base of the toilet securing it to the floor. Use a wrench to remove the nuts from these bolts. Gently rock the toilet side to side to break the wax seal. Lift the toilet straight up and place it on a protective surface.
Remove The Oatey Flange Cap
Removing the Oatey toilet flange cap is a simple task that helps access the flange for repairs or replacements. This cap protects the flange and keeps debris out. Follow clear steps to remove it without damage.
Inspect The Cap
First, look closely at the flange cap. Check its shape and material. Some caps snap off easily; others may be glued or sealed. Look for cracks or damage that could affect removal. This helps you decide the best removal method.
Use Appropriate Tools
Select tools that fit well and avoid damage. A flathead screwdriver or pliers often work. Use tools gently to prevent breaking the cap or flange. Having the right tools ready makes the job faster and safer.
Twist And Pull Off
Grip the cap firmly. Twist it slowly while pulling upward. This motion loosens the cap from the flange. If it feels stuck, apply slight wiggling without forcing too hard. The cap should come off cleanly, leaving the flange exposed.
Clean The Flange Area
Cleaning the flange area is an important step after removing the Oatey toilet flange cap. A clean flange helps ensure a good seal for the new toilet installation. Dirt, old wax, and debris can cause leaks or damage.
Take your time to clean the surface well. This will make the next steps easier and safer for your plumbing.
Remove Old Wax And Debris
Use a putty knife or scraper to remove old wax from the flange. Scrape gently to avoid damaging the flange surface. Clear away any dirt or loose material. A clean surface helps the new wax ring stick better.
Clean The Flange With A Cloth
Wipe the flange area with a damp cloth. This removes dust and small particles left behind. Use warm water for better cleaning. Make sure the flange is dry before moving on.
Check For Damage Or Rust
Look closely at the flange for cracks or rust. Damaged parts can cause leaks. If you see rust, use a wire brush to clean it off. Replace the flange if it is broken or too worn.
Prepare The Flange For The New Cap
After cleaning, make sure the flange is smooth and flat. This helps the new flange cap fit correctly. Any bumps or leftover wax can stop a good seal. Take extra care to prepare the area well.

Credit: www.youtube.com
Replace Or Repair The Flange Cap
Replacing or repairing the Oatey toilet flange cap is a key step in fixing toilet issues. A damaged flange cap can cause leaks or unstable toilet mounting. Deciding whether to repair or replace depends on the cap’s condition.
If the cap is cracked or broken, replacement is best. A worn but intact cap might only need repair. Proper handling ensures a tight seal and prevents water damage.
Choose The Right Replacement
Select a flange cap that fits your toilet flange size. Check the material type; plastic caps are common and easy to install. Match the replacement cap with your flange to avoid leaks. Always buy a quality cap for durability and performance.
Install New Cap
Remove the old flange cap carefully. Clean the flange surface to remove dirt and old sealant. Place the new cap evenly over the flange. Press down firmly to ensure a tight fit. Secure the cap with screws if needed. Test the fit before reinstalling the toilet.
Reinstall The Toilet
Reinstalling the toilet after removing the Oatey toilet flange cap is a key step. It restores your bathroom’s function quickly and safely. Follow these simple steps to put the toilet back properly.
Position The Toilet
Lift the toilet carefully and align it over the flange. Make sure the bolt holes match the flange bolts. Lower the toilet slowly to avoid damaging the wax ring. The toilet base should sit flat on the floor.
Bolt The Toilet Down
Place washers and nuts on the flange bolts. Tighten the nuts evenly to secure the toilet. Avoid overtightening to prevent cracking the porcelain. Check that the toilet does not rock or move.
Reconnect Water Line
Attach the water supply line to the toilet tank. Hand-tighten the connection and then give a slight turn with a wrench. Do not overtighten or damage the fittings. Open the water valve slowly to fill the tank.
Test For Leaks
Flush the toilet several times to check for leaks. Look around the base and water connections carefully. Fix any leaks before finishing up. A dry floor means the toilet is secure and ready to use.
Frequently Asked Questions
What Tools Do I Need To Remove An Oatey Toilet Flange Cap?
You need a screwdriver, pliers, and possibly a utility knife. These tools help loosen and remove the flange cap safely.
How Do I Loosen A Stuck Oatey Toilet Flange Cap?
Apply gentle pressure with pliers or a screwdriver to wiggle it free. Avoid force to prevent damage to the flange.
Can I Remove The Oatey Flange Cap Without Removing The Toilet?
Yes, you can remove the flange cap without taking off the toilet. Just ensure the water supply is turned off first.
How Do I Avoid Damaging The Flange When Removing The Cap?
Use the right tools and apply slow, steady pressure. Avoid using excessive force or sharp objects.
What Should I Do If The Flange Cap Is Cracked Or Broken?
Replace the damaged flange cap with a new one. A broken cap can cause leaks and poor toilet function.
Is It Safe To Reuse An Oatey Toilet Flange Cap?
Reusing is possible if the cap is undamaged and clean. Otherwise, it’s better to install a new cap.
How Long Does It Take To Remove An Oatey Toilet Flange Cap?
Removing the cap usually takes 5 to 10 minutes. Time depends on how tight or stuck the cap is.
Conclusion
Removing an Oatey toilet flange cap is easier than it seems. Just follow the simple steps carefully. Use the right tools and take your time. Avoid rushing to prevent damage to the flange or pipe. After removal, check the flange for any cracks or wear.
Replace the cap or flange if needed to keep your toilet secure. With patience and care, you can do this job yourself. Keep your bathroom working well and avoid costly repairs. Simple tasks like this save time and money in the long run.