
Are you struggling to remove your Delta tub spout adapter and don’t know where to start? You’re not alone.
Many homeowners find this task tricky, especially when the spout feels stuck or hard to twist off. But don’t worry—removing it doesn’t have to be frustrating or expensive. In this guide, you’ll discover simple, step-by-step tips that make the job quick and easy.
Keep reading, and you’ll have your tub spout adapter off in no time, ready for repair or replacement.
Credit: www.youtube.com
Tools Needed
Removing a Delta tub spout adapter requires a few basic tools. Having the right tools makes the job easier and faster. No need for complicated equipment. Just simple, common tools you might already have at home.
These tools help you grip, twist, and remove the adapter without damage. Using the wrong tool can cause scratches or leaks later. Prepare your workspace and gather these items before starting.
Adjustable Wrench
An adjustable wrench fits different sizes of nuts and bolts. It helps to loosen the adapter securely. Turn the wrench slowly to avoid stripping the metal parts.
Pipe Wrench
A pipe wrench offers a strong grip on round pipes. It is useful if the adapter is stuck tight. Use it carefully to prevent dents or marks on the spout.
Plumber’s Tape
Plumber’s tape, also called Teflon tape, wraps around threads. It prevents leaks when you reinstall the spout. Have some ready to ensure a tight seal after removal.
Rag Or Cloth
A rag protects the tub surface during removal. Place it between the tool and the spout. It also helps clean the area after removing the adapter.

Credit: www.youtube.com
Identify Your Delta Tub Spout Adapter
Knowing your Delta tub spout adapter is key to removing it safely. Different models have different parts and methods. Identifying the adapter helps prevent damage and saves time.
Look closely at your tub spout. Check for visible screws or unusual shapes. The adapter style usually shows on the underside or back of the spout.
Check For Set Screws
Many Delta tub spouts use a set screw to hold the adapter. Find a small hole on the side of the spout near the wall. Use a hex key or screwdriver to loosen this screw. This lets you slide the spout off the pipe easily.
Look For Slip-on Adapters
Some models use a slip-on adapter. These spouts twist and pull off the pipe. They do not have visible screws. To identify this type, try gently twisting the spout counterclockwise. If it moves, you likely have a slip-on adapter.
Identify Threaded Adapters
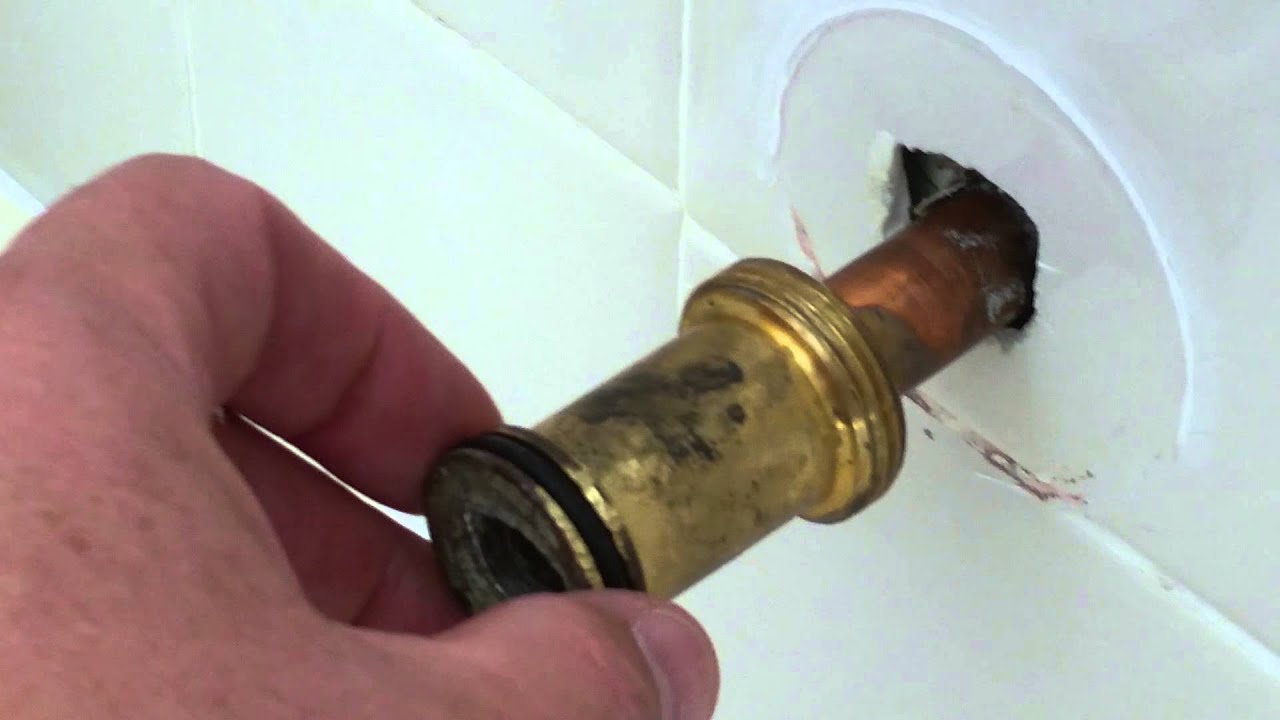
Threaded adapters screw onto the pipe. You can spot these by checking if the spout turns fully without resistance. This type often requires tools to unscrew the spout from the pipe. Look for metal threads inside the spout opening.
Turn Off Water Supply
Before removing the Delta tub spout adapter, turn off the water supply. This step prevents water from leaking or spraying out during removal. It keeps your bathroom dry and safe.
Turning off the water supply is quick and easy. It stops water flow to the tub, making the process smooth. This step also protects your plumbing from damage.
Locate The Main Water Shut-off Valve
Find the main water shut-off valve in your home. It is usually near the water meter or where the main water line enters the house. Turning this valve off stops water to the entire house.
Turn Off The Tub’s Local Shut-off Valve
Some homes have a local shut-off valve near the tub. Check behind access panels or under the tub. Turn this valve clockwise to close it. This blocks water flow only to the tub.
Test To Ensure Water Is Off
Turn on the tub faucet to check if water stops. If no water flows, the supply is off. If water still flows, double-check the valves and try again.

Credit: www.amazon.com
Protect Surrounding Fixtures
Protecting the fixtures around your Delta tub spout is important. These parts can get scratched or damaged during removal. Taking care helps keep your bathroom looking neat. It also saves money on repairs or replacements.
Prepare the area before you start. Cover nearby faucets, handles, and tiles with soft cloths or painter’s tape. This creates a barrier against tools and accidental bumps.
Clear The Work Area
Remove any items near the tub spout. Soap dishes, shampoo bottles, and towels should be moved. This gives you room to work safely and reduces the chance of accidents.
Use Protective Padding
Place a towel or foam pad under the spout. It cushions the tub and fixtures if you drop a tool. Soft padding prevents chips and cracks on hard surfaces.
Handle Tools Carefully
Grip tools firmly and keep control at all times. Avoid sudden movements that might hit the surrounding fixtures. Choose the right tool size to minimize slips and damage.
Work Slowly And Steadily
Don’t rush the removal process. Slow, steady movements reduce pressure on fixtures. This lowers the risk of breaking or loosening other parts.
Loosen The Tub Spout
Loosening the tub spout is the first step to remove the Delta tub spout adapter. This part can be tight and stuck due to water deposits or rust. You need to be gentle but firm to avoid damage. Using the right tools and techniques makes the process easier and safer. Below are some helpful methods to loosen the tub spout.
Use A Strap Wrench
A strap wrench is perfect for loosening the tub spout without scratching it. Wrap the strap around the spout and turn it counterclockwise. This tool grips firmly and protects the finish. It works well on metal and plastic spouts. Avoid using pliers or a regular wrench that can leave marks.
Apply Penetrating Oil
Penetrating oil helps loosen rust and mineral buildup. Spray the oil where the spout connects to the pipe. Let it soak for 10 to 15 minutes. This softens the bond and makes turning easier. Repeat if the spout feels stuck. Use oil sparingly to avoid mess.
Avoid Damaging The Finish
Protect the tub spout’s finish during removal. Cover the spout with a cloth before using any tools. This prevents scratches and dents. Work slowly and avoid forcing the spout. Damaged finishes can lead to leaks and costly repairs. Keeping the spout intact saves time and money.
Remove The Adapter
Removing the Delta tub spout adapter is a simple step in replacing or repairing your tub spout. This part connects the spout to the water pipe and must come off carefully to avoid damage. Follow these steps to remove the adapter smoothly and prepare for the next task.
Unscrew The Adapter
Start by turning the adapter counterclockwise. Use your hand first to see if it moves easily. If it turns, continue unscrewing until it comes off.
If the adapter is tight, try using a cloth for better grip. This prevents slipping and protects the finish. Avoid using too much force to keep the pipe safe.
Handle Stubborn Adapters
Stubborn adapters may need extra help. Use an adjustable wrench or pliers for a stronger grip. Wrap the tool with a cloth to avoid scratches.
Apply gentle pressure and turn slowly. If it still won’t budge, spray a small amount of lubricant. Let it sit for a few minutes before trying again.
Repeat the process carefully. Patience prevents damage and makes the job easier.
Clean The Plumbing Threads
Cleaning the plumbing threads is a key step in removing the Delta tub spout adapter. Clean threads help create a tight seal. This prevents leaks and ensures the new spout fits properly. Take time to carefully clean every thread for the best results.
Remove Debris And Old Tape
Start by clearing away dirt, old plumber’s tape, and any grime. Use a cloth or a small brush to scrub the threads gently. Avoid using sharp tools that can scratch or damage the metal. Removing old tape is important to avoid poor fitting of the new spout.
Inspect For Damage
After cleaning, look closely at the threads for signs of wear or damage. Check for cracks, bends, or stripped areas. Damaged threads can cause leaks or make installation difficult. If you find damage, consider repairing or replacing the pipe before adding the new spout.
Install New Tub Spout Or Adapter
Installing a new tub spout or adapter is a simple step after removing the old one. This process ensures a tight fit and prevents leaks. Follow these easy steps to install your new tub spout or adapter correctly.
Apply Plumber’s Tape
Start by wrapping plumber’s tape around the threads of the pipe. Use 2 to 3 layers of tape to cover the threads evenly. This tape helps create a waterproof seal. Wrap the tape clockwise so it stays in place when you screw on the spout.
Secure The New Fixture
Align the new tub spout or adapter with the pipe threads. Turn it clockwise by hand to start. Tighten it firmly, but do not over-tighten to avoid damage. Check the fit and make sure it is secure. Run water to test for leaks and fix if needed.
Test For Leaks
Check for leaks by turning on the water after installing the tub spout adapter. Watch closely for drips or water escaping around the connections. Fix any leaks before finishing the job.
Turn On The Water Supply
After installing or removing the Delta tub spout adapter, turn on the water supply slowly. Watch the connection point carefully. This step helps you spot any water escaping from the fittings.
Inspect The Connection Closely
Look for water drops or moisture around the adapter base. Use a dry cloth to wipe the area first. Then check again to see if water reappears. This method helps detect small leaks clearly.
Check Both Hot And Cold Water Lines
Run both hot and cold water separately to test the adapter. This ensures no leaks occur from either water line. Some leaks only show under certain water temperatures.
Listen For Dripping Sounds
Sometimes leaks make soft dripping noises. Stay quiet and listen closely near the tub spout. Dripping sounds can guide you to hidden leaks that are hard to see.
Use A Tissue Or Paper Towel
Place a dry tissue or paper towel around the adapter. If it gets wet, you have a leak. This simple test helps catch leaks that might be missed by the eye.
Tips For Easy Removal
Removing a Delta tub spout adapter can be tricky without the right approach. Simple tips can make the task easier and prevent damage. Follow these easy steps to remove the adapter smoothly.
Regular Maintenance
Check the tub spout regularly for leaks or looseness. Tighten it gently to keep it secure. Clean around the base to stop mineral build-up. This prevents parts from sticking and makes removal easier later.
Use The Right Tools
Use a strap wrench or adjustable wrench to avoid scratches. Avoid using pliers directly on the spout. Wrap a cloth around the spout before applying the wrench. This protects the finish while giving a good grip. Turn slowly and steadily to loosen the adapter without damage.
Frequently Asked Questions
How Do I Remove A Delta Tub Spout Adapter Safely?
Turn off the water supply first. Use a wrench to gently unscrew the adapter. Avoid using too much force to prevent damage.
What Tools Are Needed To Remove A Delta Tub Spout Adapter?
You will need an adjustable wrench and possibly plumber’s tape. A cloth can help protect the fixture from scratches.
Can I Remove The Delta Tub Spout Adapter Without Turning Off Water?
No, always shut off the water supply to avoid leaks and water damage. Safety first.
How Long Does It Take To Remove A Delta Tub Spout Adapter?
It usually takes about 5 to 10 minutes. The process is quick with the right tools.
What Should I Do If The Delta Tub Spout Adapter Is Stuck?
Apply some penetrating oil and let it sit for 10 minutes. Then try unscrewing it again with a wrench.
Will Removing The Tub Spout Adapter Cause Leaks?
If done carefully, it won’t cause leaks. Make sure to tighten new fittings properly.
How Do I Install A New Delta Tub Spout Adapter After Removal?
Wrap plumber’s tape on the threads. Screw the new adapter on by hand, then tighten gently with a wrench.
Conclusion
Removing a Delta tub spout adapter is easier than it seems. Follow the steps carefully and use the right tools. Avoid forcing parts to prevent damage. Take your time, and the process will be smooth. You can save money by doing it yourself.
Now, you are ready to fix or replace your tub spout with confidence. Simple tasks like this keep your bathroom working well. Keep these tips in mind for any future plumbing jobs.