
Is your shower arm leaking at the threads? That constant drip can be more than just annoying—it can waste water, increase your bills, and even cause damage over time.
You might be wondering why this happens and how to fix it without calling a plumber. You’ll discover simple, effective ways to stop the leak and keep your shower working perfectly. Keep reading, and you’ll learn easy tips that anyone can follow to solve this common problem quickly.
Common Causes Of Shower Arm Leaks
Shower arm leaks at the threads are a common problem in many bathrooms. These leaks can cause water damage and increase your water bill. Understanding the common causes helps in fixing the issue faster and preventing future leaks.
Leaks usually start at the connection points where the shower arm meets the wall or the showerhead. These spots are sensitive to wear and tear. Knowing what causes leaks can save you time and money on repairs.
Worn Or Damaged Thread Tape
Thread tape seals the connection between the shower arm and pipe. Over time, this tape can wear out or tear. Damaged thread tape no longer stops water from leaking. Replacing the tape often stops the leak immediately.
Loose Connections
Loose connections occur when the shower arm or showerhead is not tightened properly. Movement or vibration can loosen these parts over time. Tightening the connections can often solve the leak problem quickly.
Corroded Or Damaged Threads
Water and moisture can cause the metal threads to corrode or rust. Corrosion damages the threads and creates gaps. Damaged threads cannot hold a tight seal, leading to leaks. Cleaning or replacing the shower arm may be needed.
Cracked Shower Arm
Cracks in the shower arm can cause leaks around the threads. Cracks often develop from metal fatigue or impact damage. A cracked shower arm must be replaced to stop leaks and ensure safety.

Credit: www.reddit.com
Tools And Materials Needed
Fixing a shower arm that leaks at the threads needs the right tools and materials. These items help stop water leaks fast and keep the shower working well. Gather everything before starting the repair to make the process smooth and easy.
Plumber’s Tape
Plumber’s tape, also called Teflon tape, seals pipe threads tightly. Wrap it around the threads to block water from leaking out. It is thin, flexible, and easy to use. This tape helps create a strong, water-tight seal.
Adjustable Wrench
An adjustable wrench fits different sizes of nuts and bolts. Use it to loosen or tighten the shower arm without damaging it. This tool offers a good grip and control during the repair.
Pipe Sealant
Pipe sealant is a paste that seals threaded pipe joints. It works well with plumber’s tape for extra leak protection. Spread a small amount on the threads before connecting the shower arm.
Cleaning Supplies
Cleaning supplies like a cloth and brush remove old tape and dirt. Clean threads help new tape and sealant stick better. Make sure the area is dry before applying new materials.
Step-by-step Fixes For Thread Leaks
Fixing a shower arm leak at the threads can save water and prevent damage. The process is simple and requires basic tools. Follow these steps carefully for a tight, leak-free fit. Each step builds on the last for the best results.
Shutting Off Water Supply
Start by turning off the water supply to the shower. This stops water flow and keeps the area dry. Check the main valve or local shutoff valve. Opening the shower faucet helps drain any leftover water.
Removing The Shower Arm
Use a wrench to loosen the shower arm from the wall pipe. Turn counterclockwise to unscrew it. Wrap a cloth around the arm to protect its finish. Remove the arm carefully to avoid damaging the threads.
Cleaning Threads Thoroughly
Clean both the shower arm and wall pipe threads. Use a wire brush or old toothbrush. Remove old plumber’s tape and debris. Clean threads ensure a tight seal and stop leaks.
Applying Plumber’s Tape Correctly
Wrap plumber’s tape around the shower arm threads. Wrap in the direction of the threads. Use 2 to 3 layers for a good seal. Press the tape down firmly to avoid wrinkles.
Reinstalling And Tightening The Shower Arm
Screw the shower arm back into the wall pipe. Turn clockwise by hand first. Use a wrench to tighten snugly. Avoid overtightening to prevent damage. Check for leaks by turning the water back on.
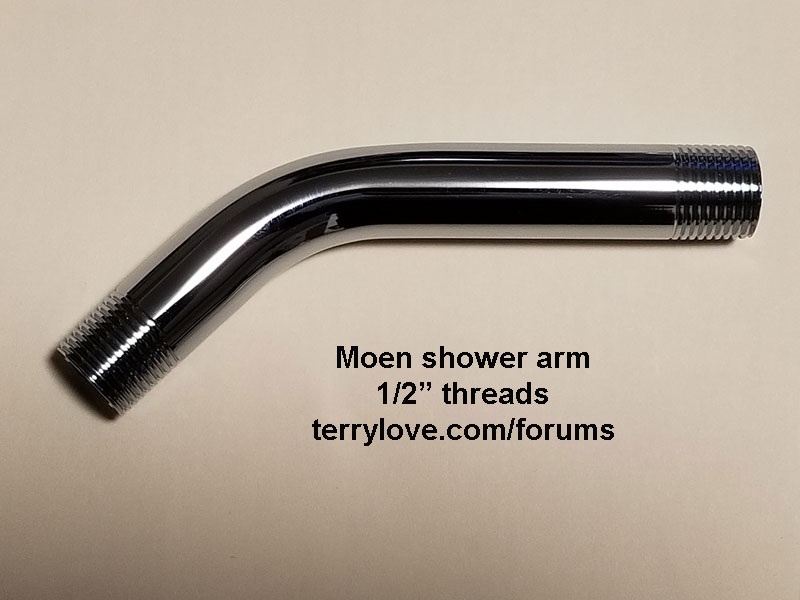
Credit: terrylove.com
Alternative Solutions For Persistent Leaks
Persistent leaks at the shower arm threads need effective solutions. Simple fixes might not stop the drip. Trying alternative methods can save water and prevent damage. These options help secure the connection and keep your shower dry.
Using Pipe Dope For Extra Seal
Pipe dope creates a strong, waterproof seal on threaded joints. Apply a thin layer on the shower arm threads before installation. It fills gaps and stops water from escaping. This paste works well with plumber’s tape for added protection. Use it carefully to avoid excess mess.
Replacing The Shower Arm
Old or damaged shower arms often cause leaks at the threads. Removing the faulty arm and installing a new one can solve the problem. Choose a shower arm with matching thread size and material. Make sure to clean the pipe threads before attaching the new arm. This step ensures a snug, leak-free fit.
Consulting A Professional Plumber
Persistent leaks might need expert help. A plumber can diagnose hidden issues causing the leak. Professionals have the right tools and experience to fix tough problems. They can replace parts or repair pipes safely. Hiring a plumber saves time and prevents water damage.
Preventing Future Leaks
Preventing future leaks in your shower arm threads helps avoid water waste and damage. Small leaks can turn into big problems over time. Taking simple steps keeps your shower working well and stops costly repairs.
Regular Maintenance Tips
Check shower arm threads every few months. Clean off dirt and old tape. Replace plumber’s tape if it looks worn. Tighten connections just enough to stop leaks. Regular care extends the life of your shower parts.
Avoiding Over-tightening
Too much force can damage threads and cause leaks. Tighten shower arms by hand first. Use a wrench gently and stop as soon as it feels secure. Over-tightening strips threads and breaks seals.
Checking For Corrosion Periodically
Corrosion weakens metal and creates leaks. Look for rust or greenish build-up around threads. Clean corrosion with a soft brush. Replace parts if corrosion is severe. Keeping metal parts clean protects your shower from leaks.
Credit: www.reddit.com
Frequently Asked Questions
Why Is My Shower Arm Leaking At The Threads?
A leak at the shower arm threads usually means the seal is broken. Water escapes through loose or damaged connections. Tightening or sealing can fix it.
How Can I Stop A Shower Arm From Leaking At Threads?
Use plumber’s tape around the threads before tightening. This tape seals gaps and stops water leaks. Make sure the tape wraps evenly.
What Causes Shower Arm Threads To Leak Water?
Threads leak because of worn-out or missing plumber’s tape. Also, over-tightening can crack the seal. Rust or debris can worsen the leak.
Can I Fix Shower Arm Leaks Without A Plumber?
Yes, you can fix leaks by replacing the tape and tightening the arm. Use simple tools like a wrench and tape. Most fixes take a few minutes.
How Do I Remove A Leaking Shower Arm Safely?
Turn off water first. Use a wrench to turn the shower arm counterclockwise. Protect the fixture with a cloth to avoid scratches.
What Materials Help Prevent Shower Arm Thread Leaks?
Plumber’s tape is the best material for sealing shower arm threads. Pipe joint compound can also help, but tape is easier to use. Both stop water from escaping.
How Often Should I Check Shower Arm Threads For Leaks?
Check the threads every 6 to 12 months for leaks or damage. Early checks stop bigger problems later. Regular maintenance keeps your shower working well.
Conclusion
Fixing a shower arm leak at the threads is simpler than it seems. Tightening the connection or adding plumber’s tape often stops the drip. Small leaks can waste water and cause damage over time. Acting quickly helps save money and prevents bigger problems.
Check the threads regularly to keep your shower working well. A little care goes a long way in avoiding leaks. Don’t let a small drip turn into a big issue. Keep your bathroom dry and comfortable with simple fixes.