
Is your tub shower unit looking worn out or causing leaks? Replacing a one-piece tub shower unit might seem like a big job, but it doesn’t have to be stressful.
Imagine having a fresh, clean bathroom space that feels brand new and works perfectly every time you step in. In this guide, you’ll discover simple steps to replace your one-piece tub shower unit with confidence. Whether you want to save money or improve your home’s comfort, this article will walk you through everything you need to know.
Keep reading to transform your bathroom without the hassle.
Tools And Materials Needed
Replacing a one-piece tub shower unit requires specific tools and materials. Being prepared makes the job easier and faster. Having the right equipment prevents mistakes and damage.
This section lists the tools and helps you pick the right replacement unit. Follow these tips to ensure a smooth installation process.
Essential Tools Checklist
- Adjustable wrench for plumbing connections
- Utility knife to cut caulk and sealant
- Putty knife to remove old adhesive and caulk
- Screwdriver set for screws and fasteners
- Caulking gun for new sealant application
- Measuring tape to check the space and unit size
- Level to ensure the unit is straight
- Bucket and rags for water spills and cleanup
- Safety glasses and gloves for protection
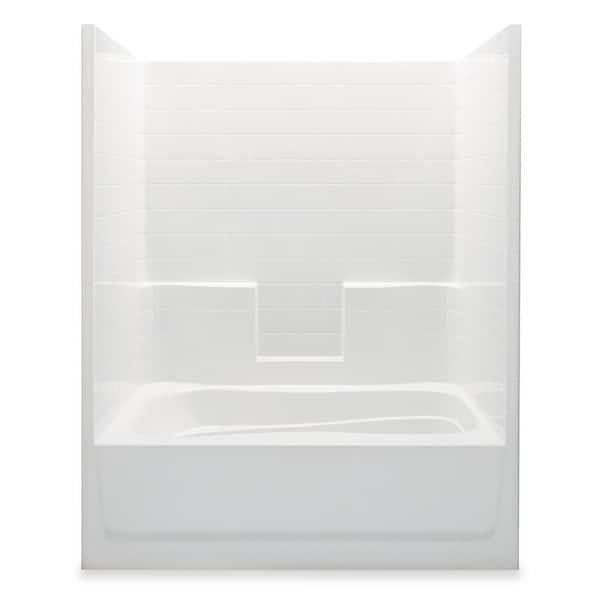
Choosing The Right Replacement Unit
Measure your existing tub and shower space precisely. Choose a one-piece unit that fits these dimensions. Check the material type—acrylic or fiberglass are common. Acrylic is lightweight and easy to clean. Fiberglass is durable and affordable.
Consider the style and color to match your bathroom decor. Verify the unit includes all parts like drain covers and trim pieces. Look for units with good reviews on durability and installation.

Credit: akerbymaax.com
Preparing The Bathroom Area
Clear the bathroom area by removing personal items and accessories. Turn off the water supply and drain the tub fully. Protect floors and surfaces with drop cloths to avoid damage during removal.
Before replacing a one-piece tub shower unit, prepare the bathroom carefully. Preparation makes the work safer and faster. Take time to get the space ready. This step helps avoid damage and keeps tools organized.
Focus on three main tasks: turning off the water supply, clearing the work space, and protecting surrounding surfaces. Each task is key to a smooth replacement process. Follow these steps closely for the best results.
Turning Off Water Supply
Start by shutting off the bathroom’s main water supply. Look for the shutoff valve near the tub or under the sink. Turn it clockwise until it stops. This step stops water flow and prevents leaks during removal.
Open the faucet to drain leftover water. Check that no water flows before starting work. Turning off water protects your bathroom from flooding and damage.
Clearing The Work Space
Remove all items from the bathroom floor and around the tub. Take out mats, towels, and toiletries. Clear the area to give yourself plenty of room to work safely.
Remove any furniture or decorations nearby. This prevents accidents and keeps your belongings clean. A tidy workspace helps you move freely and focus on the job.
Protecting Surrounding Surfaces
Cover floors and walls near the tub with plastic sheets or drop cloths. Use painter’s tape to hold coverings in place. Protect cabinets, tiles, and fixtures from scratches or spills.
Take extra care around electrical outlets and switches. Cover them with plastic to avoid water damage. Protecting surfaces saves you from costly repairs later.
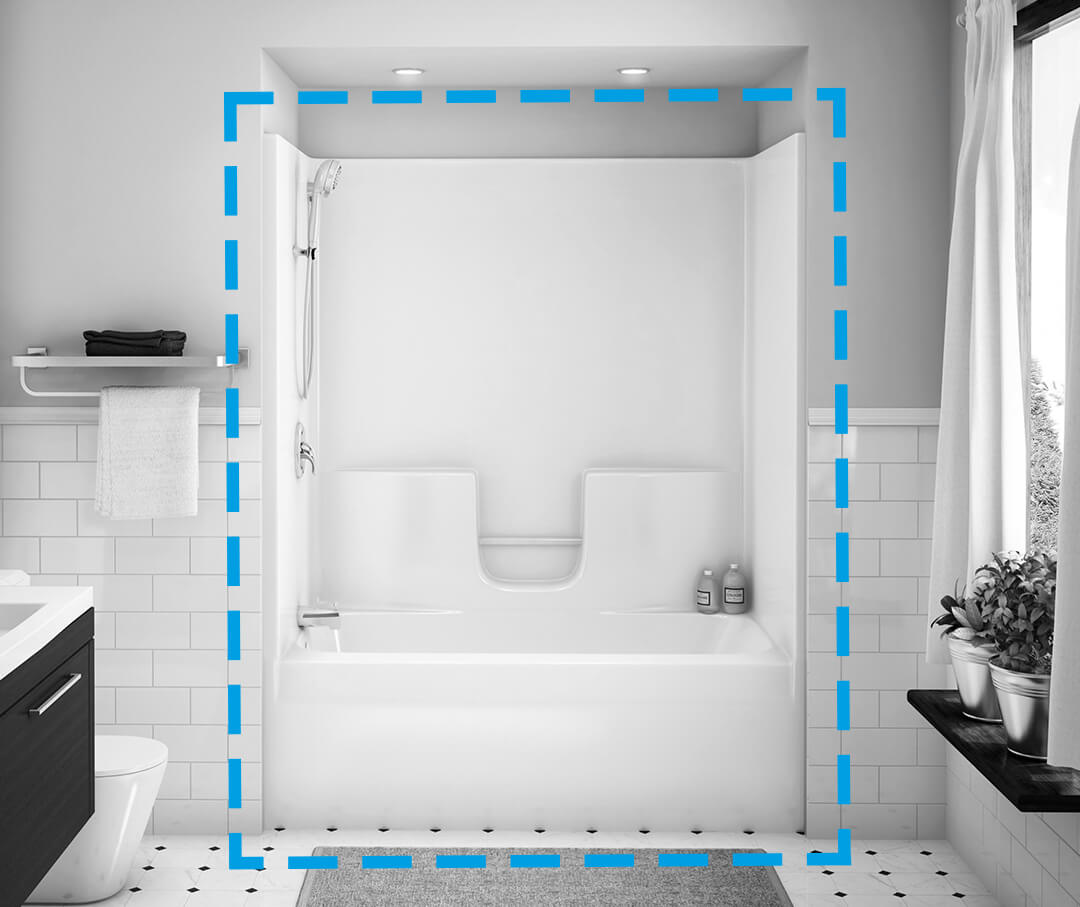
Removing The Old Tub Shower Unit
Removing the old tub shower unit is the first step in a bathroom remodel. It requires care to avoid damage to plumbing and walls. Proper removal also makes room for the new unit. Follow simple steps to disconnect and detach the old unit safely.
Work slowly and keep tools ready. Safety should be your priority throughout the process. Dispose of the old unit properly to keep your workspace clean.
Disconnecting Plumbing Fixtures
Turn off the water supply before starting. Open the faucet to drain any water left in the pipes. Use a wrench to loosen the nuts connecting the showerhead and faucet. Remove the fixtures carefully to avoid breaking pipes. Keep a bucket nearby to catch water drips.
Detaching The Unit Safely
Check for screws or nails holding the tub shower unit to the wall. Use a screwdriver or pry bar to remove them. Gently pull the unit away from the wall. Avoid sudden force to prevent wall damage. If the unit is glued, use a utility knife to cut the seal.
Handling And Disposal Tips
Wear gloves to protect your hands from sharp edges. Lift the unit with help to prevent injury. Transport it to a disposal area or recycling center. Check local rules for proper disposal of bathroom fixtures. Keep the workspace tidy to avoid accidents.
Credit: www.homedepot.com
Installing The New Unit
Installing a new one-piece tub shower unit is an important step. It requires careful handling to fit the unit properly and ensure it works well. This section guides you through the main tasks to install the replacement unit correctly. Follow each step to get a solid and lasting result.
Positioning The Replacement Unit
Start by placing the new tub shower unit near the bathroom opening. Carefully lift and slide it into the space. Align the edges so the unit fits snugly against the walls and floor. Check for levelness using a spirit level. Adjust the position until it sits evenly and flush on all sides.
Securing The Unit In Place
Use screws and anchors to fix the unit to wall studs. Drill pilot holes through the flange of the unit into the studs. Insert screws and tighten them firmly but gently. Avoid over-tightening to prevent cracks. Check stability by pressing on the unit; it should not move or wobble.
Reconnecting Plumbing And Fixtures
Reconnect the drain pipe to the new unit’s drain outlet. Ensure all washers and seals are in place to prevent leaks. Attach the water supply lines to the shower valve. Use plumber’s tape on threads for a tight seal. Finally, install the showerhead and faucet handles. Turn on the water and test for leaks or drips.
Sealing And Finishing Touches
Sealing and finishing touches are key to a successful tub shower unit replacement. They stop water from leaking and keep your bathroom safe from moisture damage. Proper sealing also gives the unit a clean, polished look. This part of the job needs care and attention to detail.
Applying Waterproof Sealant
Start by applying waterproof sealant along all edges and joints. Use a high-quality silicone caulk made for bathrooms. Apply a smooth, even bead to fill gaps between the tub and walls. Smooth the sealant with a wet finger or a caulk tool for a neat finish. Let the sealant dry completely before using the shower.
Checking For Leaks
After the sealant dries, test the unit for leaks. Run water and watch all seams closely. Look for any signs of water escaping. Check both inside and outside the tub area. Fix any leaks by adding more sealant or tightening fittings. This step prevents future water damage.
Cleaning And Final Inspection
Clean the tub and surrounding area thoroughly. Remove any excess sealant and dust. Inspect the entire unit for missed spots or imperfections. Make sure all parts are secure and sealed. A clean, well-finished unit looks great and lasts longer.
Maintenance Tips For Longevity
Proper care extends the life of your one-piece tub shower unit. Simple steps keep it clean and working well. Routine maintenance prevents damage and costly repairs. Follow these tips to maintain your shower unit for years.
Regular Cleaning Practices
Clean your tub shower unit at least once a week. Use a mild, non-abrasive cleaner to avoid scratches. Soft sponges or cloths work best for cleaning. Rinse thoroughly to remove soap and cleaner residue. Dry surfaces with a towel to prevent water spots. Avoid harsh chemicals that can damage the finish.
Preventing Mold And Mildew
Keep your shower dry after each use. Use a squeegee to remove excess water from walls and floor. Ensure proper ventilation in the bathroom to reduce humidity. Open windows or run an exhaust fan during and after showers. Check and seal any cracks or gaps to stop water leaks. Regularly inspect grout and caulking for signs of mold.
When To Call A Professional
Contact a professional if you notice cracks or leaks in the unit. Persistent mold or mildew that you cannot clean is a warning sign. Call an expert for damaged seals or loose panels. Professionals can also help with deep cleaning and repairs. Early intervention saves money and prevents bigger problems.
Credit: akerbymaax.com
Frequently Asked Questions
What Tools Do I Need To Replace A One-piece Tub Shower Unit?
You will need a utility knife, screwdriver, caulk remover, and silicone sealant. A pry bar and safety gloves are also helpful.
How Long Does It Take To Replace A One-piece Tub Shower Unit?
Replacing usually takes 4 to 6 hours for a DIY beginner. It may vary depending on experience and bathroom size.
Can I Replace A One-piece Unit Without Removing The Toilet?
Yes, it is possible but removing the toilet gives more working space. It depends on your bathroom layout and comfort level.
Do I Need To Turn Off Water Before Removing The Tub Shower Unit?
Yes, always shut off the water supply to avoid leaks or water damage. Drain any remaining water from pipes afterward.
How Do I Prepare The Wall Before Installing The New Tub Shower Unit?
Clean the wall surface and remove old caulk or debris. Check for any water damage and repair it before installation.
What Kind Of Sealant Should I Use Around The New Unit?
Use a waterproof, mold-resistant silicone sealant for a strong, lasting seal. Avoid acrylic caulk as it is not as durable.
Can I Install A One-piece Tub Shower Unit Over Existing Tiles?
It is possible if tiles are in good condition and securely attached. Ensure the surface is clean, dry, and flat before installing.
Conclusion
Replacing a one-piece tub shower unit can refresh your bathroom quickly. It improves both style and function in a small space. Careful measurement and the right tools make the job easier. Take your time to avoid mistakes and leaks. A new unit means a cleaner, safer bathing area.
Enjoy the fresh look and the comfort it brings. This simple upgrade adds value to your home. Start your project with confidence and clear steps. You’ll appreciate the change every day.