
A traditional wax ring is the best choice for most standard floor-mounted toilets because it offers a reliable, time-tested seal at a very low cost, while a wax free toilet seal is better if you need to pull and reset the toilet multiple times during a renovation. If your bathroom floor is perfectly level and the flange is at the correct height, the classic wax option remains the industry standard. If you have a slanted floor or a flange that sits too low, the rubber-based alternative is often easier to install.
Comparing wax ring vs wax free toilet seals
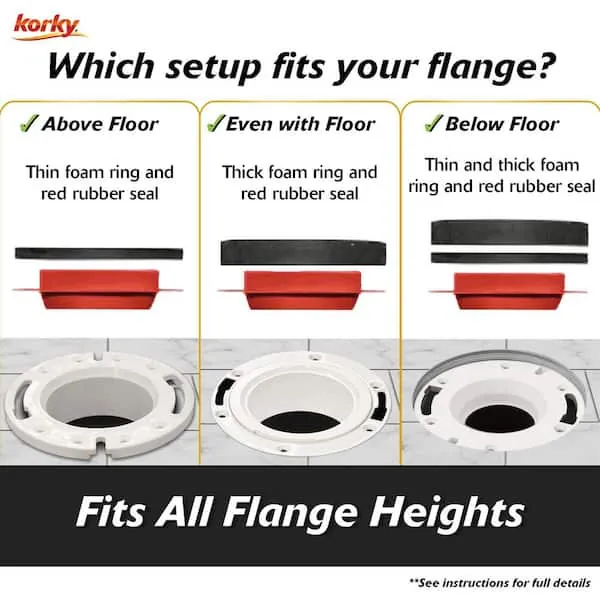
Choosing between these seals depends on your floor condition and how often you plan to move the fixture. While wax is the classic choice, modern rubber or foam rings offer flexibility that wax can’t match.
| Method | How long | Effort | Cost | Best for |
|---|---|---|---|---|
| Standard wax ring | 15 minutes | Low | Low | Level floors |
| Rubber/foam seal | 10 minutes | Very low | Medium | Uneven floors |
| Wax with horn | 20 minutes | Medium | Low | Low flanges |
A wax ring is the industry standard for a reason: it creates a permanent, airtight bond that conforms to the pipe shape perfectly. However, if your toilet flange sits more than a quarter-inch below the finished floor, don’t use a standard ring. It will fail to bridge the gap, leading to slow leaks that rot your subfloor. In that case, use a wax ring with an integrated plastic horn to bridge the height difference.
Rubber seals are superior when you’re working on uneven tile or a slightly sloped floor. Unlike wax, which compresses and stays put, rubber seals maintain a constant outward pressure. This makes them the only logical choice if you’re a DIY beginner who might need to pull the toilet back up to adjust the flange or fix a wobble.
The most common mistake is stacking two wax rings to compensate for a deep flange. This creates a weak point that will eventually shift and leak. If your flange is too low, use a flange extender kit to bring the connection flush with the floor before setting the seal. If you have a concrete floor with a history of moisture, stick to rubber to avoid the degradation wax can suffer in damp, cold environments.
Using a standard wax ring
A wax ring creates a permanent, airtight, and watertight seal by compressing against the flange and the toilet horn. It’s a single-use product that must be replaced every time you lift the toilet.
Clean the old wax off the flange and the toilet horn completely using a putty knife. If you leave even a small ridge of hardened wax behind, the new ring won’t seat properly, creating a slow leak that rots your subfloor.
Place the new ring onto the horn of the toilet or directly onto the flange. If your flange sits below the finished floor level, use an extra-thick wax ring to bridge the gap. Standard rings will fail to reach the flange in these cases, leading to inevitable floor damage.
Lower the toilet onto the flange, ensuring the bolts align with the holes. Press down firmly with your body weight to compress the wax into the gap. Don’t rock the toilet side to side once it touches the wax. If you tilt the toilet after setting it, the wax loses its shape and you must start over with a fresh ring.
Tighten the nuts on the closet bolts until the toilet is secure and level. Stop as soon as you feel resistance. Overtightening often cracks the porcelain base, which is a permanent, non-repairable mistake that costs the price of a new toilet.
This method is excellent because it conforms perfectly to irregular pipe shapes, ensuring no sewer gas escapes. Its main weakness is that it’s messy and can’t be reused. If you suspect a leak, don’t attempt to tighten the bolts further. A compressed wax ring won’t regain its seal once disturbed, so you must always remove the toilet and install a new ring to ensure a watertight bond.
Installing a wax free seal
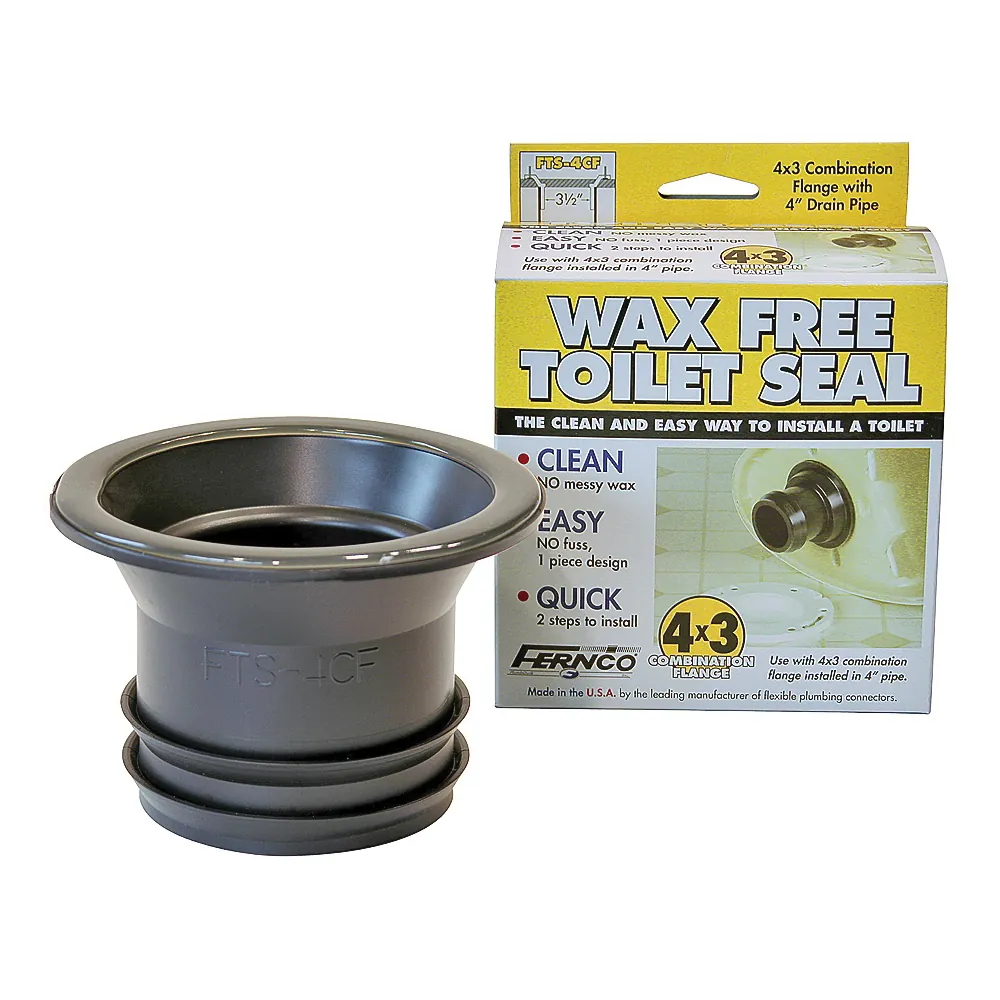
A wax-free toilet seal uses synthetic rubber or foam gaskets to create a mechanical seal. These are popular because they’re clean and forgiving if you don’t get the alignment right on the first try.
Remove all debris from the flange and check that the mounting bolts are secure. Scrape away every trace of old wax with a plastic putty knife, as any residue prevents the synthetic gasket from sitting flush.
Attach the adhesive-backed seal to the base of the toilet or the flange. If your flange sits below the finished floor level, use a thick, stackable gasket to bridge the gap. A standard thin seal will fail to reach the pipe, leading to slow, hidden leaks that rot your subfloor.
Align the toilet over the bolts and press the base down until it touches the floor. Tighten the nuts until the toilet is stable and doesn’t rock when you sit. Don’t overtighten; stop the moment the base stops moving.
This option is perfect for DIYers because it’s impossible to “squash” it incorrectly. You should inspect the seal for damage or deformation after lifting the toilet, as many manufacturers recommend replacing it if the gasket has been compromised.
The main weakness is that if your floor is extremely uneven, these seals may not provide as tight a seal as malleable wax. If you can slide a shim into a gap between the toilet base and the floor, the floor is too uneven for a foam ring. In that case, switch back to a traditional wax ring, which flows into irregular voids to maintain a permanent, airtight barrier.
Choosing the right seal for your home
When deciding which product to use, look at your specific installation needs. If you’re in a hurry, a rubber seal is the fastest way to get your toilet back in service. It requires no messy scraping and aligns almost instantly.
If you’re doing this for the first time, a rubber or foam seal is the safer choice. You can reposition the toilet without the risk of ruining a wax ring, which saves you a trip back to the store.
Beginners often make the mistake of setting the toilet down once on a wax ring and trying to shift it; this breaks the seal’s integrity and guarantees a leak. If you feel the toilet wobble after the initial set, don’t slide it. You must pull it up, scrape the old wax clean, and start over with a fresh ring.
If you want the best possible result regardless of the effort, a traditional wax ring with an integrated plastic horn is the gold standard. It provides a superior, long-lasting barrier against leaks and gases that synthetic materials sometimes struggle to match over many years.
Use the horn version if your flange sits below the finished floor level, as it bridges the gap to ensure waste flows directly into the pipe. If your flange sits flush with or above the floor, stick to a standard wax ring to avoid cracking the porcelain base during tightening.
Important rules for toilet seals
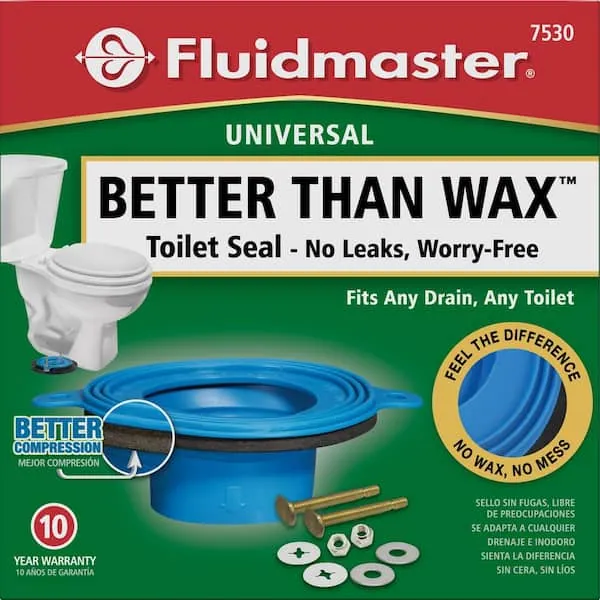
Regardless of the seal you choose, you must ensure the flange height is correct. According to general plumbing best practices, the flange should sit on top of the finished floor, not below it. If your flange is recessed more than 1/4 inch below the floor surface, a standard wax ring will fail to create a watertight compression. In this case, you must install a flange extender to bridge the gap and prevent leaks that can rot your subfloor.
Always check that your toilet doesn’t rock before you finish. If it moves, use plastic shims under the base to level it, then caulk around the perimeter. Never overtighten the bolts, as this can crack the porcelain base of the toilet. A common mistake is using a wrench to force the nut; instead, tighten by hand until snug, then add only a quarter-turn with a tool.
If you find your flange is cracked or the floor is soft from water rot, this is no longer a simple seal replacement. You can test for rot by pressing firmly on the floor around the base; if the floor feels spongy or yields under pressure, the subfloor is compromised.
At that point, you should contact a licensed plumber to inspect the structural integrity of the floor and the pipe connection. Ignoring this softness leads to catastrophic floor failure and expensive joist repairs. If the flange is metal and rusted, replace it entirely rather than attempting a temporary patch.
Frequently asked questions
Can I reuse a wax ring?
No, you can’t reuse a wax ring once it has been compressed. The wax loses its structural integrity and its ability to maintain an airtight seal once the toilet is lifted. You must always use a new ring if you remove the toilet for any reason, such as floor repairs or painting.
Is it safe to use two wax rings?
No, it isn’t recommended to stack two wax rings to compensate for a low flange. Stacking leads to a weak, unstable seal that’s prone to leaking over time. If your flange sits below the floor level, you should install a plastic or metal flange extender to bring it up to the correct height.
Why does my toilet smell like sewer gas?
A smell usually means the seal has failed or was never properly seated. This happens if the toilet is loose, if the wax was squashed unevenly, or if the flange is broken. You should pull the toilet, inspect the flange for damage, and install a new seal to restore the airtight barrier.
How do I know if my flange is the right height?
The flange should sit directly on top of your finished floor surface. You can check this by placing a straight edge across the floor over the flange opening. If the flange is more than a quarter-inch below the floor, you need an extension kit to prevent future leaks.
What happens if I overtighten the toilet bolts?
Overtightening the bolts often causes the porcelain base of the toilet to crack. You should tighten them only until the toilet is snug and doesn’t wobble on the floor. If you feel resistance, stop immediately to avoid expensive damage to the fixture.
Conclusion
Choosing the right seal doesn’t have to be complicated. If you aren’t sure which one fits your bathroom, take a quick measurement of your flange height before heading to the store. You’ll feel much more confident once you’ve got the right part in hand, so don’t hesitate to ask a pro for advice.