
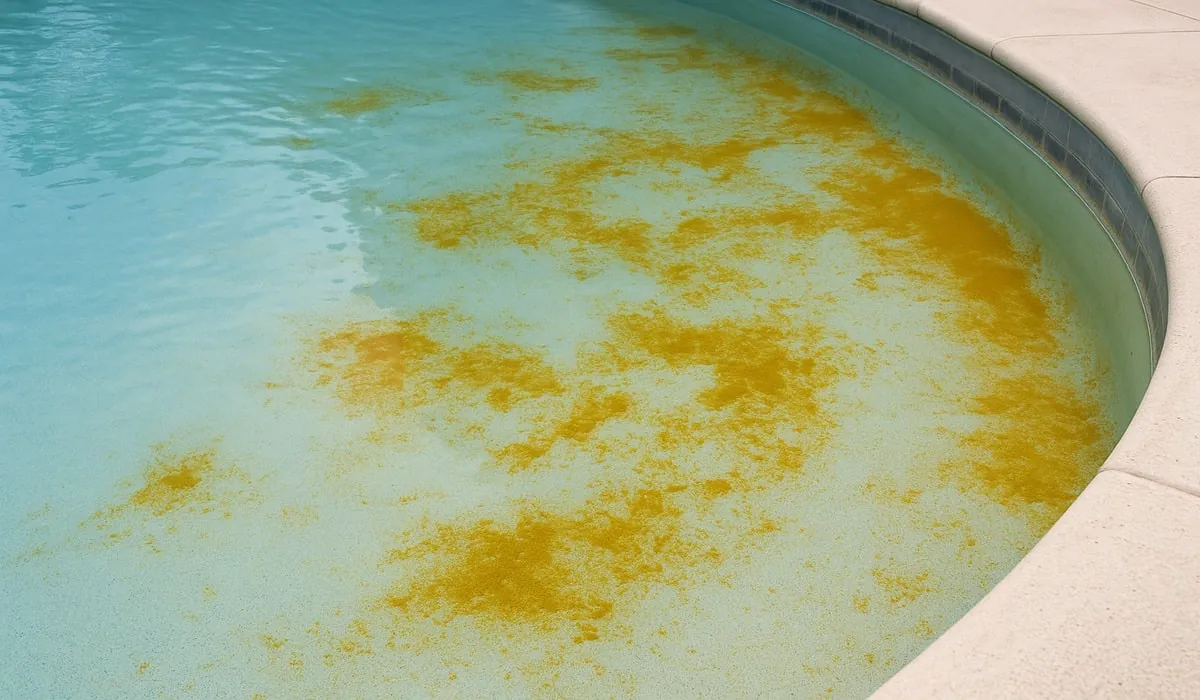
Mustard algae looks like yellow or brownish-green dust clinging to pool walls, steps, and floors. If you’re trying to identify this growth in your water, the answer is a powdery, sandy film that doesn’t brush away easily. It grows mostly in shaded spots where water circulation is weak.
The exact color shifts between pale yellow and dark brown depending on your pool’s surface material, how much sunlight hits the wall, and your current chlorine level. The rest of this page explains those differences so you can identify it correctly before you treat it.
Who needs to identify mustard algae
Pool owners who spot a strange yellow stain on their walls are the first group typing this question. They usually have a plaster, pebble, or vinyl-lined pool and keep standard test strips at home. What they actually need is a way to tell if that mark is living growth or just a metal stain from old pipes.
Service technicians form the second group. They need the specific texture details and the brushing test that separates mustard algae from pollen or dirt blown into the water overnight.
A third group includes people buying a house with an older pool that hasn’t run its pump in months. They don’t own test kits yet and just want to know if the yellow coating on the floor is something dangerous or expensive to fix.
This page serves the homeowner doing their own maintenance. If you manage a commercial facility or a public splash pad, local health departments require certified operators for any biological contamination, so you’ll need to hire a licensed service company instead. Everything below assumes you maintain a residential pool up to 20,000 gallons with a working sand or cartridge filter.
What changes the color and texture
The surface material of your pool decides the base shade you’ll see. On white plaster, the growth appears bright yellow, almost like spilled turmeric. On dark pebble finishes, it looks muddy brown because the dark stone shows through the thin layer. Check your pool’s finish first; the same organism looks completely different on white versus gray surfaces.
Sunlight exposure controls how thick the patches grow. Mustard algae avoids direct UV light, so it stays thin and dusty in open areas. In deep corners or under ladders where shade lasts all day, it builds up into a heavier, velvety mat. If your pool gets full sun, you might only see faint spots near the return jets.
Your free chlorine level directly affects the color intensity. When chlorine drops below 1 part per million, the yellow pigment becomes vivid. At 3 parts per million, the edges turn pale and start breaking apart. Test your water with liquid drops, not just paper strips, to get an accurate reading before judging the color.
Water temperature moves the growth speed, which changes how noticeable the texture is. Below 70°F, it spreads slowly and stays flat against the wall. Above 85°F, it multiplies fast enough to puff up when the pump turns on. The temperature range matters because treating warm water requires more stabilizer to keep the chlorine active.
Circulation patterns cause the most confusion. Dead zones behind ladders or inside skimmer throats let the spores settle undisturbed. People often mistake these isolated spots for rust stains because they don’t spread evenly. Run your hand over the spot; if it feels slimy rather than rough, it isn’t rust.
What mustard algae looks like in your pool
You need to perform a few physical checks before adding chemicals. Guessing wrong means wasting money on algaecides that won’t work on metal stains or pollen. Follow these actions in order, using the exact amounts listed for a standard 10,000-gallon residential pool.
- Turn off the pool pump and wait 30 minutes for the water to stop moving completely. Still water lets you see whether particles are floating or attached to the surface.
- Look at the shady side of the pool, especially behind ladders and under steps. Mark any yellow or brownish-green patches that sit flat against the wall rather than drifting in the current.
- Take a stiff nylon pool brush and scrub one marked patch firmly for ten seconds. Green algae peels off in sheets, but mustard algae clings tight and only releases a fine cloud of dust.
- Watch the brushed area for two minutes after you stop scrubbing. If the yellow powder settles right back onto the exact same spot instead of drifting away, you’ve confirmed the attachment pattern typical of this organism.
- Dip a liquid reagent test kit into the water near the patch to measure free chlorine. A reading below 1.0 ppm supports biological growth, while high chlorine with persistent staining suggests metals instead.
- Rub a small amount of vitamin C powder (ascorbic acid) on a separate similar-looking spot for 30 seconds. If that spot vanishes instantly, it’s an iron stain, not organic growth, so skip the algae treatment entirely.
- Scoop a sample of the yellow dust into a clear glass jar using a plastic cup. Hold it up to bright light; true mustard algae looks granular like fine sand, whereas pollen appears as uniform, smooth spheres.
- Shock the pool with 2 pounds of calcium hypochlorite per 10,000 gallons if steps 3 through 7 point to organic growth. For pools larger than 10,000 gallons, scale the dose proportionally by checking your manufacturer’s label.
The single judgment call here happens after brushing. If the cloud drifts away and never returns to the same tile, you’re likely looking at dirt or pollen washed in by wind. Only proceed with chemical treatment when the dust resettles stubbornly on the original spot. Handling concentrated calcium hypochlorite carries burn risks to skin and eyes, so wear gloves and goggles; if you’re unsure about dosing safely, contact a licensed pool professional.
Situations and responses at a glance
Different pool conditions change how the growth presents itself and how you should react. The table below matches common scenarios to the correct action, effort required, and warning signs.
| Situation | Action needed | Effort involved | Warning sign |
|---|---|---|---|
| White plaster pool | Brush hard, shock chlorine | Two hours labor | Stains returning within days |
| Dark pebble finish | Use flashlight to inspect | Extra time finding spots | Mistaking shadow for growth |
| Saltwater system | Boost generator output | Adjust settings only | Low salt triggering errors |
| Vinyl liner pool | Soft brush only | Gentle scrubbing | Tearing liner with stiff bristles |
| High pollen season | Vitamin C test first | Five minutes | Treating pollen as organisms |
| Covered winter pool | Uncover, circulate 24 hours | One day pumping | Spreading spores through pipes |
Each row represents a distinct starting condition. Don’t mix them up, because using a stiff wire brush on a vinyl liner will puncture it, costing thousands in repairs. Match your pool’s actual setup to the correct row before buying supplies. If your setup isn’t listed here, check your filter manufacturer’s documentation for material-specific cleaning limits.
Details that separate good results from poor ones
Reading the surface correctly
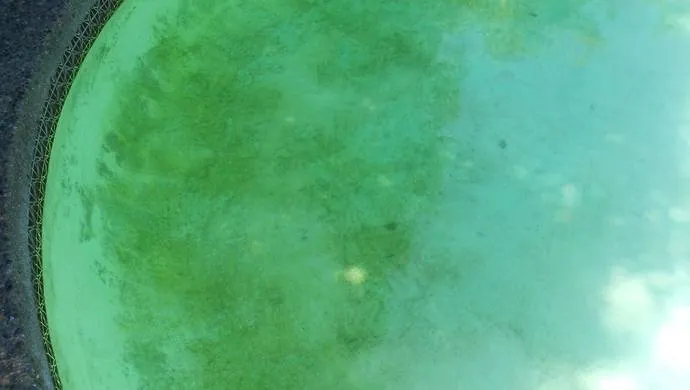
Preparation starts with knowing exactly what material covers your pool shell. Plaster and concrete handle aggressive brushing without damage, allowing you to break the organism’s grip mechanically. Vinyl and fiberglass demand soft nylon bristles because scratching the surface creates tiny grooves where spores hide permanently.
The order of operations matters just as much as the tools. Always brush before you add chlorine. Scrubbing first breaks the protective slime layer that shields the cells from sanitizers. Adding chemicals before brushing leaves the outer colony alive while only killing the loose particles floating nearby.
Watch the return jets while the pump runs after treatment. Clear water shooting from the jets means the filter is catching the dead material properly. Yellow tint in the return flow indicates the filter bed is overloaded, and you need to backwash immediately to prevent clogging.
Leave the automatic pool cleaner in the garage during this process. Robotic vacuums spread live spores across the entire floor before the chlorine has time to kill them. Manual brushing targets the infected zones without redistributing the problem to clean tiles.
Knowing when to stop
Deliberately ignoring the water chemistry for 48 hours after shocking ruins the treatment. You must test the free chlorine twice daily during this window to ensure it stays above 5 ppm. Dropping below that threshold lets surviving spores rebuild their protective coating faster than you can kill them again.
Don’t chase perfect clarity by draining the pool. Draining more than one-third of the volume risks popping a plaster shell out of the ground in areas with high water tables. Filter the existing water patiently instead of replacing it.
The trade-off here involves time versus chemical strength. Using double the recommended shock dose clears the water faster but accelerates wear on rubber seals and heater components. Sticking to the standard dose takes three extra days but preserves equipment rated for normal chlorine ranges.
Troubleshooting yellow pool spots
When things don’t go as planned, matching the symptom to the cause saves you from repeating failed treatments. Use this reference to diagnose why your efforts aren’t clearing the water.
| What you notice | What it usually means | What to do first | How to stop it happening again |
|---|---|---|---|
| Yellow dust returns overnight | Chlorine dropped too low | Re-shock to 10 ppm | Run pump longer each day |
| Spots feel rough, not slimy | Iron or copper staining | Apply vitamin C powder | Add sequestering agent monthly |
| Water turns cloudy yellow | Filter media is exhausted | Backwash or replace cartridges | Clean filters every six months |
| Patches only near lights | Poor circulation in niche | Aim return jets downward | Install variable speed pump |
| Growth survives heavy shock | Cyanuric acid too high | Partially drain and refill | Keep stabilizer under 50 ppm |
| Yellow film floats on top | Pollen accumulation | Skim surface with fine net | Cover pool during spring bloom |
If the spots survive two complete shock cycles spaced three days apart, the issue likely isn’t biological. At that point, testing for heavy metals or hiring a specialist prevents you from pouring useless chemicals into the water.
Chemical limits and safety rules
Handling pool sanitation chemicals falls under guidelines published by the Centers for Disease Control and Prevention. Their disinfection guidance for pools outlines safe handling practices and target sanitizer levels for recreational water venues. Following these standards protects both swimmers and the person applying the treatment.
Free chlorine must stay between 1 and 3 ppm for normal swimming, but eradicating established colonies requires raising it to 10-20 ppm temporarily. Never enter the water while levels exceed 5 ppm, as it causes skin irritation and damages swimwear fabrics. Wait until tests show safe numbers before letting anyone swim.
Cyanuric acid acts as a sunscreen for chlorine outdoors, but concentrations above 80 ppm block the sanitizer from working entirely. This limit varies by region and climate, so check your local health department’s published recreational water standards for the exact ceiling allowed in your area.
Mixing different chlorine types together in a bucket can create toxic gases. Always add chemicals separately to the pool water, never to each other. Store oxidizers away from acids in a dry, ventilated space according to the manufacturer’s safety data sheet.
If your pool uses a salt chlorinator, verify the cell plates aren’t scaled over before assuming the generator is producing enough sanitizer. Cleaning the cell requires shutting off power and soaking it in diluted acid, a routine maintenance task for most pool owners.
Time and supply costs
Treating this problem costs money in chemicals and hours spent maintaining equipment. For a 10,000-gallon pool, expect to spend a modest amount on calcium hypochlorite shock and specialized algaecide designed for resistant strains, which is inexpensive relative to the alternative. Prices fluctuate based on seasonal demand and your local supplier, so call ahead rather than relying on last year’s receipt.
Time represents the bigger investment. The initial brushing and shocking takes about three hours of active work. Afterward, you’ll spend 15 minutes twice daily testing water chemistry for at least five consecutive days. Skipping these checks means the colony recovers, forcing you to buy everything again.
Running the pump continuously for 72 hours during treatment increases your electricity bill. A standard single-speed pump draws roughly 1,500 watts, adding a measurable amount to your monthly usage. Variable-speed pumps reduce this penalty significantly by running efficiently at lower RPMs during filtration cycles.
The hidden cost comes from accelerated filter wear. Dead organic matter clogs cartridge pleats faster than normal debris. Plan to soak your cartridges in filter cleaner solution afterward, or budget for replacement elements if yours are already over two seasons old. Ignoring filter maintenance forces the pump to work harder, eventually burning out the motor prematurely.
Preventing regrowth after treatment
Once the water clears, keeping it that way requires adjusting your weekly routine. The organism thrives on neglect, specifically low sanitizer levels and stagnant water pockets. Maintaining consistent chemistry removes the environment it needs to establish a foothold again.
Run your circulation pump long enough to turn over the entire pool volume at least once daily. For most residential setups, this means eight to twelve hours of runtime depending on pipe diameter and pump horsepower. Shorter cycles leave dead zones where spores settle undisturbed.
Brush the walls and floor weekly even when the water looks perfect. Physical disruption prevents microscopic attachment points from developing into visible colonies. Pay special attention to the shady corners identified during your initial inspection.
Test your cyanuric acid level monthly alongside standard pH and chlorine readings. If stabilizer creeps past 50 ppm through repeated trichlor tablet use, dilute the water by draining a few inches and refilling with fresh hose water. High stabilizer locks your chlorine in an inactive state regardless of how much you add.
The sign that attention is needed again isn’t always visual. A sudden unexplained drop in free chlorine overnight, despite no heavy swimmer load, often indicates biological activity consuming the sanitizer before it forms visible patches. Catching that chemical shift early stops a full outbreak.
When this isn’t mustard algae
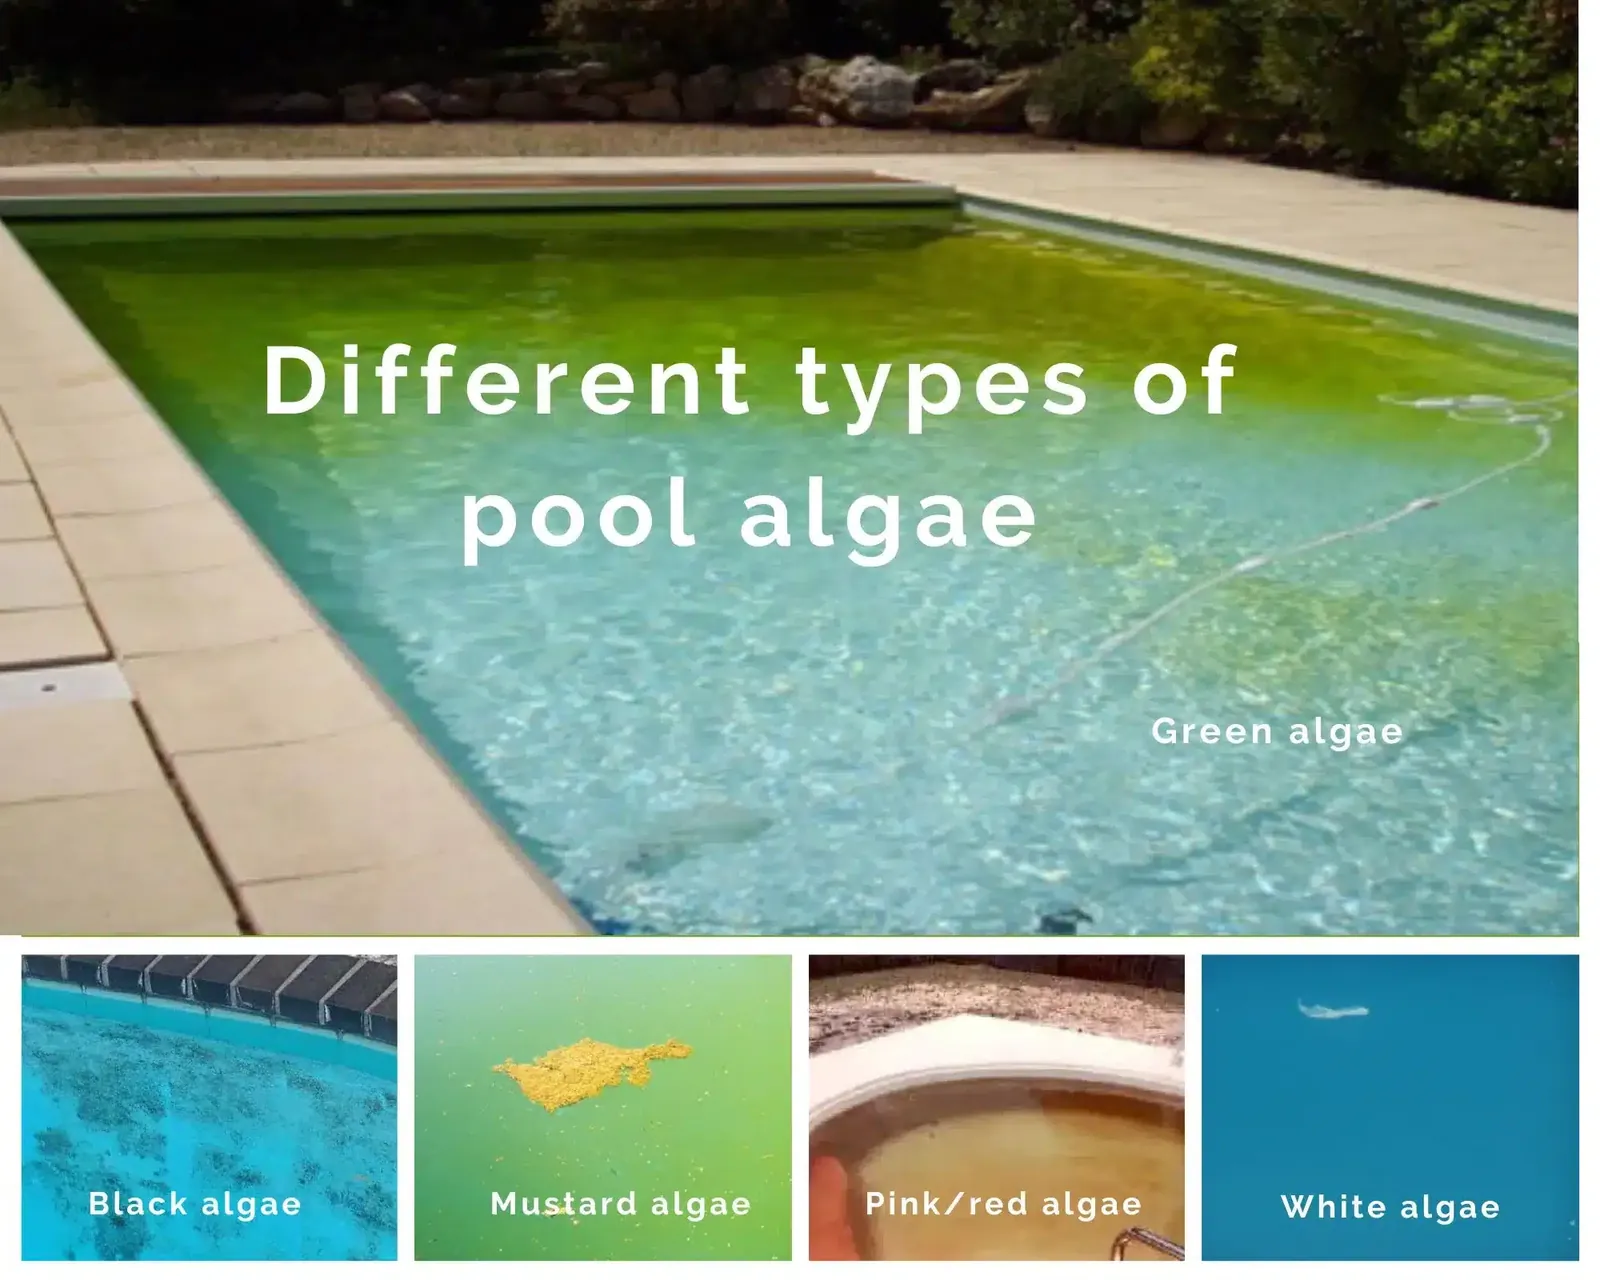
Not every yellow mark in a pool responds to shock treatment. Applying algae solutions to non-biological problems wastes chemicals and delays the real fix. Recognizing when to switch strategies keeps your maintenance budget intact.
If the stain disappears immediately upon contact with vitamin C powder, you’re dealing with dissolved metals precipitating onto the surface. Iron stains come from well water or corroded pipes, while copper stains follow improper use of mineral purifiers. Treat these with sequestering agents designed for metals, not oxidizers meant for organics.
Pollen accumulation mimics biological growth closely during spring months. The difference lies in location: pollen coats horizontal surfaces uniformly and floats freely when disturbed, whereas true growth anchors vertically in shaded niches. Skimming and covering the pool solves pollen issues without altering water chemistry.
Fading or delaminating plaster sometimes exposes underlying yellow aggregate materials. These patches feel hard and permanent, refusing to brush away at all. Resurfacing the pool shell is the only remedy for structural degradation. Attempting to dissolve solid masonry with chlorine damages surrounding healthy surfaces without improving appearance.
If you suspect structural failure or extensive metal corrosion inside underground plumbing lines, stop adding chemicals. Diagnosing internal leaks or pipe deterioration requires pressure testing equipment and excavation permits handled by licensed contractors.
Frequently asked questions
Can mustard algae make you sick?
No, it doesn’t typically cause illness in healthy swimmers like bacteria do. However, its presence indicates poor sanitation where harmful pathogens could also survive unnoticed. The slimy texture creates slip hazards on steps and ladders, posing a physical injury risk rather than a biological one.
Why does it keep coming back after shocking?
Surviving spores hide inside porous plaster or behind light fixtures where chlorine penetration is weak. If cyanuric acid exceeds 80 ppm, the shock treatment requires significantly higher chlorine doses to be effective. Lowering stabilizer levels through partial draining allows subsequent shocks to actually reach embedded colonies.
How long does treatment take to clear water?
Expect five to seven days from initial shock to completely clear water, assuming you maintain chlorine above 5 ppm constantly. Larger pools or severe infestations may require ten days of continuous filtration. Rushing the process by swimming too early reintroduces contaminants that feed remaining spores.
Is it safe to swim during treatment?
No, you shouldn’t enter the water until free chlorine drops back below 5 ppm on a reliable liquid test kit. Elevated sanitizer levels irritate eyes, bleach clothing, and dry out skin rapidly. Keep children and pets away from the deck until readings confirm safe swimming conditions.
What happens if I ignore the yellow spots?
Unchecked growth spreads across shaded surfaces and eventually clogs filter media, reducing circulation efficiency. Heavy accumulations consume available chlorine faster than automatic feeders can replenish it, leaving the entire pool vulnerable to bacterial contamination. Structural staining becomes permanent if left untreated for multiple seasons.
Does it matter what type of pool I have?
Yes, the surface material dictates your brushing technique and chemical compatibility. Vinyl liners tear under stiff brushes, requiring softer tools and gentler agitation. Saltwater systems need generator adjustments rather than manual chlorine additions, changing both the timeline and the equipment involved in eradication.
Can pollen be mistaken for this growth?
Yes, tree pollen settling on the surface creates identical yellow discoloration during spring blooms. The distinction is that pollen floats freely when agitated and coats horizontal planes evenly. True growth anchors tightly to vertical surfaces in shaded areas and releases a sinking dust cloud when brushed.
How many times should I shock the pool?
Two to three shock treatments spaced 48 hours apart usually eliminate established colonies in a 10,000-gallon pool. Each application must raise free chlorine to 20 ppm briefly before natural dissipation occurs. Fewer applications fail to penetrate deep layers, while excessive shocking degrades equipment seals unnecessarily.
Start clearing your pool today
Begin by turning off the pump and performing the nylon brush test on the shadiest yellow spot you can find. If the dust resettles stubbornly, proceed with the shock dosage matched to your pool’s gallon count and watch the water clarify over five to seven days. Stop and call a licensed technician if the stains refuse to lift after two full treatment cycles, as that signals metal contamination or structural damage beyond DIY repair.