
Are your kitchen cabinets looking a little plain? Adding trim can completely transform their appearance, giving your kitchen a fresh, custom look without a full remodel.
You might think it’s complicated, but it’s easier than you expect—and you don’t need to be a pro to get great results. In this guide, you’ll discover simple steps to add trim that fits your style and budget. Ready to make your kitchen cabinets stand out?
Keep reading, and you’ll have the confidence to tackle this project yourself.
Choosing The Right Trim
Choosing the right trim for kitchen cabinets can change the entire look of your kitchen. Trim adds detail and style, making cabinets appear more finished and polished. It is important to pick trim that fits the design and materials of your cabinets.
Good trim enhances the beauty of your cabinets without overpowering them. Think about the size, shape, and style of the trim. Consider how it will work with your kitchen’s overall look. The right trim can highlight your cabinet doors and edges.
Types Of Trim For Cabinets
There are many trim styles to choose from. Some common types include crown molding, beadboard, and rope trim. Crown molding sits at the top edge of cabinets and adds a classic touch. Beadboard is a simple, vertical lined trim that gives a rustic feel. Rope trim has a twisted design for a decorative look.
Flat trim is simple and modern. It creates clean lines and fits well in contemporary kitchens. Choose trim based on the style you want to create. Small trim pieces can add subtle detail. Larger trim makes a bold statement.
Matching Trim With Cabinet Style
Match the trim style to your cabinet design. Traditional cabinets look best with crown molding or detailed trim. Shaker-style cabinets pair well with simple, flat trim. Modern cabinets benefit from sleek and minimal trim to keep the look clean.
Consider the cabinet’s color and hardware. Light cabinets work well with white or light-colored trim. Dark cabinets may need contrasting trim to stand out. The trim should blend with the cabinet style, not clash or overwhelm it.
Selecting Materials And Finishes
Trim materials must be durable and easy to work with. Wood is the most common choice. It can be painted or stained to match your cabinets. MDF is a budget-friendly option that paints well. PVC trim resists moisture and is good for kitchens.
Choose a finish that complements your cabinet finish. Matte, satin, or glossy finishes all affect the final look. Paint or stain the trim before installation for a clean result. Proper finishing protects the trim and keeps it looking good.

Credit: www.elizabethburnsdesign.com
Gathering Tools And Materials
Gathering the right tools and materials is the first step to add trim to kitchen cabinets. This step sets the foundation for a smooth project. Having everything ready saves time and avoids frustration.
Knowing what to prepare makes the work easier and faster. It also ensures a neat and professional finish.
Essential Tools For Trim Installation
- Measuring tape – for accurate measurements
- Miter saw or hand saw – to cut trim at precise angles
- Nail gun or hammer – to attach the trim firmly
- Level – to keep the trim straight
- Sandpaper – for smoothing rough edges
- Caulking gun – to seal gaps between trim and cabinets
- Safety glasses – to protect your eyes
- Stud finder – to locate studs for secure nailing
- Pencil – to mark cutting lines
Materials Needed For The Project
- Trim molding – choose style and size that matches your cabinets
- Wood filler – to cover nail holes and gaps
- Paint or stain – to finish the trim
- Primer – if painting the trim
- Painter’s tape – to protect cabinet surfaces during painting
- Sandpaper sheets – for final sanding before painting or staining
- Drop cloth – to protect the floor
Preparing Cabinets For Trim
Preparing your kitchen cabinets for trim is a key step. It ensures the trim fits well and looks good. Proper preparation makes the whole project easier. It helps the trim stick better and last longer.
Cleaning And Sanding Surfaces
Start by cleaning the cabinet surfaces. Remove all dirt, grease, and dust. Use a mild detergent and a soft cloth for cleaning. Let the cabinets dry completely before moving on.
Next, sand the cabinet edges lightly. Use fine-grit sandpaper for this job. Sanding removes rough spots and old finishes. It also creates a smooth surface for the trim to stick to. Wipe away all sanding dust with a clean cloth.
Measuring And Marking Trim Placement
Measure the cabinet edges carefully. Use a tape measure for accuracy. Note the length and width of each section for trim. Mark these measurements on the trim pieces before cutting.
Mark the cabinet where the trim will go. Use a pencil to draw light lines. These marks guide you during the trim installation. Double-check all measurements to avoid mistakes.
Cutting And Fitting Trim
Cutting and fitting trim to kitchen cabinets is a key step in achieving a polished look. This task requires careful measuring and precise cuts. Proper fitting ensures the trim sits flush and looks seamless.
Taking your time with each piece helps avoid gaps and uneven edges. Trim adds character and style, so accuracy matters. The right cuts make installation easier and improve the final appearance.
Measuring And Cutting Trim Pieces
Start by measuring the length where the trim will go. Use a tape measure and write down the exact numbers. Measure twice to avoid mistakes.
Mark the trim with a pencil where you need to cut. Use a miter saw or a hand saw for clean, straight cuts. Cut slowly to keep edges smooth.
Always cut a little longer than needed. You can trim the piece to fit perfectly later. Short pieces are harder to fix.
Creating Perfect Corners And Joints
Trim corners must fit tightly for a neat look. Use a miter box to cut 45-degree angles on each piece. This creates a perfect corner when joined.
Check the corner fit before attaching. Sand edges lightly to remove rough spots. This helps pieces fit flush without gaps.
For joints along straight sections, cut ends square and join them tightly. Apply wood glue to strengthen the bond. Use finishing nails to hold pieces in place.
Attaching Trim To Cabinets
Attaching trim to kitchen cabinets adds a stylish and finished look. It can hide gaps and give a custom appearance. The process requires care to keep trim pieces secure and aligned. Using the right tools and techniques ensures strong attachment and a neat fit. This section explains how to attach trim properly.
Using Adhesives And Nails
Start by applying a strong wood glue to the back of the trim. Spread the glue evenly for good coverage. Press the trim firmly onto the cabinet surface. Use finishing nails to hold the trim in place while the glue dries. Nail the trim at an angle to avoid splitting the wood. Countersink nails slightly to hide them later. Adhesive and nails together create a sturdy bond.
Ensuring Secure And Flush Fit
Check that the trim fits flush against the cabinet. Gaps reduce the visual appeal and weaken the attachment. Use clamps to hold trim tight if needed. Sand any uneven edges before attaching. Make small adjustments to align corners perfectly. Double-check the fit before the adhesive sets. A secure, flush fit gives a polished, professional look.

Credit: erinzubotdesign.com
Finishing Touches
Finishing touches bring your kitchen cabinets to life. They hide small imperfections and give a smooth, clean look. These final steps make your trim look like part of the cabinet, not an afterthought. A neat finish shows your hard work and care.
Filling Gaps And Nail Holes
Fill gaps between trim and cabinets with wood filler or caulk. Choose filler that matches your cabinet color for a natural look. Use a putty knife to apply filler smoothly. Press it into nail holes and cracks. Let it dry completely before moving on.
Sanding And Painting Or Staining
Sand the filled areas with fine-grit sandpaper. Sand gently to avoid damaging the trim. Wipe dust off with a clean cloth. Paint or stain the trim to match your cabinets. Use thin, even coats for a smooth finish. Allow each coat to dry before adding another.
Maintaining Trimmed Cabinets
Maintaining trimmed cabinets keeps your kitchen looking neat and fresh. It also protects the wood and finish from damage. Regular care helps the trim stay strong and attractive for years.
Cleaning Tips
Dust trimmed cabinets often using a soft cloth or brush. Avoid harsh cleaners that can damage paint or wood. Use mild soap and warm water for sticky spots. Dry the trim immediately to prevent water damage. Clean carefully around corners and grooves to remove dirt.
Repairing Minor Damage
Small nicks and scratches can be fixed with wood filler or putty. Choose a color that matches your trim for best results. Lightly sand the area after filling to smooth the surface. Touch up paint or stain as needed to blend repairs. Prompt fixing prevents damage from getting worse over time.
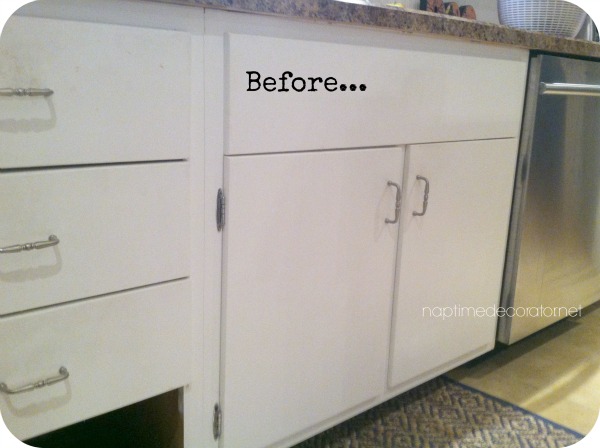
Credit: www.naptimedecorator.net
Frequently Asked Questions
What Tools Are Needed To Add Trim To Cabinets?
You will need a miter saw, measuring tape, wood glue, nails, a nail gun, sandpaper, and paint or stain. These tools help ensure precise cuts and secure attachment of the trim to kitchen cabinets.
How Do I Measure Trim For Kitchen Cabinets?
Measure the length and width of the cabinet edges where you want to add trim. Double-check measurements before cutting to avoid mistakes and ensure a perfect fit.
Can I Paint Or Stain Cabinet Trim?
Yes, painting or staining trim is recommended to match or complement your cabinets. It enhances the look and protects the wood from damage and moisture.
How Do I Attach Trim To Kitchen Cabinets?
Use wood glue and a nail gun to attach the trim firmly. First, apply glue, then nail the trim in place, and fill nail holes for a smooth finish.
Conclusion
Adding trim to kitchen cabinets can change your space quickly. It gives your cabinets a fresh, finished look. You don’t need special skills to do it right. Just follow simple steps and use the right tools. Take your time measuring and cutting for the best fit.
A neat trim makes your kitchen feel warm and inviting. Try this easy upgrade to improve your kitchen’s style today. Small changes can make a big difference. Enjoy your new kitchen look!