
Are you ready to transform your kitchen but don’t know where to start? Building your own kitchen cabinet base might sound tricky, but with the right steps, you can create a sturdy foundation that fits perfectly and lasts for years.
Imagine the satisfaction of knowing your cabinet is built by you, tailored exactly to your space and style. In this guide, you’ll discover simple, clear instructions that make the process easy—even if you’ve never done it before. Keep reading, and soon you’ll have the confidence and know-how to build a kitchen cabinet base you can be proud of.
Planning Your Kitchen Cabinet Base
Planning your kitchen cabinet base is the first step in building a strong and functional kitchen. Proper planning saves time and money. It also ensures your cabinets fit well and last long. Take your time to think through every detail before starting construction.
Choosing The Right Materials
Select materials that match your budget and style. Plywood is strong and resists warping. MDF is smooth and easy to paint. Solid wood offers durability and a classic look. Choose moisture-resistant materials to avoid damage in the kitchen.
Measuring Your Space
Measure the kitchen area carefully before buying materials. Use a tape measure to get exact width, height, and depth. Write down all dimensions. Check for obstacles like pipes or outlets. Accurate measurements prevent mistakes during installation.
Selecting Cabinet Dimensions
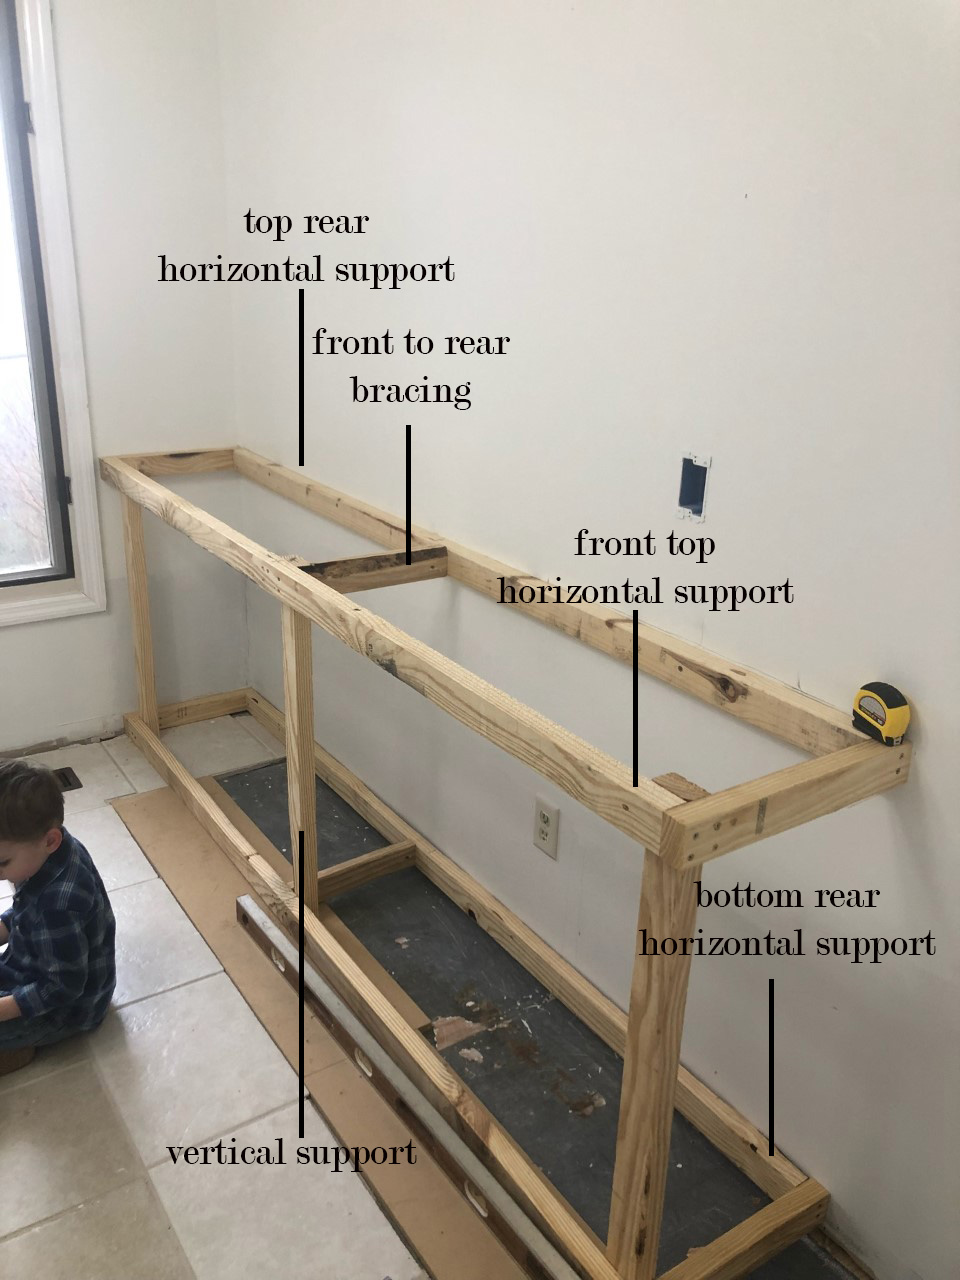
Decide on cabinet size based on your kitchen layout. Standard base cabinets are usually 24 inches deep and 34.5 inches tall. Adjust the width to fit your space. Allow enough room for drawers and doors to open fully. Keep usability in mind for daily kitchen tasks.
Credit: designingvibes.com
Gathering Tools And Supplies
Building a kitchen cabinet base starts with gathering the right tools and supplies. Having everything ready helps the project go smoothly. You avoid delays and mistakes. It also keeps the work area safe and organized.
Preparing your tools and safety gear is key to working efficiently. Knowing what you need saves time and effort. Below are the essential tools and safety items for building a cabinet base.
Essential Tools List
- Measuring tape – for accurate measurements
- Carpenter’s square – to keep corners straight
- Power drill with bits – for drilling and screwing
- Circular saw or handsaw – to cut wood pieces
- Clamps – to hold pieces firmly in place
- Screwdriver set – for tightening screws
- Level – to ensure surfaces are even
- Wood glue – to bond pieces securely
- Sandpaper or electric sander – for smooth finishes
- Pencil – to mark measurements and cuts
Recommended Safety Gear
- Safety glasses – protect your eyes from dust and debris
- Work gloves – prevent splinters and cuts
- Ear protection – reduce noise from power tools
- Dust mask – avoid inhaling sawdust
- Closed-toe shoes – protect feet from falling objects
- Long sleeves and pants – shield skin from scratches
Preparing The Workspace
Preparing your workspace is the first step in building a kitchen cabinet base. A clean and organized area helps you work safely and efficiently. Taking time to set up the right environment saves effort later and reduces mistakes.
Clearing And Cleaning The Area
Start by removing all items from the workspace. Clear the floor and countertops of clutter. Sweep or vacuum the area to remove dust and debris. A clean space prevents accidents and keeps materials in good condition. Make sure there is enough room to move around freely.
Setting Up Workbenches
Arrange sturdy workbenches or tables at a comfortable height. These surfaces support your tools and materials. Position benches near power outlets for easy access. Keep frequently used tools within arm’s reach. Proper setup helps maintain a smooth workflow and reduces strain on your body.
Credit: www.ana-white.com
Cutting The Wood Components
Cutting the wood components is a key step in building a kitchen cabinet base. Precise cuts make sure the pieces fit well. This step sets the stage for a strong and neat cabinet. Take time to measure, mark, and cut carefully. This will save effort in the next steps.
Measuring And Marking
Start by measuring each piece of wood twice. Use a tape measure for accuracy. Mark the cut lines clearly with a pencil. Draw straight lines to guide your cuts. Double-check your marks before cutting. Correct measurements prevent gaps and uneven edges.
Cutting Side Panels And Bottom
Use a saw to cut the side panels and bottom board. A circular saw works well for straight cuts. Cut slowly to keep the edges smooth. Follow the marked lines exactly. Sand the edges lightly to remove splinters. Smooth edges help pieces fit tightly together.
Preparing Face Frames
Face frames give the cabinet its finished look. Cut the frame pieces from hardwood for strength. Measure and mark each piece carefully. Use a miter saw to cut clean, angled edges. These edges join neatly at corners. Check each frame piece fits before assembly.
Assembling The Cabinet Frame
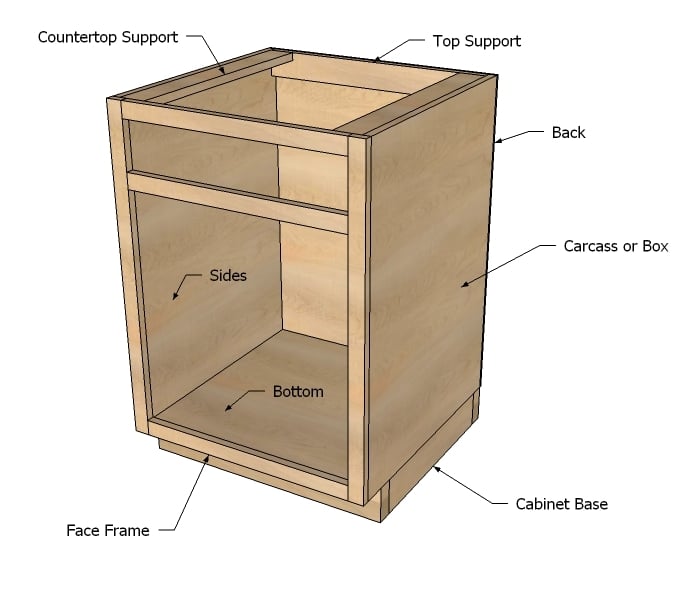
Assembling the cabinet frame is the first step in building a kitchen cabinet base. It gives the cabinet its shape and strength. A strong frame holds the cabinet parts together well. This section covers how to join the side panels, attach the bottom panel, and secure the face frame.
Joining Side Panels
Start by placing the two side panels upright. Make sure their edges line up squarely. Use wood glue on the edges to join them. Then, secure the panels with screws or nails. Drill pilot holes first to avoid splitting the wood. Check the corners with a carpenter’s square to keep them at 90 degrees.
Attaching Bottom Panel
Next, fit the bottom panel between the side panels. The bottom panel gives extra support to the frame. Apply wood glue along the edges of the bottom panel. Slide it into place and press firmly. Use screws or nails to hold the panel. Space the screws evenly for a strong hold. Confirm the bottom panel sits flush with the sides.
Securing The Face Frame
The face frame adds a finished look and strength to the cabinet front. Cut face frame pieces to fit the cabinet opening. Attach the vertical stiles first, then the horizontal rails. Use wood glue and clamps to hold pieces tightly. Nail the frame to the side panels and bottom panel. Make sure the frame is even and flush with the cabinet edges.
Installing Shelves And Supports
Installing shelves and supports is a key step in building a kitchen cabinet base. Shelves provide storage space and help keep items organized. Supports hold the shelves firmly, making the cabinet strong and durable. Proper installation ensures the shelves stay level and secure.
Measuring Shelf Placement
Start by deciding the height for each shelf inside the cabinet. Use a tape measure to mark the exact points on the side panels. Make sure the marks are even on both sides. This balance keeps shelves straight and prevents items from sliding off. Double-check measurements to avoid mistakes.
Attaching Shelf Supports
Shelf supports can be small wooden strips or metal brackets. Attach them at the marked points using screws or nails. Use a level to make sure supports are perfectly horizontal. Secure the supports tightly for strong hold. Proper support prevents shelves from sagging under weight.
Installing Adjustable Shelves
Adjustable shelves use pegs or clips that fit into holes on the cabinet sides. Drill holes evenly spaced for flexible shelf placement. Insert the pegs into holes at the chosen height. Place the shelf on top of the pegs. Adjustable shelves make it easy to change storage space as needed.
Finishing Touches
Finishing touches bring your kitchen cabinet base to life. These final steps make the cabinet smooth, attractive, and ready for use. A well-finished cabinet looks professional and lasts longer. Focus on three main tasks: sanding, painting or staining, and adding hardware and doors. Each step improves both the look and function of your cabinet base.
Sanding And Smoothing Edges
Start by sanding all surfaces and edges carefully. Use fine-grit sandpaper to remove rough spots and splinters. Smooth edges prevent injuries and give a clean look. Sand in the direction of the wood grain for best results. Wipe away dust with a damp cloth before moving to the next step.
Applying Paint Or Stain
Choose paint or stain that suits your kitchen style. Paint offers a solid color and hides imperfections. Stain highlights the wood grain and adds warmth. Apply thin, even coats with a brush or roller. Let each coat dry fully before adding another. Finish with a clear sealant to protect the surface from moisture and wear.
Adding Hardware And Doors
Attach hinges and handles carefully to fit your cabinet doors. Hardware adds style and makes doors easy to open. Align doors properly to avoid gaps and ensure smooth operation. Use screws that fit the hardware and wood securely. Check the fit and function before finalizing installation.
Credit: www.addicted2decorating.com
Installing The Cabinet Base
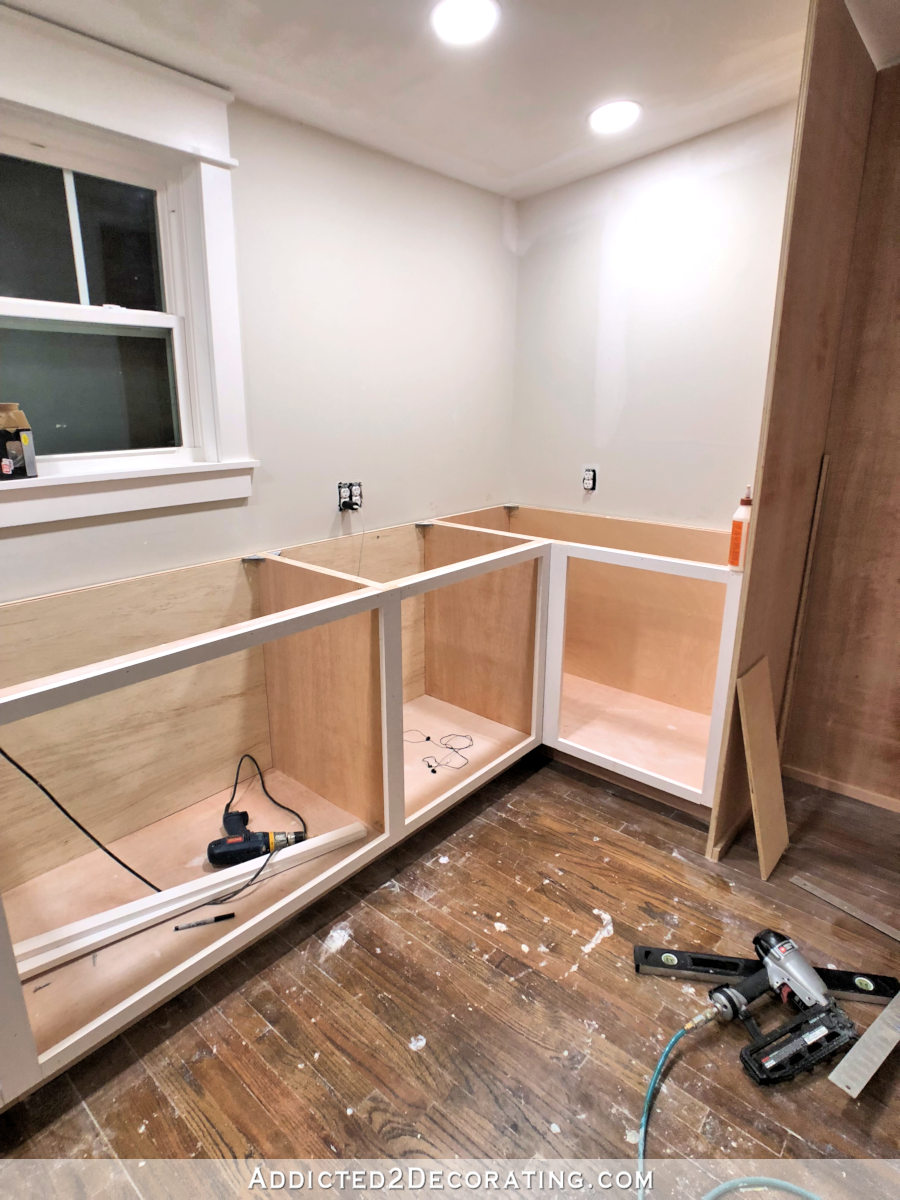
Installing the cabinet base is a key step in building kitchen cabinets. It sets the foundation for the entire structure. Proper installation ensures stability and a perfect fit. Follow these steps carefully to install your cabinet base.
Positioning And Leveling
Start by placing the cabinet base where it will sit. Check the floor and wall for any uneven spots. Use a level tool to make sure the base is perfectly horizontal. Shim under the base if needed to adjust the height. This prevents future problems with doors or drawers.
Securing To Wall And Floor
Attach the base firmly to the wall studs using screws. Locate the studs with a stud finder for a strong hold. Drive screws through the cabinet back into the studs. Also, secure the base to the floor to prevent movement. Use appropriate anchors if the floor is concrete or tile.
Final Adjustments
After securing, recheck the level of the cabinet base. Make small adjustments with shims if the base has shifted. Tighten all screws to make the base stable. Confirm there is no wobble by gently pushing on the cabinet. Your base is now ready for the upper parts of the kitchen cabinet.
Common Mistakes To Avoid
Building a kitchen cabinet base takes care and focus. Many beginners make mistakes that cause problems later. Avoiding these errors saves time and money. Pay close attention to details and safety during the project.
Incorrect Measurements
Measuring wrong leads to cabinets that do not fit. Always measure twice, cut once. Use a reliable tape measure and mark carefully. Check the height, width, and depth before cutting wood.
Poor Material Choices
Using weak or cheap materials affects durability. Choose sturdy wood that can hold weight. Avoid soft or thin panels that can break easily. Quality materials ensure your cabinet lasts long.
Skipping Safety Precautions
Ignoring safety can cause injuries. Wear safety glasses and gloves while working. Use tools correctly and keep your workspace clean. Taking safety steps protects you and others.
Tips For Maintenance And Longevity
Maintaining your kitchen cabinet base is key to keeping it strong and looking good. Small care steps help stop damage and extend its life. A well-kept cabinet base stays stable and supports your kitchen well.
Regular Cleaning
Wipe the cabinet base with a soft, damp cloth often. Remove spills and dust quickly to avoid stains. Use mild soap and water for sticky spots. Avoid harsh chemicals that can damage the surface. Dry the area fully to stop water damage.
Handling Wear And Tear
Be gentle when opening and closing cabinet doors. Don’t overload shelves to prevent bending or breaking. Use protective pads under heavy items. Fix small scratches or dents fast to stop them from growing. Treat wood surfaces with polish or sealant yearly.
Periodic Inspections
Check the cabinet base every few months for signs of damage. Look for loose screws, cracks, or water marks. Tighten any loose parts to keep stability. Repair or replace damaged components early. Regular checks catch problems before they get worse.
Frequently Asked Questions
What Materials Are Best For Kitchen Cabinet Bases?
Plywood and hardwood are ideal for cabinet bases. Plywood offers strength and resistance to moisture. Hardwood provides durability and a smooth finish. Both materials ensure long-lasting support for your cabinets and withstand daily kitchen use.
How Do I Measure For A Kitchen Cabinet Base?
Measure the floor space where the cabinet will sit. Note the width, depth, and height accurately. Double-check measurements before cutting materials. Proper measurement ensures the cabinet fits perfectly and aligns with countertops and appliances.
What Tools Are Essential For Building Cabinet Bases?
Key tools include a circular saw, drill, tape measure, and clamps. A level and square ensure accuracy. These tools help cut, assemble, and secure the cabinet base properly for a sturdy build.
How Can I Ensure Kitchen Cabinet Bases Are Level?
Use a spirit level during installation to check evenness. Shim the base where needed to adjust height. A level base prevents cabinet doors from misaligning and supports countertop stability.
Conclusion
Building a kitchen cabinet base is easier than it seems. Follow the steps carefully and take your time. Use the right tools and measure twice before cutting. A strong, stable base lasts for years. Enjoy the satisfaction of making your own cabinet.
Keep practicing, and your skills will improve. This project adds value and style to your kitchen. Start small, and soon you can try bigger projects. Keep safety in mind throughout the process. Your kitchen will look great with your new cabinet base.