
Are you looking to give your kitchen a warm, timeless feel without spending a fortune? Antique kitchen cabinets might be exactly what your space needs.
Imagine transforming your ordinary cabinets into charming, vintage pieces that tell a story and add character to your home. In this guide, you’ll discover simple, step-by-step tips to antique your kitchen cabinets like a pro. Whether you’re a beginner or just want to refresh your skills, you’ll find easy techniques that bring out the beauty in your kitchen.
Ready to make your cabinets stand out and impress everyone who walks in? Let’s get started!

Credit: www.geccabinetdepot.com
Choosing Cabinets For Antiquing
Choosing cabinets for antiquing requires careful thought. The right cabinets make the antiquing process easier and more effective. Focus on wood type, style, and condition. These factors affect the final look and durability of your cabinets. Start with cabinets that suit your kitchen’s style and your personal taste.
Selecting The Right Wood
Wood type plays a big role in antiquing success. Softwoods like pine are easier to distress and paint. Hardwoods such as oak or maple hold stains and finishes well. Choose wood that fits your skill level and desired finish. Avoid veneers or particleboard since they don’t age well or take paint evenly.
Identifying Cabinet Styles
Choose a style that matches your kitchen’s theme. Traditional raised panel cabinets work well with antique finishes. Shaker-style cabinets also respond nicely to antiquing techniques. Avoid ultra-modern or flat-front cabinets. They may not look authentic after antiquing. Look for details like molding and panels to enhance the aged effect.
Assessing Cabinet Condition
Check cabinets for damage before antiquing. Cracks or loose joints can get worse with distressing. Fix any structural issues first. Sand surfaces lightly to remove gloss. Remove old paint or finish if it peels easily. Smooth, stable surfaces hold antique finishes better. Cabinets in good shape will last longer and look better.
Preparing Your Cabinets
Preparing your cabinets is the first step to achieve an antique look. This stage sets the base for all the work that follows. Proper preparation ensures the finish lasts longer and looks authentic. It takes patience and attention to detail but pays off in the end.
Removing Hardware And Doors
Start by taking off all knobs, handles, and hinges. Use a screwdriver to remove screws carefully. Take down the cabinet doors and place them on a flat surface. This makes it easier to work on each part separately. Keep all hardware in a safe place for reuse or replacement.
Cleaning And Sanding
Clean every cabinet surface with mild soap and water. Remove grease, dirt, and old polish to prepare for sanding. Let the cabinets dry completely before sanding. Use medium-grit sandpaper to smooth the wood. Sand in the direction of the grain for the best result. This step removes old paint and rough spots.
Repairing Damages
Look for cracks, holes, or dents on the wood. Use wood filler to fix small holes and cracks. Apply the filler with a putty knife and smooth it out. Let the filler dry fully before sanding it smooth. For larger damages, consider replacing parts or using wood glue. Proper repairs make the cabinets stronger and look neat.
Antiquing Techniques
Antiquing kitchen cabinets gives them a warm, vintage look. It adds charm and character to your kitchen space. The process involves a few key steps that create an aged effect. Each technique helps to bring out the beauty of old, worn furniture. These methods are easy and fun to try at home.
Applying Base Paint
Start with a clean, dry cabinet surface. Choose a base paint color that suits your style. Use a brush or roller to apply an even coat. Let the paint dry completely before moving on. This base layer sets the tone for the antique look. It should be smooth and fully covered.
Distressing Methods
Distressing creates the worn, aged effect on cabinets. Lightly sand edges and corners to reveal the base paint. Use sandpaper or a sanding block for control. Focus on areas that naturally wear over time. Be gentle to avoid removing too much paint. You can also use a scraper or wire brush for texture.
Using Glazes And Stains
Glazes and stains add depth and color variation. Apply glaze with a brush or cloth in small sections. Wipe off excess to highlight details and crevices. Stains can darken wood grain and create shadows. Choose colors that complement the base paint. Let each layer dry fully before applying the next. This step enhances the antique appearance beautifully.

Credit: rtawoodcabinets.com
Adding Vintage Details
Adding vintage details brings character and charm to kitchen cabinets. These small touches create an authentic antique look. They help transform plain cabinets into beautiful focal points. Simple changes make a big difference in style and feel.
Choosing Antique Hardware
Hardware sets the tone for antique cabinets. Look for knobs and handles with aged finishes. Brass, bronze, or wrought iron work well. Choose pieces with classic shapes like cup pulls or ornate handles. Old-style hardware adds a unique vintage touch quickly.
Incorporating Decorative Accents
Decorative accents enhance the antique effect. Apply molding or trim around cabinet doors. Use corbels or carved wood pieces to add depth. Small details like these bring old-world charm. They make cabinets look handcrafted and timeless.
Enhancing With Stencils And Decals
Stencils and decals add personality without damage. Choose vintage patterns like floral or geometric shapes. Paint them lightly for a faded, worn look. Use subtle colors that blend with cabinet paint. This technique offers easy, affordable vintage flair.
Protecting And Finishing
Protecting and finishing antique kitchen cabinets is key to keeping their charm and durability. The right finish seals the wood, stopping damage from moisture and stains. It also brings out the natural beauty of the wood and paint. This step preserves your hard work and ensures the cabinets last long.
Sealing With Topcoats
Topcoats create a strong barrier on cabinet surfaces. Use a clear polyurethane or water-based sealer. These protect against scratches and water damage. Apply thin, even layers for the best results. Let each coat dry fully before adding another. Sand lightly between coats for a smooth finish.
Maintaining Antique Cabinets
Regular care keeps your cabinets looking fresh. Clean with a soft cloth and mild soap. Avoid harsh chemicals that can wear the finish. Check for any signs of wear or damage often. Fix small problems quickly to stop bigger issues. Gentle care extends the life of your cabinets.
Tips For Longevity
Keep cabinets dry and avoid direct sun exposure. Use coasters or mats under hot or wet items. Open cabinet doors gently to prevent loosening hinges. Reapply topcoat every few years to refresh protection. This simple upkeep keeps cabinets beautiful for decades.
Design Ideas For Vintage Kitchens
Designing a vintage kitchen brings charm and warmth to your home. It blends the past with the present. Antique kitchen cabinets play a big role in creating this look. You can choose colors, mix styles, and set a cozy mood. These ideas help you create a kitchen that feels timeless and inviting.
Color Palettes That Work
Soft, muted colors suit vintage kitchens best. Cream, pale blue, and sage green add a gentle touch. Warm tones like mustard yellow and dusty rose bring comfort. White cabinets with dark hardware create a classic look. Choose colors that feel calm and welcoming. Avoid bright or flashy shades. They clash with the vintage style.
Mixing Old And New Elements
Combine antique cabinets with modern appliances for balance. A sleek stove fits well next to aged wood. Use vintage light fixtures with new countertops. This mix keeps the kitchen fresh and functional. It prevents the space from feeling outdated. Keep the colors and shapes simple. Let the cabinets stand out as the main feature.
Creating A Cozy Atmosphere
Use warm lighting to make the kitchen inviting. Soft bulbs and lamps add glow and comfort. Add rugs or cushions with classic patterns. These small touches bring warmth and texture. Open shelves with old dishes show charm. Plants also add life and freshness. The goal is a space that feels lived in and loved.
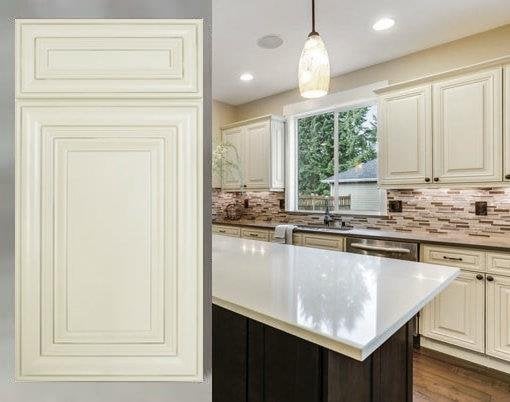
Credit: www.kitchencabinetdepot.com
Frequently Asked Questions
What Materials Are Best For Antiquing Kitchen Cabinets?
Wood cabinets, especially oak, maple, and pine, are ideal for antiquing. They absorb stains and finishes well, enhancing the vintage look. Using quality paints and glazes also helps achieve an authentic antique finish.
How Do I Prepare Cabinets Before Antiquing?
Start by cleaning the cabinets thoroughly to remove grease and dirt. Sand the surfaces lightly to ensure smoothness. Remove old hardware and fill holes or dents for a flawless antique appearance.
What Techniques Create An Authentic Antique Cabinet Look?
Popular methods include distressing, glazing, and layering paint. Distressing adds worn edges, while glazing highlights details. Combining these techniques creates a natural, aged effect on kitchen cabinets.
How Long Does The Antiquing Process Usually Take?
The process typically takes 2 to 4 days, depending on the cabinet size. This includes cleaning, sanding, painting, drying, and applying finishes for a durable antique look.
Conclusion
Antiquing kitchen cabinets adds charm and warmth to any space. The process takes time but brings great satisfaction. You can use paint, stain, or glaze to create an aged look. Small details like sanding edges help achieve a natural finish.
Take your time and enjoy each step carefully. Your kitchen will feel cozy and inviting after the work. Try this project to give old cabinets new life. It’s a simple way to update your kitchen style.