
Are you dreaming of a kitchen that looks sleek, feels spacious, and offers plenty of storage? Building a floor-to-ceiling kitchen cabinet might be the perfect solution for you.
Imagine having all your pots, pans, and pantry items neatly organized within easy reach, while adding a stunning focal point to your space. In this guide, you’ll discover simple steps to create your own custom cabinet, even if you’ve never done a project like this before.
Ready to transform your kitchen and make your daily routine easier? Let’s dive in and build something amazing together.
Planning Your Kitchen Cabinet
Planning your floor to ceiling kitchen cabinet is the first step to a successful project. Careful preparation helps avoid mistakes and saves time. It also ensures the cabinet fits perfectly in your kitchen space. This section covers measuring, choosing materials, and designing the layout.
Measuring Your Space
Start by measuring the height, width, and depth of the wall where the cabinet will go. Use a tape measure for accuracy. Check for any obstacles like pipes, switches, or vents. Note any uneven walls or floors. Write down all measurements carefully. Double-check to avoid errors.
Choosing Materials
Select materials that suit your style and budget. Common options include plywood, MDF, and solid wood. Plywood is strong and resists warping. MDF is smooth and easy to paint. Solid wood offers a natural look but costs more. Pick finishes that match your kitchen décor. Think about durability and maintenance too.
Designing Cabinet Layout
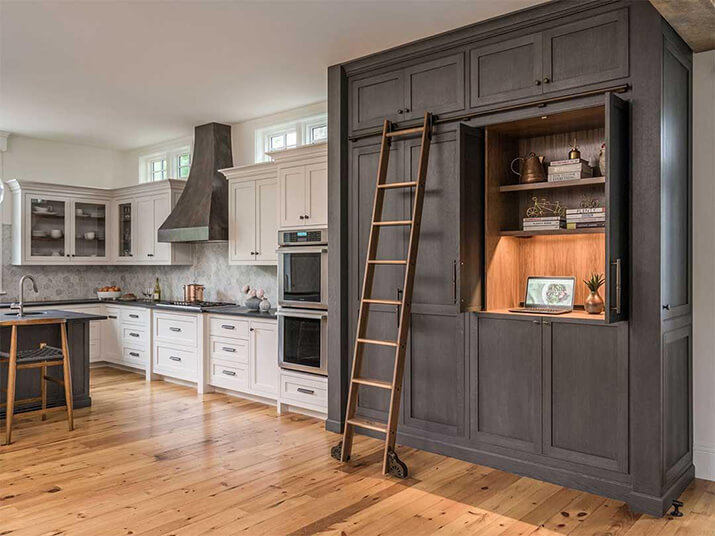
Plan the cabinet shelves and compartments. Decide how many shelves you need for plates, pots, and pantry items. Consider adding pull-out drawers for easy access. Think about the height of shelves for tall items. Leave enough space for doors to open fully. Draw a simple sketch to visualize the layout.
Credit: www.divinecabinetry.com
Gathering Tools And Supplies
Gathering the right tools and supplies is the first step to build a floor to ceiling kitchen cabinet. Having everything ready makes the project smoother and faster. It helps avoid interruptions and keeps you focused on building.
Choose tools and materials that fit your cabinet size and design. Good quality items make the cabinet last longer and look better. Safety is important too. Prepare safety gear before starting any cutting or drilling.
Essential Tools List
Start with a tape measure to get accurate dimensions. A level keeps the cabinet straight and balanced. Use a drill for screws and holes. A saw cuts wood to the right size. Clamps hold pieces together while you work. Screwdrivers help with assembling hardware. Sandpaper smooths rough edges. A pencil is useful for marking cuts and drill points.
Selecting Hardware
Pick hinges that open smoothly and close firmly. Choose handles or knobs that match your kitchen style. Use screws that fit the wood thickness. Shelf supports must hold the weight of items you plan to store. Consider soft-close options for quiet cabinet doors. Hardware should be durable and rust-resistant for kitchen use.
Safety Equipment
Wear safety glasses to protect your eyes from dust and wood chips. Use ear protection when cutting or drilling. Wear gloves to avoid splinters and cuts. A dust mask keeps you from breathing sawdust. Make sure your work area is well lit. Keep a first aid kit nearby for any small accidents.
Preparing The Workspace
Preparing the workspace is a crucial first step when building a floor to ceiling kitchen cabinet. A clean and organized area helps you work safely and efficiently. Taking time to set up properly saves frustration and mistakes later on.
Clearing The Area
Remove all furniture and items from the kitchen space. Clear countertops and floors near the wall where you will install the cabinet. This creates enough room to move freely and handle large cabinet pieces. It also prevents damage to your belongings.
Protecting Floors And Walls
Cover the floor with drop cloths or old sheets. Use painter’s tape to secure them in place. Protect walls with cardboard or foam sheets around the work area. This prevents scratches, dents, and paint spills during the building process.
Setting Up Workstations
Create distinct zones for cutting, assembling, and finishing parts. Set up a sturdy workbench or table close to the workspace. Keep all necessary tools and materials within reach. Organizing workstations boosts productivity and reduces time spent searching for items.

Credit: cocolapinedesign.com
Building The Cabinet Frame
Building the cabinet frame is the first important step in making a floor to ceiling kitchen cabinet. This frame forms the basic shape and support for the entire cabinet. A strong and well-built frame keeps the cabinet sturdy and long-lasting. Precision and care are key during this stage.
Start with good quality wood panels. Measure and cut them carefully to fit your kitchen space. Then, assemble the pieces into a solid frame. Use screws and wood glue to hold the parts together tightly. Finally, secure all joints well for extra strength. This process ensures your cabinet will stand tall and stable for years.
Cutting Wood Panels
Measure the height, width, and depth of your cabinet space. Mark these dimensions on your wood panels. Use a saw to cut the panels along the marks. Cut slowly to keep the edges smooth and straight. Sand down any rough edges after cutting. Accurate cuts make assembly easier and the cabinet stronger.
Assembling The Frame
Lay out the cut panels on a flat surface. Start by joining the side panels to the top and bottom panels. Use wood glue on the edges before fitting them together. Press the pieces firmly and hold them in place. Check that the frame is square by measuring diagonally. Adjust as needed before the glue dries.
Securing Joints
Use screws to secure the glued joints. Drill pilot holes first to avoid splitting the wood. Insert screws evenly along each joint. Countersink the screws so they sit flush with the wood surface. Add corner braces or blocks inside for extra strength. Tight joints prevent wobbling and increase durability.
Installing Shelves And Dividers
Installing shelves and dividers is a key step in building floor-to-ceiling kitchen cabinets. Shelves create space for dishes, pots, and pantry items. Dividers help organize tall or narrow items like baking sheets or cutting boards. Proper installation ensures strong support and neat arrangement.
This section guides you through measuring shelf placement, cutting shelves to size, and attaching support brackets securely. Follow these steps carefully for a durable and functional cabinet.
Measuring Shelf Placement
Start by deciding the height for each shelf. Think about the items you want to store. Measure the inside height of the cabinet. Mark the shelf positions on both sides with a pencil. Use a level to keep marks even. Double-check measurements for accuracy.
Cutting And Fitting Shelves
Choose sturdy wood or plywood for shelves. Measure the cabinet width and depth. Cut shelves to fit exactly between the cabinet sides. Sand edges smooth for a clean look. Test fit each shelf before final installation. Adjust cuts if shelves do not sit flush.
Attaching Supports
Use shelf pins, brackets, or cleats for support. Drill holes for pins or screw brackets into marked spots. Make sure supports are level and secure. Place shelves on supports and press firmly. Check stability by applying gentle pressure. Reinforce weak spots with extra supports if needed.
Credit: kitchencabinetkings.com
Adding Doors And Hardware
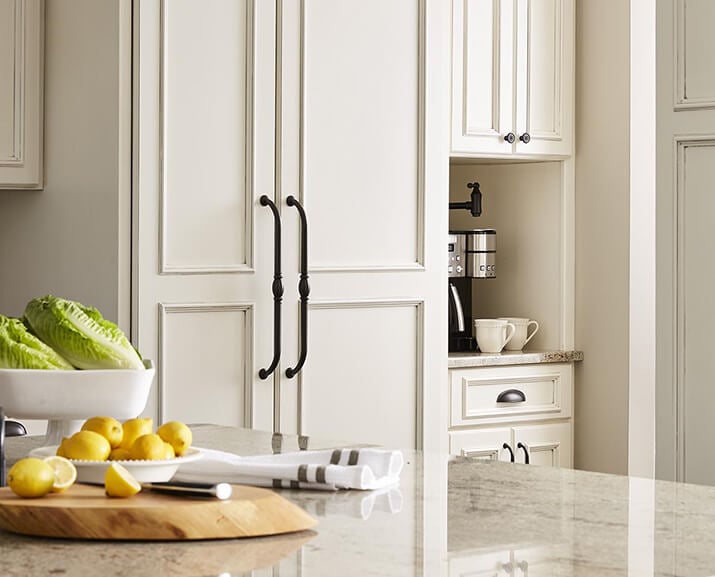
Adding doors and hardware completes the look of your floor-to-ceiling kitchen cabinet. It protects your items and gives a clean, finished appearance. Proper installation ensures smooth use and long-lasting durability.
Choosing the right doors and hardware also impacts the cabinet’s style. This step requires care and attention to detail. Follow clear steps for hanging doors, installing handles, and adjusting alignment.
Hanging Cabinet Doors
Start by attaching hinges to the doors. Use screws and a drill for secure fastening. Next, line up the doors with the cabinet frame. Hold the door in place and screw the hinges into the cabinet sides. Test the swing to ensure it opens smoothly.
Installing Handles And Knobs
Mark the spots for handles or knobs on each door. Measure carefully for even placement. Drill holes at the marks. Insert screws through the door back and fix handles or knobs on front. Tighten screws so they do not move but avoid over-tightening.
Adjusting Door Alignment
Check if the doors close evenly and sit flush with the cabinet. Adjust hinges by loosening screws slightly. Shift doors up, down, or sideways for perfect fit. Tighten screws after adjustments. Make sure doors do not rub or stick.
Finishing Touches
Finishing touches bring your floor-to-ceiling kitchen cabinet to life. These final steps improve its look and durability. Careful work here ensures your cabinet lasts for years. Let’s explore the key parts of this process.
Sanding And Painting
Start by sanding the cabinet surface smoothly. Use fine-grit sandpaper for the best finish. Sanding removes rough spots and prepares the wood for paint. Wipe away dust with a clean cloth before painting.
Choose a paint that suits kitchen use. Apply thin, even coats to avoid drips. Allow each coat to dry completely before the next. Light sanding between coats helps the paint stick well. This step creates a neat and polished look.
Sealing And Protecting
Seal the paint with a clear protective finish. This shield guards against moisture and stains. Use a water-based polyurethane for easy cleanup and low odor. Apply two to three thin coats for strong protection.
Let each coat dry fully. Lightly sand between coats for smoothness. This process keeps your cabinet looking fresh. It also extends the life of your work.
Cleaning Up
Remove painter’s tape carefully to avoid peeling paint. Clean brushes and tools with warm soapy water. Dispose of waste materials responsibly. Clear the work area of dust and debris.
Good cleanup prevents damage and keeps your kitchen tidy. It prepares your cabinet for daily use. A clean workspace reflects your craftsmanship and care.
Maintaining Your Kitchen Cabinet
Maintaining your floor to ceiling kitchen cabinet keeps it looking new and working well. Proper care stops damage and makes your cabinet last longer. Small efforts every day protect your investment. Clean surfaces, fix small problems early, and take steps to extend its life. This section guides you through easy ways to care for your kitchen cabinet.
Regular Cleaning Tips
Dust your cabinet weekly to prevent buildup. Use a soft cloth or microfiber duster for best results. Clean spills immediately to avoid stains. Use mild soap and water for sticky spots. Avoid harsh chemicals that can damage the finish. Dry the surfaces well after cleaning to stop water damage. Clean handles and knobs often to reduce germs.
Repairing Minor Damages
Fix small scratches with a wood touch-up marker. Use wood filler for tiny holes or dents. Sand lightly before applying filler for a smooth finish. Tighten loose screws on doors and hinges regularly. Replace worn-out handles or knobs to keep doors functional. Repair peeling paint or finish to protect the wood. Act quickly to prevent small problems from worsening.
Extending Cabinet Lifespan
Keep your kitchen cabinet away from direct heat sources. Avoid placing heavy items on top shelves to prevent sagging. Use liners inside drawers and shelves to reduce wear. Check hinges and tracks for smooth door movement. Refinish or repaint cabinets every few years to refresh their look. Control kitchen humidity to stop warping or mold growth. Good care keeps your cabinet strong and attractive for years.
Frequently Asked Questions
What Materials Are Best For Floor To Ceiling Kitchen Cabinets?
Plywood and MDF are popular materials for sturdy, durable cabinets. Solid wood offers a premium finish but costs more. Choose moisture-resistant options to prevent warping in kitchen environments.
How Do I Measure For Floor To Ceiling Cabinets?
Measure wall height, width, and depth accurately. Account for baseboards and ceiling height variations. Use a level to ensure straight cabinet alignment during installation.
What Tools Do I Need To Build These Cabinets?
Basic tools include a drill, saw, measuring tape, level, clamps, and screwdriver. Safety gear like gloves and goggles is essential. A nail gun speeds up assembly.
How Can I Maximize Storage In Tall Kitchen Cabinets?
Use adjustable shelves and pull-out drawers. Install vertical dividers for baking sheets and trays. Utilize cabinet doors for spice racks or small storage bins.
Conclusion
Building floor-to-ceiling kitchen cabinets adds great storage space. It also makes your kitchen look neat and modern. Follow each step carefully to ensure strong and safe cabinets. Use the right tools and materials for best results. Take your time and measure twice before cutting.
Enjoy the satisfaction of a well-organized kitchen. Your new cabinets will last for years. Keep your kitchen tidy and clutter-free. A simple project with big benefits.