
Have you ever wished your small bathroom could do more? Imagine turning your sink into a shower—yes, it’s possible!
This clever idea can save you space, money, and time. Whether you’re dealing with a tiny apartment, a guest room, or just want to upgrade your bathroom without major work, this guide is for you. Keep reading to discover simple steps and smart tips that will help you transform your sink area into a fully functional shower.
You’ll be surprised how easy and practical this change can be!
Choosing The Right Sink
Choosing the right sink is the first step to turning it into a shower. Not all sinks work well for this change. You need a sink that can handle water flow and provide enough space. The material and size also matter a lot. Picking the right sink makes the conversion easier and safer.
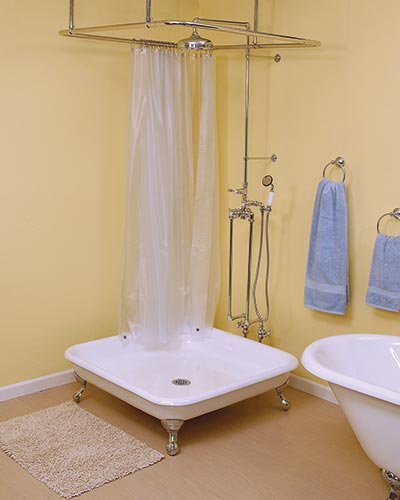
Types Suitable For Conversion
Some sinks fit better for shower conversion than others. Deep kitchen sinks or utility sinks are good options. They have enough space for water and are strong. Bathroom sinks with a wide basin can also work. Avoid shallow or decorative sinks. They cannot hold enough water or support shower parts well.
Material Considerations
Sink material affects durability and water resistance. Stainless steel sinks resist rust and last long. Porcelain sinks look nice but can crack easily. Acrylic sinks are light and easy to clean. Avoid sinks made of wood or metal that rusts. Choose materials that handle water and heat well.
Size And Depth Factors
Size matters for comfort and function. The sink should be wide enough for standing or sitting. Depth helps hold water and prevents splashes. A sink too small or shallow will not work well. Aim for a sink at least 16 inches wide and 10 inches deep. This size helps keep water inside during showering.
Credit: lojasbeirario.com.br
Gathering Necessary Tools And Materials
Turning a sink into a shower needs careful planning. Gathering the right tools and materials helps the project go smoothly. This step saves time and prevents mistakes. Prepare everything before starting the work.
Plumbing Supplies
Plumbing supplies are essential for this conversion. You will need pipes, connectors, and valves. Choose pipes that fit your water system. Use connectors to join pipes securely. Valves control water flow and pressure. A pipe cutter and wrench will help with installation.
Shower Fixtures
Shower fixtures include the showerhead, controls, and mounting parts. Pick a showerhead that fits your space and style. Controls let you adjust water temperature and flow. Mounting brackets keep everything in place. Make sure the fixtures match your plumbing setup.
Waterproofing Materials
Waterproofing is key to avoid leaks and damage. Use waterproof membranes or sealants around the shower area. Apply waterproof tape on joints and corners. A water-resistant backer board can protect walls. Proper waterproofing keeps your home safe and dry.
Preparing The Sink Area
Preparing the sink area is the first step to turn a sink into a shower. This process helps ensure the space is safe and ready for changes. Proper preparation can save time and avoid problems later. Start by making the area clean and empty. Then check the plumbing and drainage to fit the new use.
Cleaning And Clearing Space
Remove all items around and inside the sink. Clean the surfaces with soap and water. Dirt and grime can block your work and cause issues. Clear enough space to move tools and parts easily. A tidy area helps you work faster and safer.
Assessing Plumbing Setup
Check the pipes under and near the sink. Identify hot and cold water lines. Make sure pipes are in good condition and not leaking. Note where the water shut-off valves are located. Confirm the water pressure is enough for a shower head. Plan how to connect new shower fittings to the existing plumbing.
Ensuring Proper Drainage
Inspect the drain pipe connected to the sink. It must handle more water from the shower. Make sure the drain is not clogged or damaged. Consider adding a trap to prevent odors. Test water flow by running water and watching it drain quickly. Proper drainage prevents water damage and keeps the area dry.
Modifying Plumbing Connections
Modifying plumbing connections is a key step in turning a sink into a shower. It involves careful work with pipes and fittings. Mistakes can cause leaks or water damage. Basic plumbing skills help ensure a safe and lasting setup.
Start by removing old pipes. Then add new parts for the shower. Pay close attention to water flow and drainage. Each change should fit well with existing plumbing.
Disconnecting Existing Pipes
First, turn off the water supply. Use a wrench to loosen pipe connections. Remove the sink drain and water lines carefully. Keep a bucket nearby to catch any leftover water. Inspect pipes for damage before proceeding.
Installing Shower Drain
Choose a drain designed for showers, not sinks. Remove the old drain and clean the area. Fit the new shower drain securely in place. Seal around the drain with plumber’s putty. Check that the drain slopes correctly to avoid water pooling.
Connecting Water Supply Lines
Match hot and cold water lines with new shower valves. Use flexible supply lines for easier installation. Tighten connections with a wrench, but avoid overtightening. Test water flow by turning the water back on. Watch for leaks at each joint.
Installing Shower Fixtures
Installing shower fixtures is a key step in turning a sink into a shower. Proper installation ensures the shower works well and avoids leaks. Pay close attention to each part for a smooth setup.
Choosing Showerheads
Pick a showerhead that fits your space and water pressure. A handheld showerhead offers flexibility and ease. Fixed showerheads provide steady water flow. Consider water-saving models to reduce bills. Match the style with your bathroom decor for a neat look.
Mounting Fixtures Securely
Use strong anchors and screws to mount fixtures. The wall must hold the weight without damage. Check the studs behind the wall for support. Tighten each fixture carefully to avoid movement. Loose mounts can cause leaks and damage over time.
Sealing Connections
Seal all pipe connections with plumber’s tape or sealant. This prevents water from escaping and causing damage. Wrap tape around threads before connecting pipes. Apply sealant to joints for extra protection. Test the shower for leaks before finishing the wall.
Waterproofing And Sealing
Waterproofing and sealing play a key role in turning a sink into a shower. They protect the area from water damage. Proper sealing stops water from leaking into walls and floors. Waterproofing keeps moisture from causing mold and decay. Both steps ensure a long-lasting and safe shower space.
Applying Sealants
Sealants fill gaps between tiles, fixtures, and walls. Use silicone or waterproof caulk for best results. Apply sealant evenly along edges and corners. Smooth it out with a finger or tool. Let the sealant dry fully before using the shower.
Using Waterproof Membranes
Waterproof membranes act as a barrier under tiles. They stop water from reaching the wall structure. Roll or lay the membrane carefully over the sink area. Seal seams with special tape or adhesive. Membranes add strong protection against water leaks.
Preventing Leaks
Check all joints and connections for gaps. Tighten plumbing fixtures securely. Inspect sealant and membrane for damage regularly. Replace worn materials immediately. These steps help avoid costly water damage later.
Testing And Adjusting
Testing and adjusting your new shower setup is an important step. It ensures everything works well and avoids future problems. Take your time to check each part carefully. Small fixes now save big headaches later.
Checking Water Flow
Turn on the water and watch how it flows from the showerhead. The water should flow steadily and at the right pressure. If the flow is weak, check for blockages or loose connections. Make sure both hot and cold water mix properly.
Inspecting For Leaks
Look closely around all connections and joints. Any dripping or wet spots mean a leak. Tighten fittings or replace washers if needed. Even small leaks can cause damage over time. Don’t ignore any sign of water escaping.
Making Final Adjustments
Adjust the showerhead angle for comfortable use. Set the water temperature controls to your liking. Confirm all knobs turn smoothly without leaks. Double-check everything before finishing. Your shower is now ready for use.

Credit: www.reddit.com
Maintaining Your New Shower
Maintaining your new shower is key to keeping it clean and working well. Regular care prevents problems and extends the life of your shower. Small habits can save you from costly repairs later. Follow these simple tips to keep your shower fresh and clog-free.
Regular Cleaning Tips
Clean your shower at least once a week. Use a mild cleaner and a soft cloth or sponge. Wipe down walls, doors, and fixtures. Remove soap scum and mildew before they build up. Rinse surfaces well with warm water. Dry the shower after use to stop mold growth.
Preventing Clogs
Keep hair and debris out of the drain. Use a drain cover or hair catcher. Remove trapped hair after each shower. Avoid pouring grease or thick liquids down the drain. Flush the drain monthly with hot water. This helps break down soap and dirt buildup.
Long-term Care Advice
Check shower parts regularly for leaks or damage. Replace worn-out seals and washers quickly. Inspect the showerhead for mineral buildup. Soak it in vinegar to clear blockages. Keep grout and caulk in good shape. Repair cracks or gaps to prevent water damage.

Credit: www.amazon.com
Frequently Asked Questions
How Can I Turn A Sink Into A Shower?
You need to install a showerhead adapter on the sink faucet. Connect a hose from the faucet to a handheld showerhead for easy use.
What Tools Are Needed To Convert A Sink Into A Shower?
Basic tools like a wrench, screwdriver, and plumber’s tape are required. Also, get a showerhead adapter and a flexible hose.
Is It Safe To Use A Sink As A Shower?
Yes, if the water pressure and temperature controls are properly adjusted. Ensure the area is waterproof to prevent water damage.
Can A Sink Shower Fit In Small Bathroom Spaces?
Yes, sink showers are compact and ideal for small bathrooms. They save space and offer a simple bathing solution.
How Much Does It Cost To Turn A Sink Into A Shower?
The cost depends on materials and tools but usually stays under $50. Most adapters and hoses are affordable and easy to install.
Will Converting A Sink Affect Water Drainage?
No, the sink’s drainage system remains the same. Water flows down the drain as usual, so no extra plumbing is needed.
Can I Use Hot Water With A Sink Shower?
Yes, as long as your sink has hot water supply. The showerhead will deliver both hot and cold water for comfort.
Conclusion
Turning a sink into a shower can save space and money. It requires some basic tools and simple steps. Planning well helps avoid mistakes and extra costs. You can create a functional shower in small areas easily. This DIY project adds convenience without major renovations.
Try it to make the most of your bathroom space. Small changes can bring big benefits. Give your home a fresh, practical update today.