
For most home plumbing projects, flexible tubing is the better choice because it’s easier to install and resists freezing, but for rigid applications where UV resistance is required, a fixed pipe remains the standard. Choosing between pex vs cpvc pipe usually comes down to whether you prefer speed or rigidity in your system. PEX is excellent for residential water lines, while CPVC is often used in situations where the pipe must remain straight and unsupported over long distances.
Differences between PEX and CPVC pipe
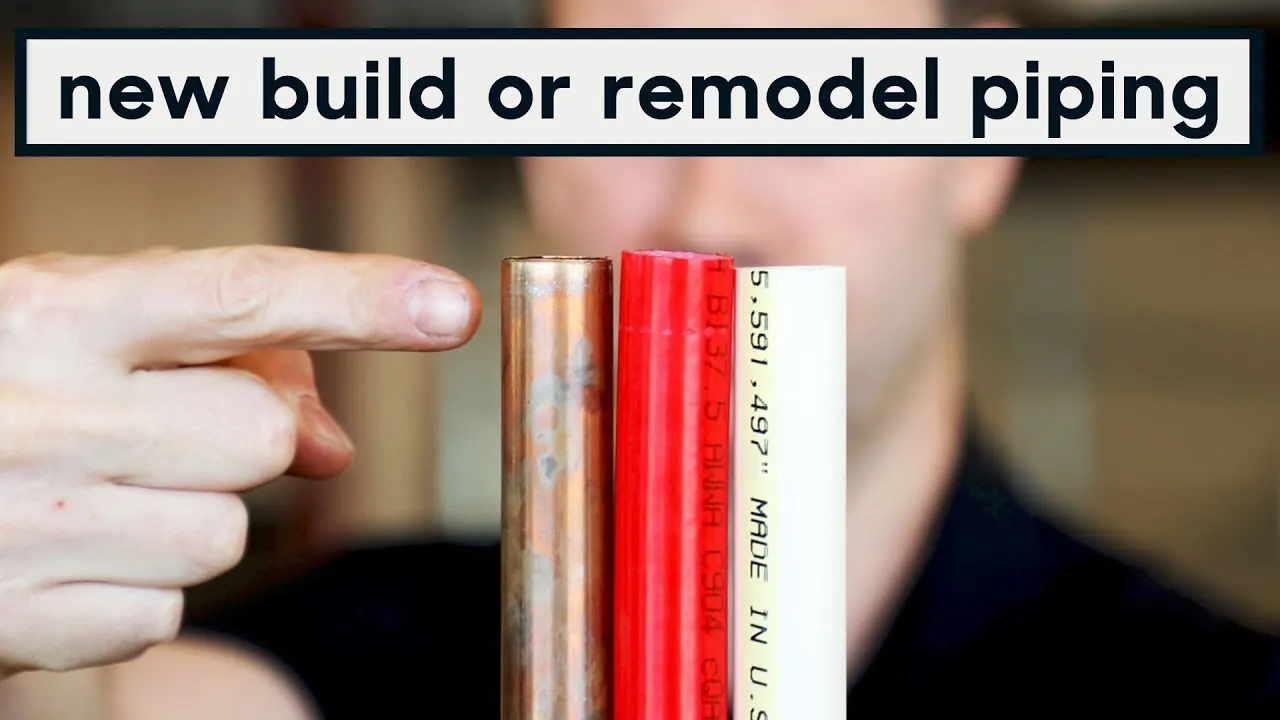
The primary difference between these materials is how they handle installation, temperature, and movement. While one is flexible and uses crimp fittings, the other is rigid and uses chemical solvent welding.
| Method | How long | Effort | Cost | Best for |
|---|---|---|---|---|
| PEX | Fast | Low | Low | Retrofits |
| CPVC | Medium | Medium | Medium | Exposed areas |
| Copper | Slow | High | High | Outdoor runs |
If you’re working in a tight crawl space, PEX allows you to snake lines through existing framing without needing many joints. Because PEX expands, it resists bursting during a freeze, unlike rigid pipes that crack under pressure.
If you need a pipe to run perfectly straight along a wall, CPVC provides a cleaner look that doesn’t sag. However, CPVC becomes brittle when exposed to direct sunlight for long periods. If your run is outdoors, stick with copper to avoid premature material failure.
PEX tubing and fittings are manufactured to standardized dimensions; ensure your crimp rings and fittings are compatible with the specific PEX pipe type (e.g., PEX-A or PEX-B) you’re using.
You should check your local building codes to ensure the material you pick is approved for your specific area. Some municipalities have strict restrictions on plastic piping, especially in multi-family dwellings where fire ratings take precedence over ease of installation.
Working with PEX tubing
PEX, or cross-linked polyethylene, is a flexible plastic that connects using crimp rings or push-fit connectors. It’s highly resistant to burst damage from freezing temperatures because the material can expand slightly.
Measure the length of the run needed and cut the PEX tubing using a dedicated plastic pipe cutter to ensure a square edge. A jagged or angled cut prevents the O-ring inside a push-fit fitting from creating a watertight seal, leading to slow drips behind finished walls.
Slide a copper crimp ring over the end of the pipe, then insert the barbed fitting fully into the tube. If the pipe doesn’t bottom out against the fitting shoulder, the connection will fail under pressure.
Position your crimping tool over the ring and squeeze the handles until the connection is secure. The ring must sit between 1/8 and 1/4 inch from the end of the pipe. If you crimp too close to the edge, the tubing can tear; too far back, and the barb won’t grip the pipe wall. Use a “go/no-go” gauge after every crimp to verify the compression diameter is correct.
Test the line for leaks by turning on the water pressure slowly before closing up any wall cavities.
PEX is ideal for long runs because you can pull it in one continuous piece, which reduces the number of potential leak points. However, it isn’t UV-stable and will break down if left in direct sunlight for more than 30 days. If you aren’t comfortable using crimping tools, use push-fit connectors for repairs, but avoid them for permanent, inaccessible wall connections.
Using CPVC piping
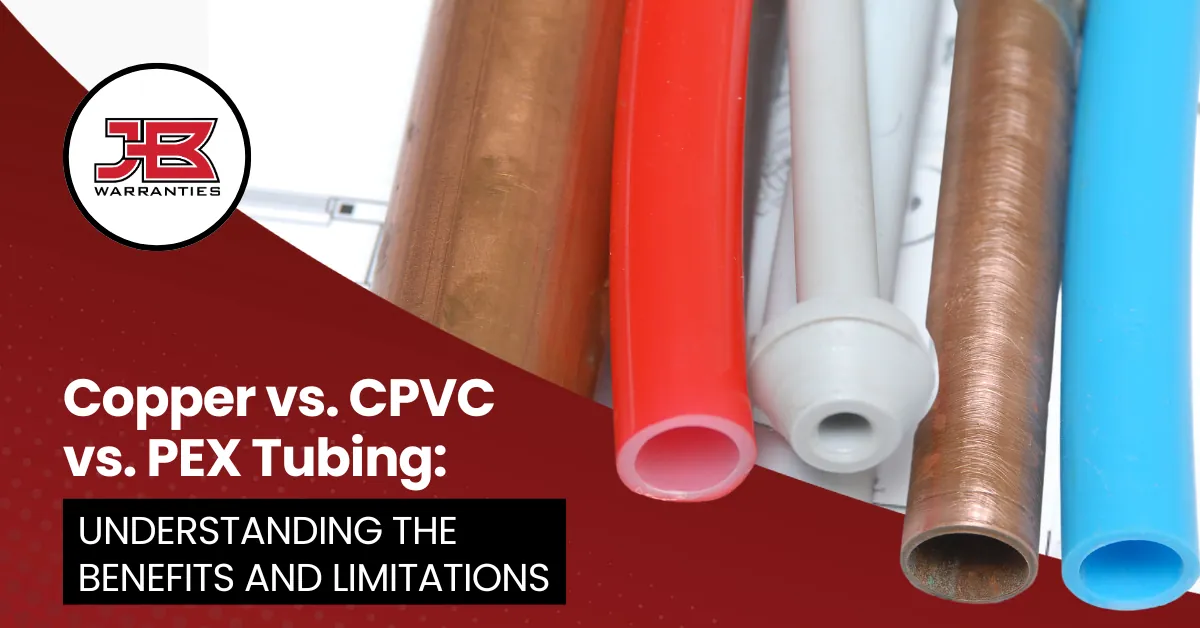
CPVC is a rigid plastic designed for hot and cold water distribution. It connects using a two-step solvent welding process that creates a permanent chemical bond between the pipe and the fitting.
Cut the CPVC pipe to the exact length required using a fine-tooth saw or a specialized plastic cutter. If you use a standard hacksaw, always file away the burrs from the cut edge. A jagged edge prevents the pipe from seating fully, which creates a weak point where the solvent can’t seal properly.
Apply a thin layer of primer to the outside of the pipe end and the inside of the fitting to soften the plastic surface. Apply a layer of solvent cement to both surfaces, then push the pipe into the fitting with a quarter-turn twist to distribute the glue. Hold the connection steady for 30 seconds to allow the bond to set.
Wait for the manufacturer’s recommended cure time before pressurizing the system. If you’re working in temperatures below 40 degrees Fahrenheit, double the cure time to ensure the solvent evaporates completely.
This material is very stiff, making it perfect for vertical risers or exposed piping where you want a professional, straight appearance. The main weakness is that it becomes brittle over time, especially when exposed to high heat or direct sunlight.
If your pipe run passes through an attic or an unconditioned crawlspace, wrap the exterior in UV-resistant insulation. If the pipe turns yellow or develops hairline cracks, it has lost its structural integrity and must be replaced immediately to prevent a catastrophic burst.
Choosing the right material
When you’re in a hurry, PEX is the winner because the installation is faster and requires less precision than solvent welding. If you’re doing this for the first time, PEX is also safer because you don’t have to work with harsh chemical glues that require ventilation and careful handling.
When you want the best possible result regardless of the effort, you might choose a hybrid approach: use PEX for hidden runs inside walls and CPVC for any exposed sections that need to look straight and clean.
The trade-off is between the ease of a flexible system and the structural stability of a rigid one. If you have a professional plumber handling the work, they might prefer the rigid material for specific code compliance in certain states. If you’re a beginner, the main mistake people make isn’t using enough support brackets, which leads to sagging pipes and unnecessary stress on the joints.
If your pipe diameter is half an inch, place your supports every 32 inches. If you’re working with three-quarter-inch pipe, you can stretch that gap to 48 inches. Always check the manufacturer’s stamp on the side of the pipe to confirm these intervals.
If your run involves a vertical rise, add a support bracket within 12 inches of every turn. This prevents the weight of the water from pulling the fitting loose over time.
Rules for all pipe installations
Regardless of the material, you must follow the local building codes set by your municipality. These rules dictate the specific pipe gauges allowed for potable water and the exact spacing required between support hangers. Always follow the manufacturer’s specified support intervals for your specific pipe material and diameter to prevent sagging and joint stress.
Before you start, turn off the main water supply and drain the lines completely. Always keep a bucket nearby to catch the residual water trapped in the low points of the system. While water can interfere with soldering copper, ensure surfaces are clean and dry for proper solvent welding of CPVC.
If you’re using a torch or chemical glues, ensure your workspace is well-ventilated and clear of flammable materials. If a project involves modifying the main supply line or working inside an apartment building, you likely need a permit. Failing to pull a permit can void your homeowner’s insurance if a leak occurs later.
Improperly installed joints lead to slow leaks that rot wood framing or cause mold growth behind your walls. Before you finish the area, pressurize the system and wait at least 30 minutes. If the pressure gauge drops even one PSI, you have a leak that requires immediate attention.
Related guides
- Pipe Insulation Foam vs Heat Tape: Which One Do You Need in 2026
- 5 Best Drain Cleaner for Plastic Pipes Picks for Safe Plumbing in 2026
- Mini Pebble vs Pebble Tec: Which Pool Finish Wins in 2026
Frequently asked questions
Can I mix PEX and CPVC in the same system?
Yes, you can join these materials together using specialized transition fittings that are designed to connect different pipe types. You must ensure that the transition fitting is rated for both materials to prevent leaks at the connection point. This is common when you need to extend an existing rigid system using flexible tubing for a new, hard-to-reach area of the home.
How long does CPVC last?
CPVC is designed for long-term use when installed according to the manufacturer’s specifications. The actual lifespan depends on the water quality, the temperature of the water running through the pipes, and whether the system is exposed to direct sunlight. You can check the pipe markings to see if it meets the specific pressure and temperature ratings required by your local building department.
Is it safe to drink water from plastic pipes?
Yes, both PEX and CPVC are safe for drinking water as long as they’re certified by an independent testing body like NSF International. These materials undergo rigorous testing to ensure they don’t leach harmful chemicals into the water supply. Always look for the certification stamp printed directly on the side of the pipe before you purchase it for your home plumbing system.
Why is my pipe leaking at the joint?
A leaking joint is usually caused by a poor crimp on a PEX ring or an incomplete solvent weld on a CPVC connection. If the leak is on a PEX fitting, check if the ring is positioned correctly or if the tool needs calibration. For CPVC, a leak often means the glue wasn’t applied evenly or the pipe wasn’t fully inserted into the fitting before it set.
How many support clips do I need?
The number of clips depends on the pipe diameter and the material, but you generally need a support every 32 to 48 inches for horizontal runs. If the pipes aren’t supported properly, the weight of the water will cause them to sag, which puts extra pressure on the fittings and leads to failure. Check the manufacturer’s installation manual to find the exact spacing required for your specific pipe size.
What happens if I use the wrong glue for CPVC?
Using the wrong glue or failing to use a primer will result in a weak bond that can fail under pressure, causing a major flood. CPVC requires a specific solvent cement that chemically fuses the plastic pieces together, whereas standard PVC glue isn’t strong enough for hot water lines. You should always use the primer and cement recommended by the pipe manufacturer to ensure the integrity of your water system.
How long does it take for CPVC glue to dry?
The setting time for CPVC glue is typically 30 seconds to a few minutes, but it needs at least 24 hours to fully cure before you turn the water pressure back on. The exact curing time varies based on the ambient temperature and the humidity in your home. You can find the specific drying times printed on the side of the solvent cement can for different pipe sizes.
Conclusion
If you’re still unsure which material fits your layout, take a quick look at your local building codes before heading to the store. You’ll find that checking these rules first saves you plenty of time. Once you’ve confirmed the requirements, you’re ready to start your project with confidence and get the job done.