
Are you looking to add a beautiful and practical touch to your above ground pool? Putting rocks around your pool is a simple way to enhance its look and keep the area clean and safe.
But how do you do it right? In this post, you’ll discover easy steps to create a stunning rock border that protects your pool and boosts your backyard’s charm. Keep reading, and you’ll learn everything you need to make your pool area look amazing and work better than ever.
Choosing The Right Rocks
Choosing the right rocks for your above ground pool is important. The rocks create a nice border and protect the pool. They also add beauty to your yard. Picking the right rocks makes the area safe and neat. Consider the rock type, size, shape, color, and texture. These details affect the look and function around your pool.
Types Of Rocks To Consider
Gravel is a popular choice. It drains water well and is easy to spread. River rocks look smooth and natural. They come in many colors and sizes. Flagstone gives a flat surface, perfect for walking. Crushed stone adds a rough texture and good drainage. Choose rocks that stay in place and resist weather.
Size And Shape Selection
Small rocks are easy to move and fit well around the pool. Larger rocks create a strong border and stop dirt from moving. Rounded rocks feel smooth and safe to walk on. Flat rocks make good stepping stones. Sharp or jagged rocks may hurt bare feet. Pick sizes and shapes that match your pool area and safety needs.
Color And Texture Options
Light-colored rocks keep the area cooler in the sun. Dark rocks absorb heat and can get warm. Mix colors for a natural look. Smooth textures feel nice underfoot and look neat. Rough textures add grip and stop slipping. Choose colors and textures that match your yard and pool style.
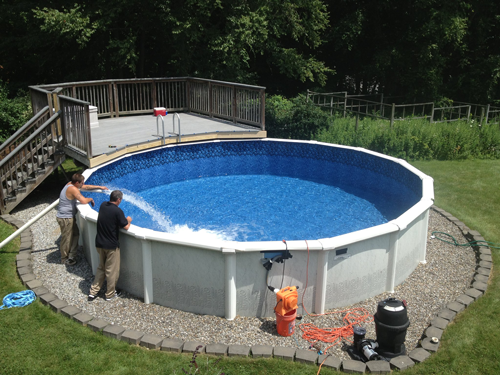
Credit: wilsonblacktop.com
Preparing The Pool Area
Preparing the area around your above ground pool is the first step to a neat rock border. This step makes sure the rocks sit well and look good. It also keeps the pool area safe and tidy.
Follow these simple steps to get the pool space ready before adding rocks.
Clearing The Surrounding Space
Remove all plants, grass, and debris near the pool edge. Clear stones, sticks, and leaves. This creates a clean base for the rocks. It also stops plants from growing under the stones later.
Leveling The Ground
Check the ground around the pool for bumps or holes. Use a shovel or rake to make the surface flat. A level ground helps the rocks stay in place. It also prevents water from pooling unevenly.
Marking The Layout
Decide how wide you want the rock border to be. Use string or spray paint to mark the shape around the pool. This guide helps place the rocks evenly. It also gives a clear idea of the final look.
Gathering Tools And Materials
Before placing rocks around your above ground pool, gather all tools and materials. Having everything ready makes the process smooth and fast.
Prepare a clean and flat workspace near the pool. This helps keep tools and materials organized. It also saves time during the project.
Essential Tools List
- Shovel – for digging and moving soil
- Wheelbarrow – to carry rocks easily
- Garden rake – to level the ground
- Gloves – protect your hands from sharp rocks
- Measuring tape – measure the area around the pool
- Level – ensure the rock border is even
- Rubber mallet – to adjust rock positions gently
Materials Needed Alongside Rocks
- Landscaping fabric – stops weeds growing under rocks
- Gravel or sand – creates a stable base for rocks
- Edging material – keeps rocks from spreading out
- Rocks – choose size and style that match your pool
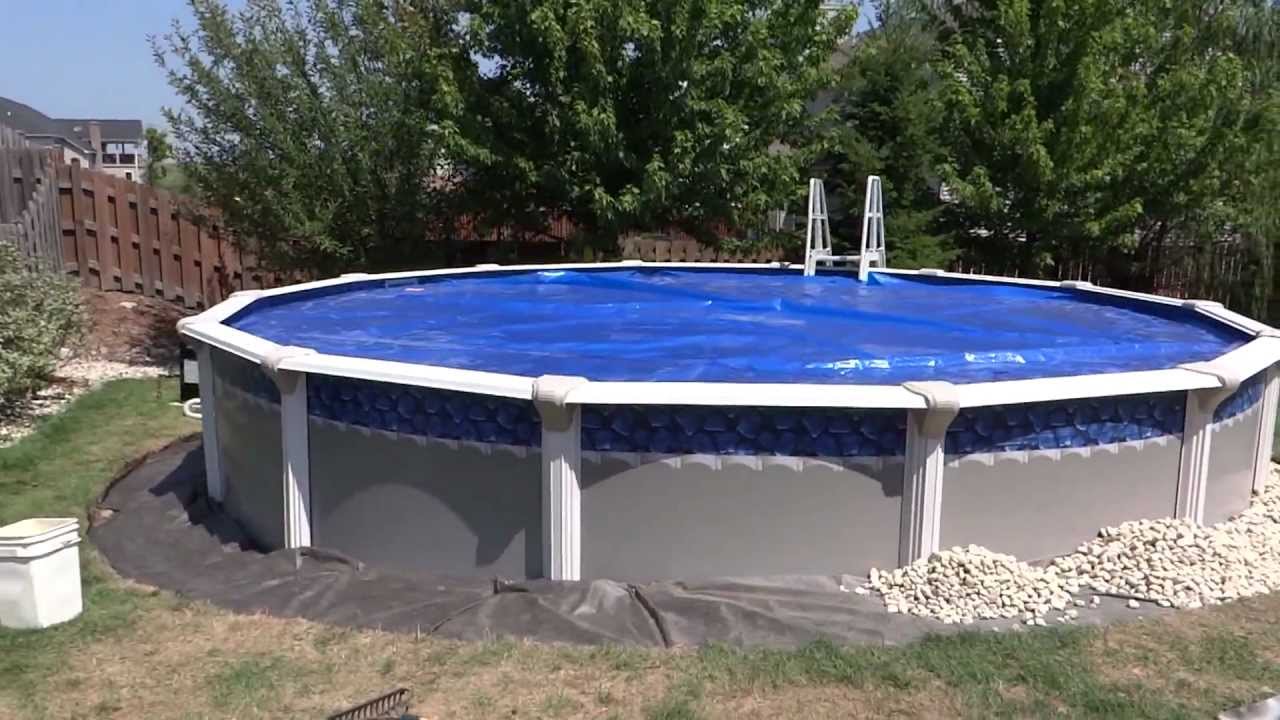
Credit: www.youtube.com
Laying A Base For Stability
Laying a strong base is key for placing rocks around your above ground pool. The base keeps the rocks steady and stops them from sinking or shifting. It also helps water drain away from the pool. A well-prepared base makes the area safe and neat. Follow these steps to create a solid foundation before you add the rocks.
Choosing A Base Material
Pick a material that supports weight and drains water well. Crushed gravel or sand works best. Gravel lets water flow through and stops puddles. Sand is easy to level and compact. Avoid using soil or clay because they hold water and cause sinking. Use clean, sharp gravel or coarse sand for best results.
Spreading And Compacting The Base
Clear the ground around the pool first. Remove grass, roots, and debris. Spread the base material evenly to cover the area. Make the layer about 2 to 4 inches thick. Use a rake to smooth it out. Then compact the base by pressing it down firmly. You can use a hand tamper or a heavy board. Compacting stops the rocks from moving later and keeps the base stable.
Arranging Rocks Around The Pool
Arranging rocks around an above ground pool creates a natural, attractive border. It also helps to keep dirt and grass away from the pool. The right placement of rocks can improve the pool’s look and safety. Follow these steps to arrange your rocks effectively.
Placing Larger Rocks First
Start by placing the largest rocks around the pool’s edge. These rocks form the base and provide stability. Set them evenly to create a strong foundation. Avoid leaving big gaps between the large rocks.
Filling Gaps With Smaller Stones
Fill the spaces between large rocks with smaller stones. Smaller stones help lock the larger ones in place. They also prevent weeds from growing through the gaps. Spread the smaller stones evenly for a neat finish.
Creating A Balanced Look
Mix different sizes and shapes of rocks for a balanced look. Avoid placing all large rocks on one side. Keep the colors and textures varied but natural. This creates a pleasing, harmonious border around the pool.
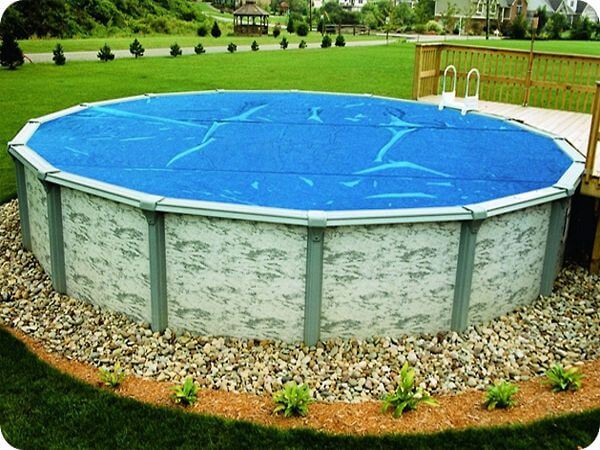
Credit: intheswim.com
Securing The Rocks In Place
Securing the rocks around your above ground pool is important. It keeps them stable and safe. This step stops rocks from moving or shifting over time. A solid base and strong hold make the pool area look neat and last longer.
Using Sand Or Gravel To Lock Rocks
Place a layer of sand or gravel under the rocks. This base fills gaps and helps rocks stay put. Use about two inches of sand or gravel for good support. Press the rocks down firmly into the base. This action locks the rocks in place naturally. Sand and gravel also help with drainage around the pool.
Adding Landscape Adhesive For Durability
Apply landscape adhesive between the rocks for extra strength. This glue sticks the rocks together firmly. Use a small amount on each rock side that touches another. Hold the rocks for a minute to let the glue set. Landscape adhesive resists weather and water damage. It keeps the rocks stable for many seasons.
Finishing Touches
Finishing touches make your above ground pool area look complete and neat. They improve the pool’s appearance and keep the space tidy. Small details create a welcoming and relaxing environment around your pool. This section covers easy steps to finish your rock installation perfectly.
Cleaning Excess Debris
Remove leaves, dirt, and small stones from the rocks. Use a broom or leaf blower to clear loose debris quickly. Clean rocks keep the area safe and prevent slipping. Regular cleaning stops weeds from growing between the rocks. Check the rocks often, especially after wind or rain.
Adding Plants Or Mulch For Contrast
Place small plants or shrubs around the rocks for color and life. Choose plants that need little water and grow well in your climate. Mulch adds texture and keeps soil moist near plants. It also helps stop weeds from spreading. The mix of rocks, plants, and mulch creates a natural, beautiful look.
Maintenance Tips
Maintaining rocks around your above ground pool keeps the area neat and safe. Proper care stops dirt buildup and prevents damage. Regular attention makes your pool area last longer and look better.
Regular Cleaning Guidelines
Remove leaves and debris from the rocks often. Use a broom or leaf blower to clear the surface. Washing rocks with water helps remove dirt and dust. Avoid harsh chemicals that can harm the rocks or pool. Check the rocks for algae and clean them if needed. Keep the area dry to stop mold growth.
Replacing Displaced Rocks
Rocks can move after heavy rain or pool use. Check the edges regularly to spot missing stones. Replace displaced rocks quickly to keep the border even. Use similar size and type of rocks for a uniform look. Secure loose rocks by adding sand or soil beneath them. This prevents future shifting and keeps the area safe.
Frequently Asked Questions
How Do I Prepare The Ground For Rocks Around My Pool?
Clear the area of grass and debris. Level the ground for a smooth base.
What Type Of Rocks Work Best Around Above Ground Pools?
Flat, smooth rocks like river rocks or flagstones prevent tripping and look nice.
How Thick Should The Rock Layer Be Around The Pool?
A 2 to 3-inch layer is enough to cover the ground and control weeds.
Can Rocks Help Prevent Mud And Dirt Near My Pool?
Yes, rocks stop mud and dirt from splashing into the pool area.
Should I Use A Weed Barrier Under The Rocks?
Yes, a weed barrier keeps plants from growing through the rocks and keeps it neat.
How Do I Keep The Rocks From Moving Or Spreading Out?
Edge the area with plastic or metal borders to keep rocks in place.
Conclusion
Adding rocks around your above ground pool creates a neat, natural look. It also helps keep dirt and grass away from the pool edge. Choose stones that fit your style and space. Place them carefully to avoid gaps or sharp edges.
This small step improves safety and pool maintenance. Enjoy your pool area more with this simple upgrade. Take your time and have fun with the process. Your pool will look better and feel more inviting.