
When you notice cracks or holes around your home, you might wonder: should you use caulk or spackle to fix them? Choosing the right product can make all the difference in how your repair looks and lasts.
If you want your walls and surfaces to look smooth and flawless, understanding the key differences between caulk and spackle is essential. You’ll discover exactly when and where to use each one. Keep reading to avoid costly mistakes and get professional-looking results every time.
Caulk Basics
Caulk is a flexible material used to seal gaps and joints. It prevents water, air, and insects from entering through cracks. Understanding caulk helps you pick the right type for your project. It is easy to apply and works well in many areas around your home.
Types Of Caulk
There are several types of caulk. Acrylic latex caulk is easy to use and paintable. Silicone caulk is waterproof and very flexible. Polyurethane caulk is strong and good for outdoor use. Each type fits different needs and surfaces.
Best Uses For Caulk
Caulk works well around windows and doors. It seals gaps in bathrooms and kitchens to stop water leaks. Use caulk to fill cracks in walls or trim. It keeps your home energy-efficient by blocking drafts.
Application Tips
Clean the area before applying caulk. Cut the tube tip at a 45-degree angle for control. Apply steady pressure while moving the tube along the crack. Smooth the bead with a wet finger or tool. Let it dry fully before painting or exposing to water.
Spackle Essentials
Spackle is a simple material used to fix small holes and cracks in walls. It dries fast and is easy to sand. Many homeowners and DIYers keep spackle handy for quick repairs. Understanding spackle helps you choose the right product and apply it correctly. Here are the essentials about spackle.
Common Spackle Varieties
There are several types of spackle for different tasks. Lightweight spackle is easy to spread and dries quickly. It works best for tiny holes and nail marks. Vinyl spackle is stronger and good for bigger holes. Some spackles come pre-mixed, ready to use. Others are powders that you mix with water. Choose spackle based on the size of the repair and surface type.
Ideal Situations For Spackle
Spackle is perfect for small wall repairs. It fills nail holes, minor cracks, and dents. Use it on drywall or plaster surfaces. It is not suitable for areas with water exposure. Avoid using spackle on large gaps or deep holes. For bigger repairs, other materials like joint compound work better. Spackle is best for quick touch-ups before painting.
How To Apply Spackle
Start with a clean, dry surface. Remove loose paint and dust from the area. Use a putty knife to scoop spackle and press it into the hole. Spread it smoothly over the surface. Let it dry fully; drying time varies by product. After drying, sand the area gently to make it even. Wipe away dust before painting for a smooth finish.
Caulk Vs Spackle
Caulk and spackle are common materials used for home repairs. They fill gaps and holes but serve different purposes. Knowing their differences helps choose the right one for each job.
Material Differences
Caulk is a flexible material made from silicone or latex. It seals joints and gaps to stop water or air leaks. Spackle is a thicker paste made from gypsum or vinyl. It fills small holes and cracks in walls before painting.
Durability And Flexibility
Caulk stays flexible after drying. It moves with surfaces during temperature changes. This makes caulk ideal for places that expand and contract. Spackle becomes hard and brittle once dry. It cracks if the surface moves too much. It works best on stable, flat surfaces.
Drying And Curing Times
Caulk usually takes a few hours to dry. Full curing can take up to a day. Spackle dries faster, often within 30 minutes. Some types of spackle may require sanding before painting. Drying times depend on the product and room conditions.
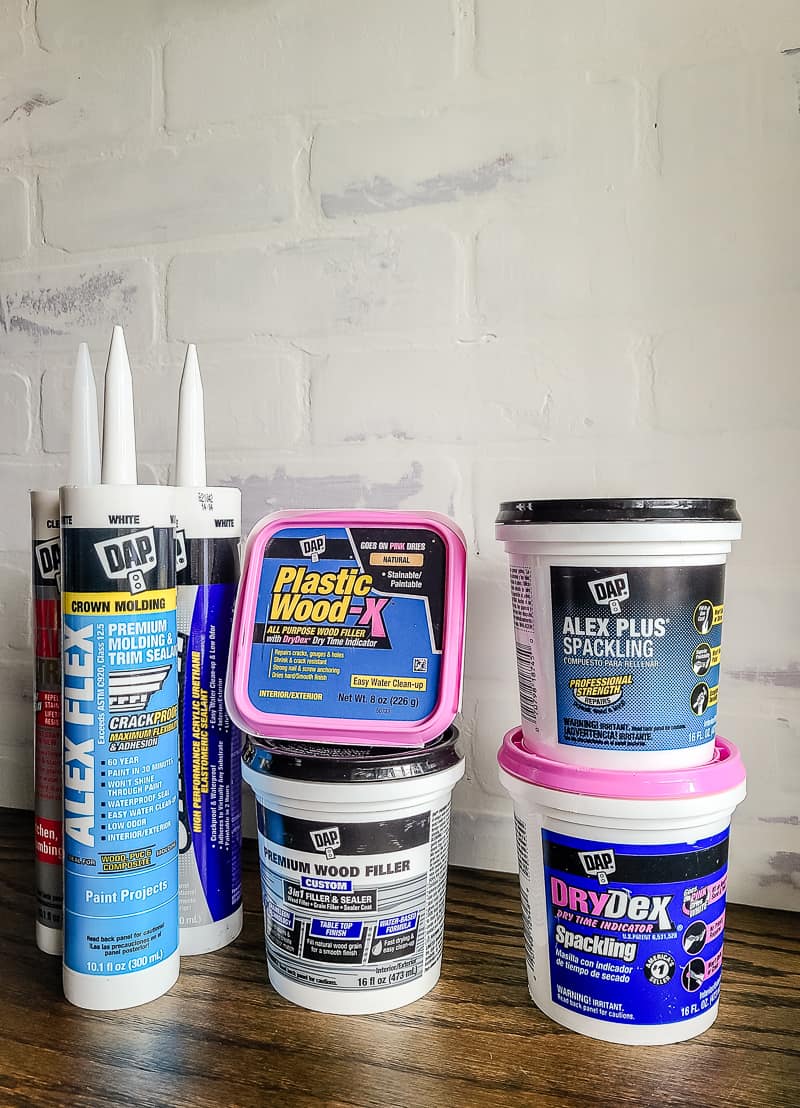
Credit: www.makingmanzanita.com
Choosing The Right Product
Choosing the right product for repairs can save time and effort. Caulk and spackle serve different purposes. Picking the right one ensures a strong and lasting fix. Understand their features before starting your project.
Matching Repairs To Materials
Caulk works well on gaps and joints. It sticks to wood, glass, and metal. Spackle is best for small holes and cracks in drywall. Use spackle for patching nail holes or dents. Choose based on the surface and type of damage.
Indoor Vs Outdoor Use
Caulk is often designed for outdoor use. It handles weather and temperature changes better. Some caulks resist water and mold. Spackle is mainly for indoor walls. It is not good for moist or wet areas. Pick a product that fits the location of your repair.
Cost Considerations
Spackle is usually cheaper and sold in small tubs. Caulk comes in tubes and costs more. Consider how much material you need. For many small repairs, spackle saves money. For sealing gaps, caulk is worth the extra cost.
Step-by-step Repair Process
Fixing cracks or holes in walls needs the right approach. Using caulk or spackle depends on the damage type. Follow these steps carefully for the best repair results.
Preparing The Surface
Clean the area from dust and loose paint. Use a brush or cloth to remove dirt. Make sure the surface is dry before starting. Remove old caulk or spackle if it is cracked. Smooth edges help new material stick better.
Applying Caulk Correctly
Cut the tip of the caulk tube at a 45-degree angle. Use a caulk gun to apply a thin, even bead. Fill gaps or joints, not deep holes. Smooth the caulk with a wet finger or tool. Wipe away extra caulk quickly before it dries.
Applying Spackle Correctly
Use a putty knife to scoop some spackle. Press it firmly into small holes or dents. Spread it evenly, making the surface flat. Allow it to dry completely, usually a few hours. Sand the area gently for a smooth finish.
Finishing Touches
Check the repaired area for any uneven spots. Sand lightly to blend with the wall surface. Paint over the repair to match the wall color. Clean your tools immediately after use. Proper finishing ensures a neat, lasting repair.

Credit: www.youtube.com
Common Mistakes To Avoid
Choosing between caulk and spackle can be tricky. Many people make simple mistakes that cause poor results. Avoiding these errors will save time and effort. Here are the common mistakes to watch out for.
Wrong Product Choice
Caulk and spackle serve different purposes. Caulk fills gaps and seals joints. Spackle fills holes and cracks in walls. Using caulk instead of spackle leaves rough patches. Using spackle for gaps causes cracks and peeling. Choose the right product for the right job.
Improper Application
Applying too much or too little product causes issues. Overfilling with spackle leads to long drying times. Too little caulk does not seal properly. Smooth the surface with a putty knife or finger. Apply even layers for a clean finish. Patience matters during drying and sanding.
Ignoring Surface Preparation
Dirty or dusty surfaces prevent good adhesion. Clean the area thoroughly before applying caulk or spackle. Remove loose paint, dirt, and grease. Dry the surface completely. Proper preparation helps the product stick and last longer.
Maintaining Repairs
Maintaining repairs is key to keeping walls and surfaces looking their best. Both caulk and spackle need care over time to avoid cracks and damage. Regular checks and small fixes help extend the life of your repair work. This saves time and money by preventing bigger problems later.
Inspection Tips
Check repaired areas every few months. Look for cracks, gaps, or peeling paint. Run your finger along the edges to feel for rough spots. Watch for water damage or mold near caulk lines. Early signs mean quick action can stop further damage.
Touch-up Techniques
Use a small putty knife for spackle touch-ups. Apply a thin layer over cracks or holes. Smooth it out and let it dry fully. For caulk, clean the area with rubbing alcohol first. Use a caulk gun to add fresh caulk in gaps. Smooth the bead with a wet finger or tool.
When To Replace
Replace spackle if it crumbles or falls out easily. Large cracks or holes need fresh repair. Replace caulk if it is cracked, peeling, or moldy. Old caulk loses its seal and lets water in. Remove old material fully before applying new for best results.

Credit: www.thriftydecorchick.com
Frequently Asked Questions
What Is The Main Difference Between Caulk And Spackle?
Caulk seals gaps and joints, while spackle fills holes and cracks in walls.
Can Caulk Be Used Instead Of Spackle For Wall Repairs?
No, caulk is flexible and not ideal for filling large holes like spackle.
How Long Does Caulk Take To Dry Compared To Spackle?
Caulk usually dries in a few hours; spackle can take up to 24 hours.
Which Is Better For Sealing Bathroom Edges, Caulk Or Spackle?
Caulk is best for bathroom edges because it resists water and stays flexible.
Can Spackle Be Painted Over After It Dries?
Yes, spackle dries hard and can be sanded and painted easily.
Is Caulk Suitable For Outdoor Repairs?
Yes, some caulk types are made for outdoor use and resist weather well.
Conclusion
Caulk and spackle serve different purposes in home repair. Caulk fills gaps and seals edges to stop water or air leaks. Spackle fills holes and smooths wall surfaces before painting. Choosing the right product helps your project last longer and look better.
Use caulk for cracks around windows and doors. Use spackle for small holes or dents in walls. Knowing their differences saves time and effort. Simple tools and correct use make repair easier. Keep your home neat and protected by picking wisely.